Professionals frequently say that an audience will sit through poor video quality if the audio is good, but they won’t sit through a video with bad audio.
The more I learn about video recording, the more I recognise the importance of audio and understand that audio levels need to be correct.
Vocals and background music need to be set at the correct level to ensure that speech can still be understood. It is also important to set your audio so that it is not too loud or too quiet.
The problem with uploading videos to YouTube is that everyone is doing things differently. There is no agreed upon standard for audio levels. Everyone seems to be doing things in their own way and everyone believes that the way they are doing it is correct.
I have reached a point where I want to ensure I modify audio correctly for publishing on YouTube. So I began a journey to find out what the right audio levels are for publishing videos online.

I am not an audio expert and certainly do not claim to be one, however in this article I would like to share with you what I have learned. I have made a point of explaining any technical jargon so that fellow videography novices can still understand everything clearly.
The YouTube Loudness War
One problem that has affected YouTube throughout the years is volume. It is common for YouTube users to watch one video that is playing audio loud and then play another video and the audio is very quiet.
Part of the problem is that a high percentage of YouTube users simply record a video and then upload it. Then do not modify the audio in any way before uploading. The unfortunate side-effect of this is that people who did spend time modifying audio appeared to have uploaded a video that was too quiet.
Not everyone uploaded loud videos because they hadn’t modified audio levels. It has become popular over the last few years for large music companies to make songs louder as they hope to grab more attention. This has been referred to by many people as The Loudness War.
Thankfully, it appears that YouTube is finally trying to put the loudness war to bed. Ian Shepherd recently published an article entitled “YouTube just put the final nail in the Loudness War’s coffin” which highlighted that YouTube are taking measures to normalise audio so that the volume of all music videos are at the same level. From a viewers point of view, this is great news.

Ian also noticed that songs are not being normalised on upload. Normalisation does not appear to be occurring until weeks after a video has been uploaded.
Unfortunately, it does not appear that non-music videos are being normalised. Hopefully, this situation will change in the future. Until then, YouTubers such as myself will need to pay attention to the volume of audio in their videos.
A Quick Techy Section with Some Audio Jargon
Like everyone else, when I started uploading videos to YouTube, I did not change audio levels in any shape or form. Everything was just uploaded in the same way it was recorded.
I then started reading more about audio levels.
One key term I learned was dBFS. This abbreviation stands for Decibels Relative to Full Scale and is used to monitor digital levels. 0 dBFS is used to define the maximum digital signal level.
When I first started learning about audio, I frequently mixed up the abbreviations db (Decibels) and dBFS (Decibels Relative to Full Scale). These are not the same.
Named in honour of my fellow Scotsman Alexander Graham Bell (a deciebel is one tenth of a bel), the decibel measures the difference in sound level.
Record-Producer.com has a good explanation of decibels (much better than any explanation I could give):
We talk about differences in sound levels in decibels.
Differences in sound level.
So one sound can be 10 decibels louder than another. Or you can take a sound signal and make it 10 decibels quieter. Or you can leave your fader at 0 decibels and make absolutely no change at all.
So that is the meaning of 0 dB – no change in level.
The same article has a good explanation of dBFS:
0 dBFS on the other hand refers to a specific level.
‘FS’ stands for ‘full scale’. 0 dBFS is the level of a signal that is at the maximum level your system can cope with without clipping the tips of the waveform.
So -10 dBFS means a level that is 10 decibels lower than the maximum level your system can handle.
Different video and audio services have different rules on what dBFS level should be adhered. For example, it is common for television channels to use -18 dBFS for their content (i.e. 18 decibels below the maximum level). Different levels are used for other platforms such as cinemas, DVDs, radio, video games etc.
The Maximum Peak Level refers to the absolute highest level of a signal. In Europe, most television networks set this maximum peak level at -9 dBFS. This means that the maximum decibel level is nine below what a system can produce. Pay attention to the word maximum, as most sound will be lower than that to ensure there is good Dynamic Range (which is the ratio between the loudest and quietest sounds).

In the last section, I spoke about audio normalisation. This is used to change audio to a particular level. For example, in order to adhere to audio guidelines by television networks, a company would have to normalise peaks so that the peak level does not exceed the maximum peak level e.g. -9 dBFS.
What YouTube are doing is normalising all music videos so that the volume level is the same across the board. For quiet videos, normalising the audio will increase the audio gain so that it is louder. For louder videos, normalising the audio will decrease the audio gain so that it is quieter.
The end result of this is that all music videos will play at the same volume and the loudness war will die on YouTube. Something that television viewers have been accustomed to for several decades because content creators have to adhere to the audio rules of television networks.
Correct Audio Level for Vocals
I recently started adjusting the audio in my videos to -9 dBFS. I made the decision to do this after reading dozens of threads where YouTubers talked about how they define the max peak of their audio levels to between -6 dBFS and -12 dBFS because that is most television networks use. These people adjusted their audio to these levels because of this.
Ten days ago I created a thread on YTTalk; a great YouTube forum that I recommend joining if you are interested publishing on YouTube. The discussion was about background music levels, however many members also noted the level they use for vocals too.
Some set their max audio level to -6 dBFS, some to -9 dBFS, and another at -12 dBFS. They all seem to follow the guidelines of setting audio between -6 dBFS and -12 dBFS. YouTuber Andrew Flint also mentioned that he was advised at University to always keep voice peaks at between -6 dBFS and -12 dBFS.
With my max peaks at -9 dBFS and my average peaks around -12 dBFS, I should be happy about the fact my recently uploaded videos have been using the correct audio levels.
Well, I should, Shouldn’t I?
Actually, no.
You see, during my investigation about background music audio levels (which I will discuss later in this article), I read more and more about YouTube audio levels and it soon became crystal clear to me that there was more to this story.

An article by Jan Ozer entitled “Return of the Video Doctor: Simple Fixes for Online Video Errors” really changed the way I was looking at audio for YouTube. Before reading his article, I had previously assumed that I was doing everything right by setting max peaks at -9 dBFS. Jan’s article made me realise that I was perhaps looking at it all wrong.
Many YouTubers, including myself, had been setting the max peaks of their audio between -6 dBFS and -12 dBFS because that is what television networks recommended. However, YouTube is a different platform to television.
Jan explained the dilemma that YouTubers like myself face at the bottom of his article in the section entitled “What’s the Right Target Audio Level?”.
He wrote:
Finally, let me tackle the appropriate target decibel level for audio uploaded to YouTube or otherwise deployed on the web. I’ll start with a short story. I was consulting with a client in D.C. and the editor in charge of uploading video to the web related that they were having serious issues with audio volume on their web videos. He said that they sounded great in the studio, but remote viewers playing the videos over the Internet complained the audio was too low. He wondered if it was an audio compression issue.
I downloaded one of the compressed files, loaded it into my sound editor, and saw that volumes peaked at -12 dB. I said, “That’s the problem, the volume is too low.” He responded, “I worked in TV for years, and I’ve always set my peaks at -12 dB. It’s perfect and sounded great in the studio.” Interestingly, we were both right.
In the broadcast world, most channels recommend a max volume of -12 dB; everything you watch on the TV is set to these levels. For this reason, audio at -12 dB sounds normal. On the web, virtually all producers target 0 dB, and web viewers are used to this higher volume. My client’s videos, set to -12 dB, had much lower volume than the average video on the web; hence the complaints.
I always normalize my audio to 0 dB before uploading to YouTube or otherwise deploying. As you’ll learn if you watch this video normalization pushes the maximum peak in the audio file to 0 dB, so it never causes distortion. You can argue the technical merits of targeting -12 dB, but your volume will be lower than most other audio on the web, and they’ll suspect that you’re out of step, not the other way around.
If YouTube do start normalising the audio of all uploaded videos, none of this will be a concern; however, it seems that, at least for the time being, YouTube are only normalising music videos.
Therefore, what this means is that all of the videos I have normalised to a max peak of -9 dBFS are quieter than they should have been. Looking back at my videos, they do not sound terribly quiet, though obviously I would rather they were uploaded at the correct volume (unfortunately, YouTube does not allow you to replace audio in videos you have uploaded – the only thing you can do is replace your audio with a song from their music repository).
Jan recommends normalising all audio to 0 db. Many others advise against this and state that when a video is uploaded to YouTube the encoding process can make audio distort if it is too close to 0 db. To stop distortion from occurring, it is better to normalise at a lower level so that there is some headroom to avoid distortion or clipping occurring. Some recommend -0.1 dBFS, some recommend -1 dBFS, and some recommend -3 dBFS. And there are others who still prefer to normalise at lower levels such as -6 dBFS or -9 dBFS.
Jan makes a point of saying that normalising audio to 0 db will not cause distortion because it is only the maximum peak that reaches 0 db. However, if you look at the video he recommended watching (below), you can see that he actually normalised audio to -0.1, not 0.
There was a good discussion on Gearslutz in 2012 that discussed audio levels for the internet and how it was like the Wild West for audio due to no agreed upon standard. One member recommended -0.1 dBFS, one recommended -0.5 dBFS, and another recommended -1 dBFS.
As you can see, even those who agree that broadcast safe audio standards should not be followed cannot agree on what audio level should be used. And if experienced audio engineers cannot agree on this, what chance does a beginner like me have of setting audio correctly?
Let us back up a little. We now understand the reason why many people do not adhere to the max peak levels that television networks recommend.
So I think the question we need to answer is: “At what level is it safe to normalise audio and not cause distortion when a video is uploaded to YouTube and other online video services?“.
I am not even going to begin to attempt to answer this question. If a community of audio engineers cannot agree on this issue, I do not think I will be able to do a proper case study on it.
However, I do have questions that I believe are relevant to this issue:
- With so many people uploading videos to YouTube without editing, wouldn’t distortion and clipping be a widespread problem?
- Surely YouTube encoding has improved over the years and has learned to accommodate videos that have not been normalised to -0.1 dBFS, or -1 dBFS, or -3 dBFS?
- Nearly all good video editors have an option to export an optimised video file for YouTube. This export functionality needs to take into account the YouTube encoding process, doesn’t it?
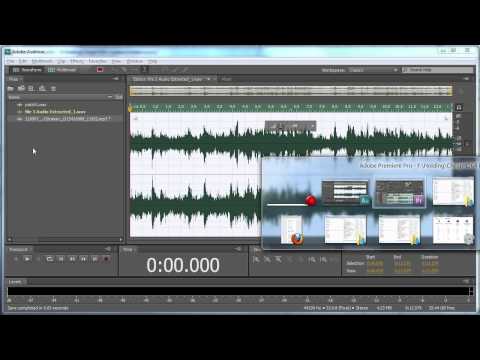
I have been using Adobe Premier Pro CC to edit my videos since the end of March 2015. It was a move I was forced to make since I am travelling with a Windows laptop and Screenflow, which is the video editing application I was using previously, is only available for Mac. I have, however, been really pleased with what Premiere Pro can do.
When I export videos using Adobe Premier Pro CC, I choose the preset named YouTube 1080p HD. There is no information on the Adobe website about whether audio is optimised for YouTube using this preset.
Thankfully, an article on iZotope entitled “Mastering for Compressed Audio Formats” shed some light on this issue.
The article explains the codecs that YouTube uses and how audio is affected on uploading.
YouTube transcodes all uploaded video (and the contained audio) in order to offer streaming qualities at 360p, 480p, 720p, 1080p, 1440p (2K) and 2160p (4K). Youtube uses the H.264 video codec with the AAC audio codec. The quality of stereo audio playback depends on the user selected streaming quality setting as follows:
- 360p and 480p video will playback audio at 128 kbps
- 720p, 1080p, 1440p (2K), 2160p (4K) video will playback audio at 384 kbps
YouTube can only down-convert video, so it’s best to upload the highest quality level you can within the H.264 codec. Why not upload a .MOV with uncompressed audio? For best results, YouTube actually recommends uploading media that is already encoded, rather than uploading a .MOV that contains a full quality .WAV file.
Here are some recommended settings when mastering audio for YouTube:
- Use a True Peak limiter, such as Ozone 6, to ensure that the margin is set to no higher than –1 dBFS.
- Not all encoders are created equal. Render from the video editor in full, uncompressed quality for both video and audio, and then audition the audio visual qualities of different media encoders.
The ‘Intersample detection’ feature in Ozone 5 enables True Peak limiting.
This was the first instance in which I read that YouTube preferred videos to be uploaded using the H.264 codec. I have been exporting my videos in this format for some time as I realised YouTube supported it, but did not realise that YouTube actually preferred videos to be uploaded in that format.
Moving forward, I am going follow the advice of iZotope and normalise the max peaks of my audio to –1 dBFS.
At this point, I am sure whether this is the right setting to use. Perhaps Jan Ozer is correct that I should normalise all audio to 0 db or -0.1 dbBFS. Or perhaps other audio engineers are correct that I should use –3 dBFS or –6 dBFS.
–1 dBFS is only one decibel lower than 0 db and should avoid any distortion issues caused by encoding that many believe occurs when audio is normalised at 0 db. Therefore, I believe that if I do not have the optimal setting for audio, I am very close to it.
Hopefully, YouTube will normalise all uploaded videos in the future. Until YouTube do so, I am going to normalise all of my future videos to –1 dBFS.
Correct Audio Level for Background Music
One of the reasons I started looking into the issue of audio levels so closely is because I wanted to experiment with adding a background music track to my videos.
I spent time playing a background track on a video I created at different audio levels. I soon realised how difficult it can be to get the correct level of background music. Set the background music too low and it may sound like an inaudible noise in the background that annoys viewers because they cannot hear it correctly. Set the background music too high and it may be difficult to hear vocals.
I posted about this problem on YTTalk and Rise Forums to get feedback from others.
To help illustrate my dilemma to fellow Rise Forums members, I uploaded two versions of a video I uploaded.
In the first version, I set my vocals at -9 dBFS and the background music at -45 dBFS.

I reuploaded the video with different audio levels. In the second version, I kept vocals at -9 dBFS, but set background music at -30 dBFS.

If you watch the start of both videos, you can hear the difference the background music makes. In the first version of the video, the background music is too low. In the second version of the video, it is arguably too high.
It is difficult to tell. When I listen to both versions in Adobe Premiere Pro CC, they sound good. The reason being that I am listening to the video using good headphones.
However, if I play back either video using the poor speakers that are on my Lenovo X220 laptop, they both sound very different. In the first version, I cannot hear background music at all, and in the second version the background music is much lower than the level I had actually attempted to achieve.
Chris Lavigne explained the difficulties of getting background music correct in an article entitled “Video Background Music: Getting the Volume Perfect“.
The article has an interesting section that displays a video with background music at five different audio levels: Too Low, Low, Just Right, High, and Too High. I found that the “Just Right” setting was ok when listening through my laptop speakers, but background music sounded way too high when I used my headphones. This illustrates the difficulties that content creators face trying to get audio right for viewers who are watching videos on a wide variety of devices.
When I asked about background music on YTTalk, a few people recommended setting background music about 10 decibels below the audio level for vocals. Andrew Flint also mentioned that he was advised to keep all other sound audio peaks around 10 db lower than vocals too.
However, that is not what we should be using.
The World Wide Web Consortium (W3C), who are the main international standards organisation for the World Wide Web, advise mixing audio files so that non-speech sounds are at least 20 decibels lower than the speech audio content.
The objective of this technique is to allow authors to include sound behind speech without making it too hard for people with hearing problems to understand the speech. Making sure that the foreground speech is 20 db louder than the background sound makes the speech 4 times louder than the background audio.
There you have it and black and white: Vocals need to be at least 20 decibels higher than background audio.
You may want to make background music and other background audio more than 20 decibels lower than vocals. My recommendation is to use 20 db as a benchmark and move down until you find the level that suits the song you are using.
For example, when I normalise the max peaks of my vocals to -1 dBFS, I find that my vocal range seems to be be around -5 dBFS. I therefore set my background music to -25 dBFS. I find this level allows my vocals to be heard clearly and the background music is loud enough to hide any background noises that occurred during the original recording.
Final Thoughts
Audio was something that I always took for granted. It was only when I started creating videos and examining the audio quality of videos online that I started to appreciate the difference audio can make.
Bad audio will make viewers click the back button, while good audio will give viewers the professional image you want to project.
In the future, YouTube may attempt to normalise all uploaded videos to avoid the volume problems it has had in the past; however, I do not believe they can treat regular videos in the same way as music videos. Therefore, my advice to all of you is to monitor your audio levels closely and, if you can afford it, buy better equipment to ensure that your audio quality is always high.

I feel it is worth closing this article with the same statement I shared in the beginning. Your audience will sit through poor video quality if the audio is good, but they will not sit through a video with bad audio. This is something that I hope you always remember when creating video.
I hope you all found this article useful. If you have any questions about audio levels, or want to share your own audio experience with fellow readers, please leave a comment below.
Thanks,
Kevin
Featured image by Rudy and Peter Skitterians from Pixabay