On a scale of 1 to 10, how annoying are pop-ups? For me, it’s about a 9, especially when the pop-up obstructs my view of what I was reading. Even worse is when I have to click on a “no thanks” to make it go away. There are many different pop-up plug-ins available that avoid these annoying characteristics. For example, LeadIn, the plug-in I wrote about earlier has a non-annoying pop-up that you can configure based on your preferences, but my favorite opt-in plugin is Hello Bar.
Hello Bar is, you guessed it, a bar. It can be setup to show on the top of each page of your website, or you can customize the page it shows on (or doesn’t). You can make new bars for specific pages, with different goals. You can also run A/B testing. More importantly, you can track analytics to see how well each bar is converting.
You’re probably wondering how much this will cost you? Zero. Hello Bar is free to use. Setup as many bars as you want. I had to clarify this with their team because until a few years ago there was a limit to how many clicks you could get before you had to sign up for a paid version, but not anymore.
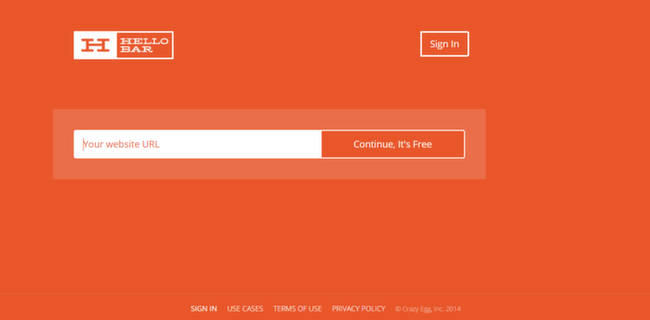
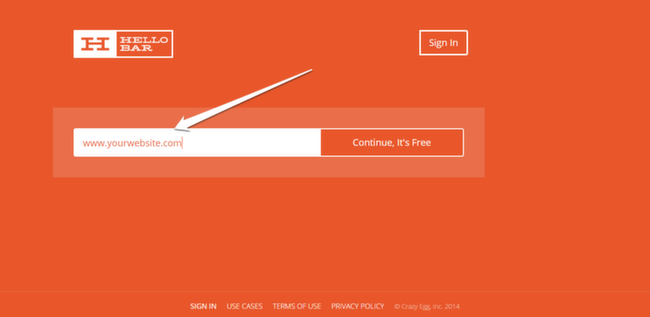
Head over to HelloBar.com and enter your site URL in the text box provided to start creating your first Hello Bar.
Set Goals
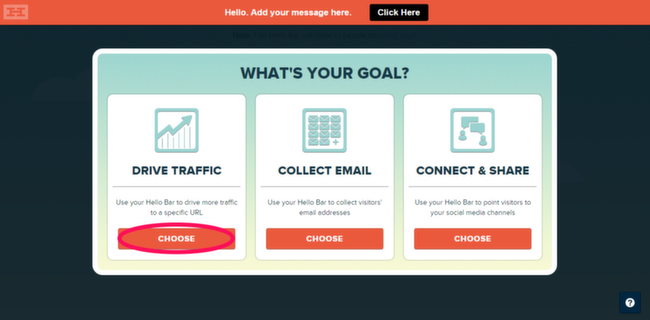
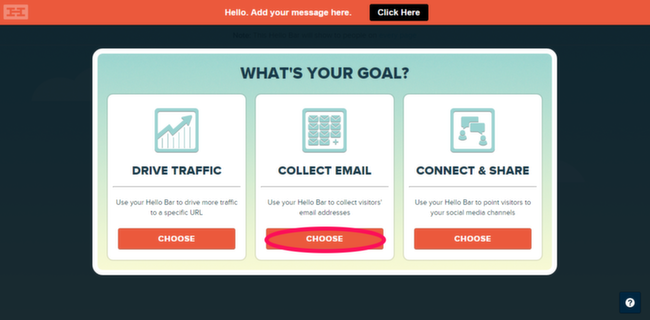
Sometimes you want to drive traffic to a landing page, sometimes you want people to share a page on social media and sometimes you just want people to sign up for a mailing list. All of this is possible with Hello Bar, as it allows you to optimize each bar based on one of these three goals.
1. Increase Click-Through
Let’s say you want people to click-through to a landing page for a product you’re selling. Choose “Drive Traffic” as a goal on the goals page.
Enter the landing page information. This can be a landing page on your website, a form hosted on another website, or any other webpage you’re interested in driving traffic to. This is also the point you can choose whether the Hello Bar shows up on every page on your website, or just on specific ones.
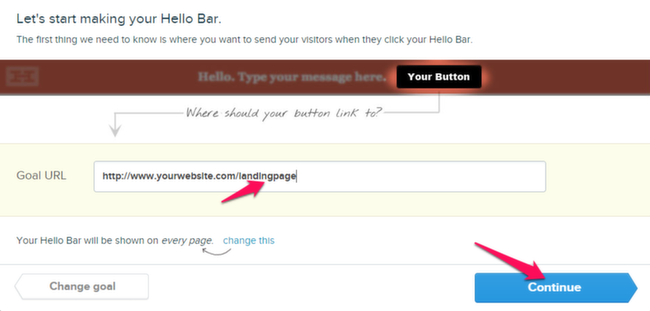
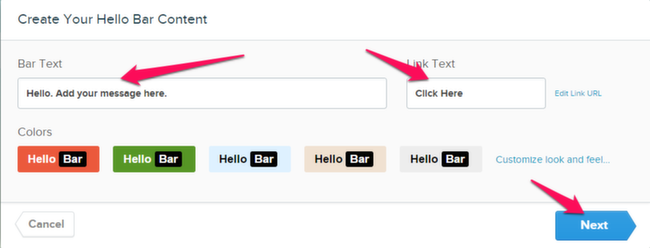
Clicking Continue will take you to the page where you can edit the actual bar itself. Choose the message you want to show, the link text (Click Here is default), and customize what the bar looks like.
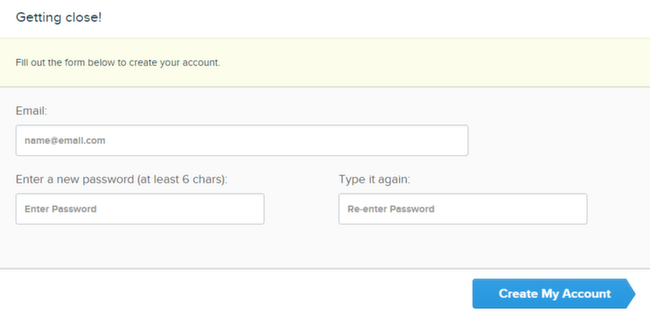
If this is your first time using Hello Bar, you will now get prompted to sign up for an account. It’s super simple – just enter an email and password, and you’re done.
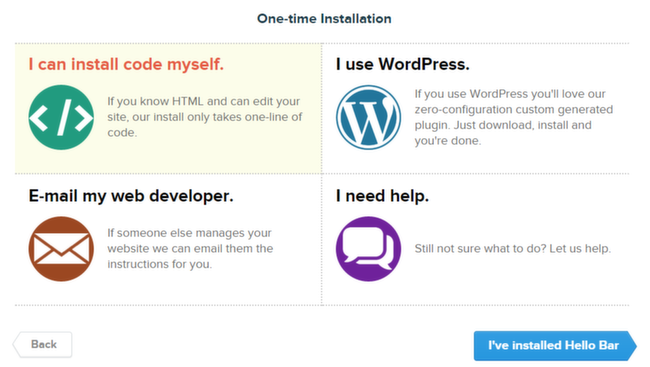
If you’re worried about installing the code for Hello Bar onto your website, this next step is for you. The only needs to be done the first time you install a bar. Choose from one of the four options provided: install the code yourself, e-mail the instructions to your web developer, one-click install for Wordpress, or ask customer service to help you out.
2. Add Subscribers to Email List
Plenty of blog owners use Hello Bar to encourage sign-ups to their mailing list. A process similar to the one above can help you setup this goal.
Choose Collect Email as your goal on the goals window.
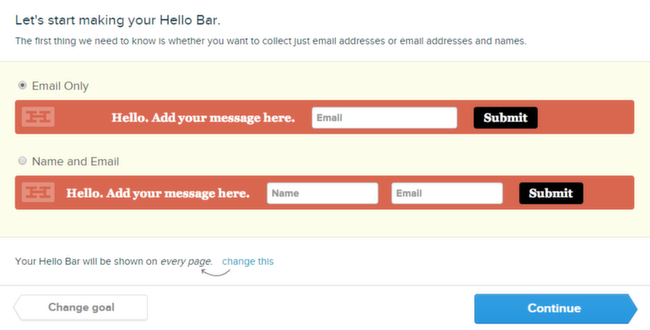
Choose whether you want to collect just email addresses, or both names and email addresses. Again, this is the point where you can choose the pages this Hello Bar shows up on.
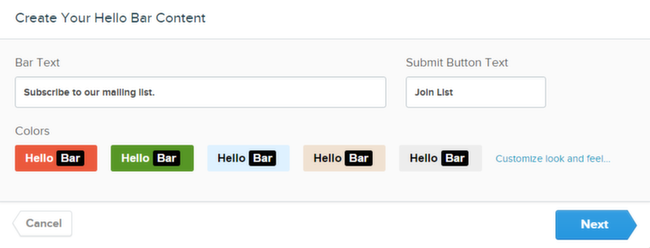
Customize the bar. Choose the text and colors you want to use.
If this is the first bar you’re setting up, you will again see a sign-up window, followed by an installation guide. For the sake of simplicity, I’m not adding those screenshots here again. Currently, you can sync this mailing list to the following services:
- AWeber
- Campaign Monitor
- Constant Contact
- MailChimp
- GetResponse
- iContact
- Mad Mimi
- MyEmma
- Vertical Response
3. Social Sharing
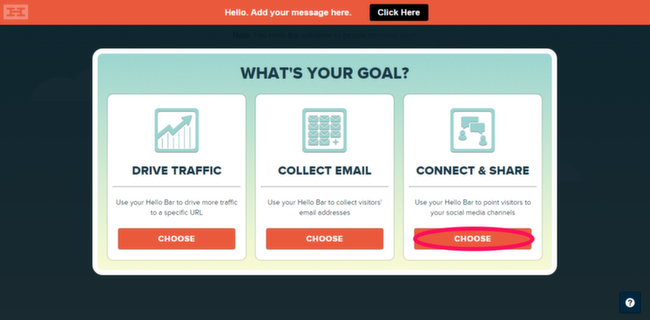
Goal #3 is social sharing. This is for people who want to increase social media engagement on their website.
Click on Connect & Share to install a bar for this goal.
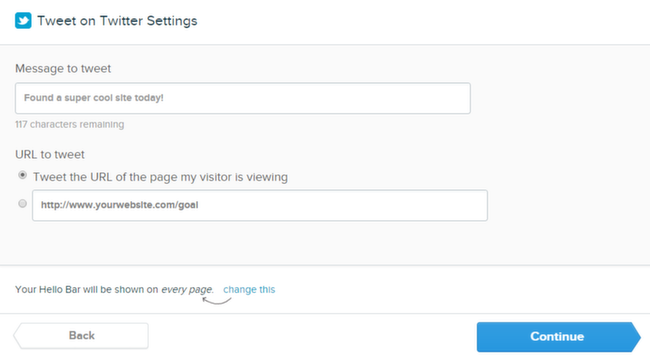
Choose the social network you want to make a bar for. You can choose between Twitter, Facebook, LinkedIn, Google+, Pinterest and Buffer.

I’m using Tweet on Twitter as an example here, but they’re all pretty similar. Just add the message you want to tweet out, the URL you want to include in the tweet, and once again – choose which pages the Hello Bar will show up on.
Why Hello Bar?
Track Conversions
The best part about Hello Bar – besides the easy installation and setup – is that you can track conversions easily and from your main Hello Bar page.

As you can see, from this window you can also copy a bar, edit it, pause it, or delete it. Should you want to setup a new bar for the same goal (to allow for A/B testing), this would be the place to do it from. You can also choose a new goal.
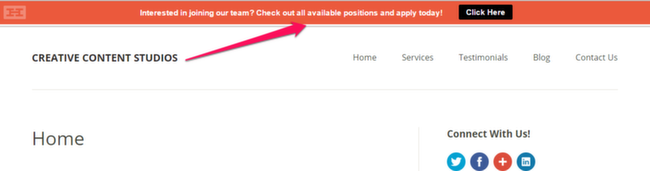
I’ve been using Hello Bar to encourage writers to apply to my writing agency. The link clicks through to a Google Form. This way I don’t get writer application requests through our Contact Us page. The Google Form links to an automated mailing list which guides writers through the application process. This is just one way you can use Hello Bar.
Use A/B Testing
Setup multiple bars with the same goal (using different messages or colors) to enable A/B Testing. The service will keep track of which bar gets how much conversion, so you can see which message or colors are resonating with your audience better. You can also create different bars for mobile users.
Conclusion
I’ve been using Hello Bar for a few months. I never knew the service back when it was paid for, so I can’t compare what’s on offer now vs. what it was like then. That being said, it’s simple to setup, easy to use, and I’ve only ever contacted customer support for clarifications for this review (and it took them just 5 minutes to get back to me).
The simplicity of setting it up means you won’t ever be nervous about adding new bars. Adding and removing bars takes minutes. I should know, as I created half-dozen bars to test out different goals for this review. The fact that it’s all free is just the cherry on top.
Hello Bar is best for Wordpress users (because of how easy it is to install on the platform) who want to direct traffic or create mailing lists. Instead of hoping the reader will click through to your e-book, you can make it easier for them by adding the landing page to a Hello Bar and having it show up on your home page.