Love them or loathe them; Pop ups are one of the most effective ways of converting your visitors to subscribers. I have tried several solutions in the past. The last popup plugin I used actively on all my websites was Pippity, however I found it to be very buggy.
The overall growth of my email list has been disappointing over the last few months. Therefore, I decided to look for a new popup plugin to use on my content websites. The majority of popup plugins retail at $67 or $99, however I opted for Ninja Popups, which retails for only $18 at CodeCanyon. It lacks some premium features that other popup plugins boast such as split testing, though it is hard to complain when it costs around a fifth of the cost of many of the alternatives.
Main Features
The main selling point of Ninja Popups is its ability to increase the number of people who subscribe to your email list.
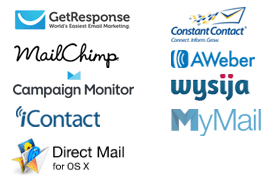
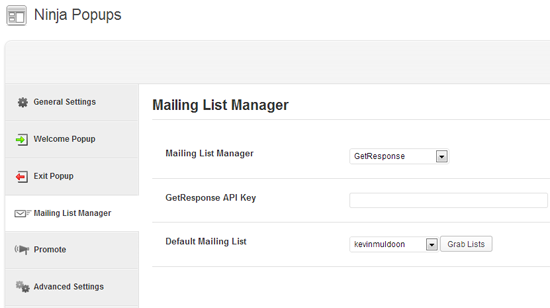
It supports most major email mailing providers such as Aweber, GetResponse, MailChimp, iContact and ConstantContact. You need not worry if your email provider is not listed as you can use your own custom HTML form or. You can also store emails in a CSV file.
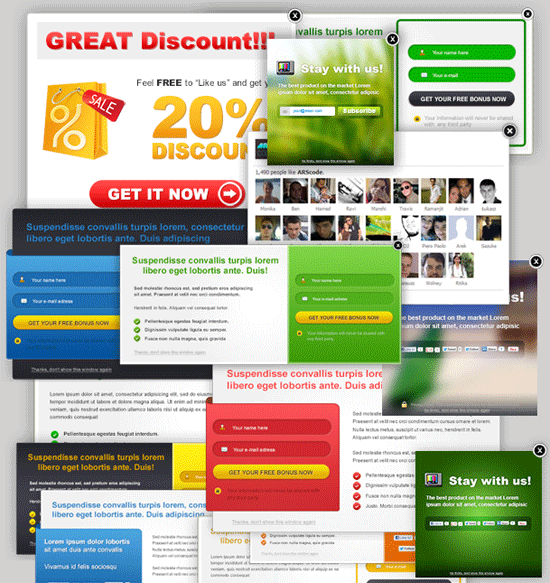
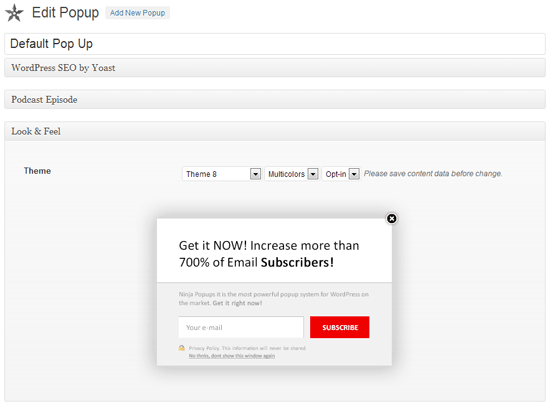
Ninja Popups comes packaged with eight different themes. An additional five themes can be downloaded from CodeCanyon for a total of only $5. The themes on offer are quite varied, therefore you should find something suitable for your website. All themes are mobile responsive too.
In addition to increasing your email subscribers, Ninja Popups can be used in a number of different ways such as popping up a Google map. You can also pop up an iframe, Facebook like box or use your own HTML. Content can also be blocked until the visitor has shared your page.
One of my favourite features of Ninja Popups is the ability to add a simple subscription form with an image above. This allows you to create a great looking advertisement yourself through a program such as Photoshop, and then upload it. For example, you could use a picture of your free eBook and add a simple headline and testimonial.

The number of times your popup has been displayed can be viewed at any time together with the number of conversions. This helps you see how well your popup is performing. The developer of the plugin states that your subscriber sign up rate will increase by 700%. Popups do convert well, though 700% seems a bit higher than what most people will receive in practice. I only installed the plugin two days ago, therefore it is too early for me to comment on how well it performs. So far I have had a disappointing return on KevinMuldoon.com with 2 conversions in 819 displays (0.24% sign up rate), however Martial Arts Videos has had 14 conversions in 970 views (1.44% sign up rate).
Configuring Your Popup
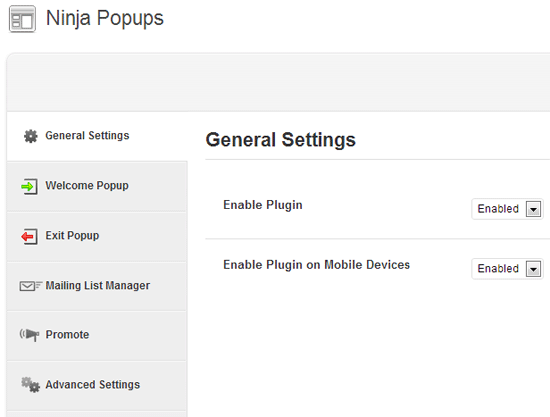
Ninja Popups can be setup in less than five minutes. The general settings area has six main sections. This area is quite small compared to the the popup configuration area. It has six sections. The general settings area allows you to disable and enable the plugin. I would, however, recommend deactivating the plugin if you are planning on switching the plugin off for a while.
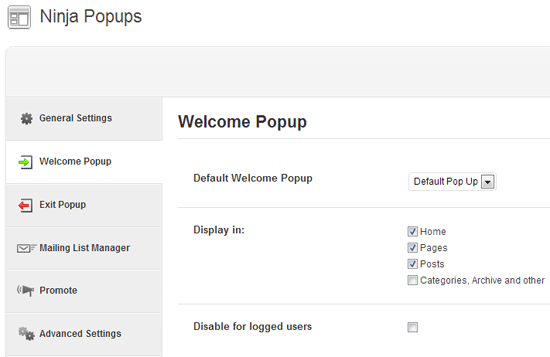
Popups can be shown when a user visits your website and when they leave. You can choose to display popups on your home page, posts, pages and archive pages (e.g. categories etc). With exit popups, you can also specify specific URLs in which the popup is disabled.
Unfortunately, you cannot specify popups to be enabled on particular posts or pages. This would be a good option to have as you could switch off your welcome popup on pages such as your contact or advertising information page.
The configuration process for all supported email mailing companies takes seconds. Most simply require you to enter your account application ID. Once connected, you can then choose the appropriate email list for your website.
The plugin only allows you define one email list per website. Originally, I assumed that the plugin restricted usage to one particular email list. It does not. A default list can be configured, however you can choose any list you want during the popup creation page. This allows you to use different email lists on different areas of your website.
Unfortunately, you cannot specify a form for Ninja Popups. All email providers allow you to create multiple sign up forms. This allows you to track where sign ups are coming from. For example, I can create a form for my header, a form for my sidebar and for my newsletter information page. Then on my email provider (GetResponse), I can see exactly where sign ups are coming from. This information can be seen through the plugin, however I would prefer to have this tracked through my email provider too. As it stands, if I ever stop using Ninja Popups, my conversion statistics are lost.
The plugin also allows you to automatically add a “Powered by Ninja Popups” referral link with all your popups. It’s a useful way of redeeming the cost of the plugin and making a few extra dollars along the way. The advanced section allows you to specify CSS classes for links and disable certain javascript code from loading (e.g. from Facebook or Twitter).
The popup creation page has more settings than the general settings area; however it should not take you more than a few minutes to set up. The first thing to do is decide what theme or type of popup (e.g. Facebook like box) you want to use. The first themes have many different colour options and allow you to choose an opt-in registration form or social content locker. If you choose the latter, the visitor has to like or share your page in order to view the page. I am not a big fan of this kind of thing, however I can see how it could be useful in certain situations such as releasing a premium product for free.
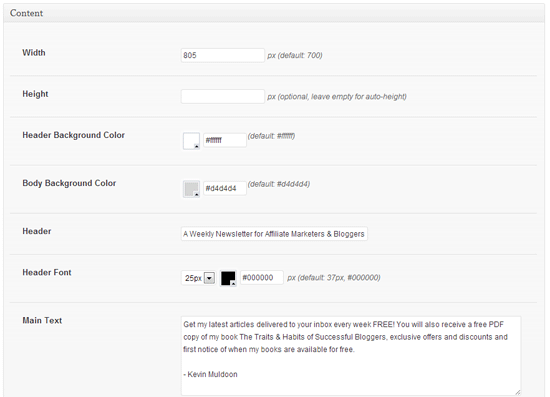
The fields of the content configuration area change according to the type of theme and popup you choose. The width, height and colour scheme of the popop can all be defined. You can also change the font size and change the names of the fields.
I was not too happy with the placement of images within the popups. I tried adding a picture of my book to my popup using different designs, however the standard themes are not set up well for that. Currently, there is a bug just now that displays the name field, even if you disable it through the configuration area. Hopefully this will be resolved in the next update.
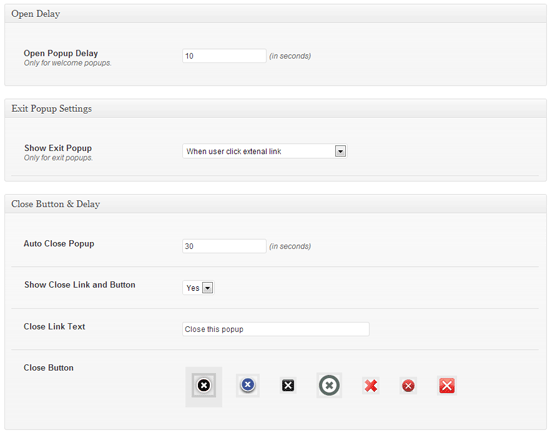
An overlay with 60% opacity can be displayed with your popup. Alternatively, you can disable it or upload your own image. You can also set the plugin to start and end on defined dates using a calendar, although you cannot specify an exact time. This would have been useful for promotions that have to end at a specified time.
If you choose to use an exit plugin, you can use one of those annoying Javascript alert boxes that asks the visitor if they really wanted to leave the page. I detest these alerts, I really do, however they are available to you if you wish.
The time in which a welcome popup appears can be defined. It can be set to closed after a defined number of seconds too. One of the most important fields to complete is the cookie duration. You need to define when the popup will appear again for someone that has converted and for someone that has closed the popup.
After a visitor has opted-in or shared your page, you can redirect them to a specific URL. I have set it up so that those who sign up to my email list are redirected to a page that thanks them for registering and explains that an email has been sent to them. I am not sure if this is the best thing to do. You could argue that it is better for the visitor to stay on the page they were originally reading so that they do not have to click the back button on their browser.
Custom CSS and Javascript can be entered at the bottom of the page too. This is useful if you want to customise your form.
Overview
Ninja Popups is not the best popup plugin available for WordPress. Therefore, if you want the popup with the most features, Ninja Popups is not for you. There are other solutions out there that have more features.
I was personally looking for a simple solution: Something that simply displayed a sign up form to visitors and increased my sign up rate. Ninja Popups does that. Price is not usually the deciding factor when I choose a plugin. I normally want to ensure I get the right plugin for the project, regardless of the cost. This time, price was a big factor. It just did not make sense for me to pay an additional $80 for a popup plugin for one or two additional features. Particularly when those additional features were not essential.
The standard themes that come with the plugin are ok, however I recommend checking out the themes pack that is available for an additional $5 as the designs are of a higher standard. If you do not want to spend any money on a popup plugin, I recommend giving Optin Revolution: WordPress Popup a try. That’s a good solution if you do not need any bells or whistles.
For everyone else, I recommend checking out Ninja Popups. Those of you who are currently looking at one of the more expensive popup plugins should definitely check it out as it could save you a lot of money.
If you have any questions about the plugin, please let me know :)
Kevin
Link: Ninja Popups