One of the quintessential factors of delivering a good user experience is a fast website. A speedy website will rank better in search engines, improve conversions (i.e. more people would buy your product), and pave the way to what might turn out to be a great user experience.
There are many ways to speed up a website:
- Page, Disk and Object Caching
- JavaScript and CSS compression
- Image Optimization
- Optimal Use of Web Objects
- Using a Content Delivery Network (CDN)
One of the most popular and easy ways to speed up the website is to use a content delivery network – commonly known as a CDN. This tutorial shows you how to setup and install MaxCDN with WordPress using the W3 Total Cache plugin. I’ve written this tutorial keeping the absolute beginner in mind. Each step is described using relevant screenshots. If you have any question, please feel free to ask them in the comments section.

For those of you who are new to WordPress and/or W3 Total Cache, I would advise you to setup a demo website in order conduct a trial of this tutorial, and then set it up for your main website. Let us begin.
Install W3 Total Cache
We start by installing the W3 Total Cache plugin. There are two ways you can do this.
The longer way is as follows:
- Download the zip file to your computer
- Extract the archive (you’ll find that the files are always contained within a folder)
- Upload the plugin folder to WP_INSTALL_DIR/wp-content/plugins via File Transfer Protocol (For those of who are unfamiliar, WP_INSTALL_DIR is a macro name that I randomly chose for your WordPress installation directory)
- Once uploaded, activate the plugin
This method, however tedious it may be (and it really is) – is very useful for debugging. In certain rare cases, where your host does not have cURL enabled, or you cannot install the plugin via the WordPress dashboard, you’ll have to follow this method.
Now for the easy way. This should work for 99.9% of the folks out there.

- Simply goto WordPress Dashboard > Plugins > Add New
- Search for “w3 total cache”
- Install and activate the first result
You can also upload the zip file using the WordPress dashboard from Plugins > Add New > Upload.
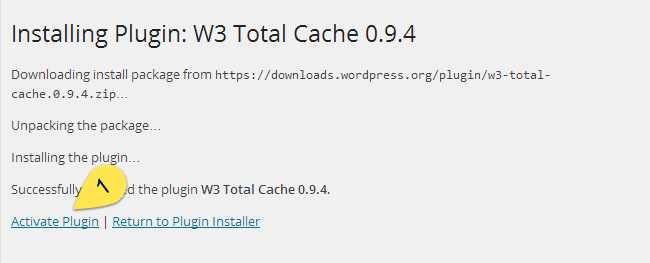
Once you have installed the plugin, you’ll find the following message. Click on Activate Plugin. Now we’re ready to setup W3 Total Cache.
Configuring W3 Total Cache (W3TC)
As you all know, W3 Total Cache is the highest rated and most versatile WordPress caching plugin out there. From AT&T to Mashable – all these high performance sites use W3 Total Cache.
Our tutorial focuses on setting up a content delivery network for WordPress. Before we do that, I’m going to go through the optimal setting of the plugin. This would be helpful to those who are new to WordPress and/or W3 Total Cache.
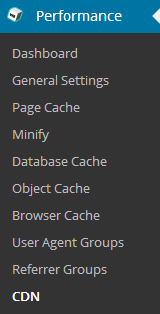
We first open the plugin’s General settings page. You can find it under Performance > General Settings in the bottom left corner of your WordPress dashboard. You’ll note that the plugin is disabled. You’ll also find a whole lot of boxes (or modules as some of you might prefer to call it) – each of which contains a particular setting.
Note that I am assuming that you are using a shared hosting server or a virtual or dedicated server and not a Managed WordPress hosting service such as WP Engine.
In any case, if you do not possess the technical expertise to configure W3 Total Cache, I would not recommend experimenting with unfamiliar settings on a live site. If you are testing things in a test environment, I encourage you to go through John Saddington’s WordPress Caching guide for an advanced course!
General and Page Cache Settings in W3TC
The first box you’ll find is the the General settings box. Only use this box when you want to disable the plugin completely. We’re going to enable specific modules and discuss them in the following paragraphs. The first module we want to activate is Page Cache. Simply check the box and select Disk Enhanced as the Page Cache method.
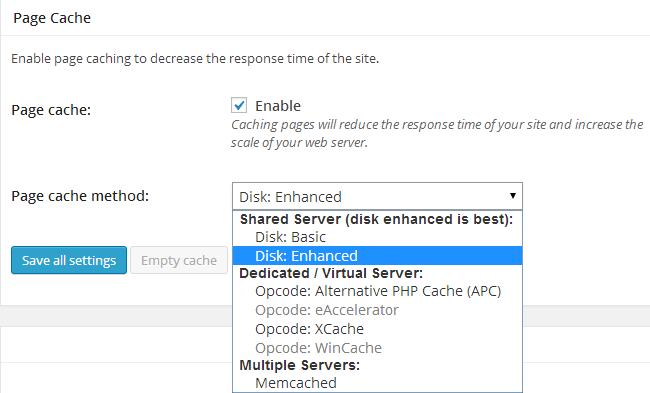
If your hosting environment allows other (advanced) methods of caching, select them. My test server allows me to use APC, which stands for Accelerated PHP Cache. It is a form of Opcode Caching. These terms may be new to you. Don’t worry. Simply select Disk Enhanced when in doubt and you’re good to go. Do not click on Save Settings just yet.
Minify Setting in W3 Total Cache
The next module is Minify. It essentially combines your JavaScript and CSS files and removes unwanted white spaces (blanks), etc. and compresses them to the last byte. This results in faster transfers and hence lower response time.
Occasionally, enabling Minify might cause the theme’s CSS to break down. So it is best to first successfully integrate MaxCDN and then A/B test the Minify settings to see what works. Thus, we won’t activate the Minify settings for now.
Other Settings in W3 Total Cache
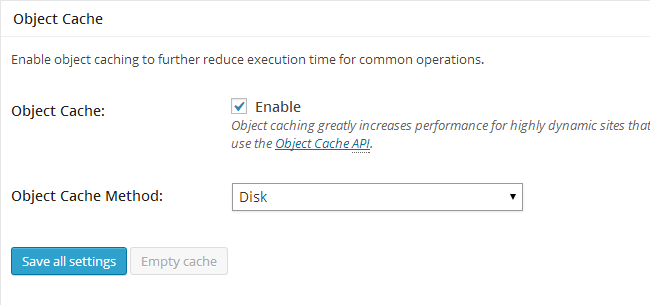
The rest of the settings include Database Cache, Object Cache and Browser Cache, all three of which should be activated.

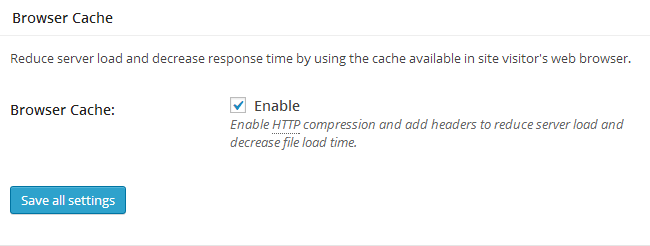
Once you’ve checked all the relevant modules, click on Save Settings.
Configuring MaxCDN with W3 Total Cache in WordPress
Now for the end game. We’ve successfully enabled the recommended caching settings in W3TC and now proceed to integrate MaxCDN.
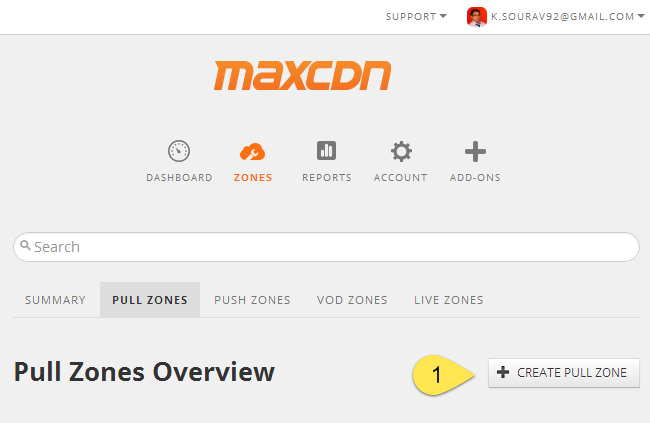
Create a new Pull Zone in MaxCDN
Firstly, we need to create a new Pull Zone from our MaxCDN panel. Login to your MaxCDN account and select the Zones icon followed by the Pull Zones tab and then on Create Pull Zone. Next, we configure the new Pull Zone (this is a very crucial part).
There are three fields:
- Pull Zone Name: This should be alphanumeric and cannot contain special characters including spaces.
- Origin Server URL: This must be the base URL of your site. Even if WordPress is installed in a distinct folder, you should enter the base URL. For example, if WordPress is installed under http://www.example.com/blog/ just enter http://www.example.com. Do not add the trailing ‘/’. If your site does not have www in its base URL, omit that part. In this tutorial, I’m using a sub-domain and WordPress is installed under http://stage.thinkingteapot.com/kevin. Note what I’ve entered in this field.
- Label: This can be any text you want – whatever helps you categorize this Pull Zone. I’ve used the demo site’s name.

Once you’ve entered the data, press Create. A new pull zone should be created in a few minutes:

Once the new Pull Zone is created, head over to its Overview panel and copy the CDN URL.
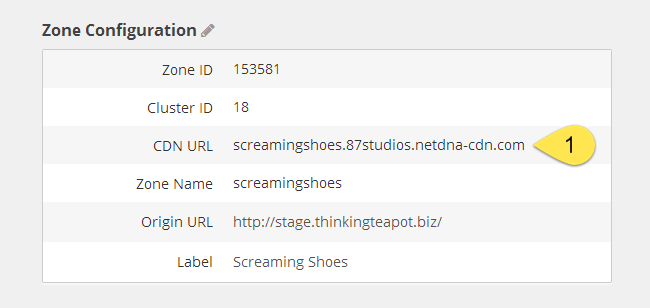
We will need to enter this data in W3 Total Cache. I recommend neither closing this tab nor logging out of MaxCDN, since we will have to authorize MaxCDN with W3 Total Cache.
Authorize MaxCDN with W3 Total Cache
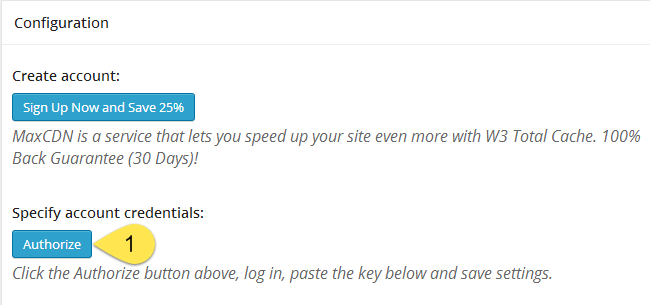
W3 Total Cache’s CDN settings can be found under Performance > CDN from the WordPress dashboard. In order for W3 Total Cache to access MaxCDN and work in synch with it, we will have to authorize W3 Total Cache to use MaxCDN’s API.
It’s super easy and only the click of a button. Open the CDN settings in W3 Total Cache and click on the Authorize button. If you haven’t logged out of MaxCDN in the previous step, then you’ll be automatically redirected to MaxCDN’s panel. In any other case, you’ll have to login again. After a few seconds, you should see something like this:
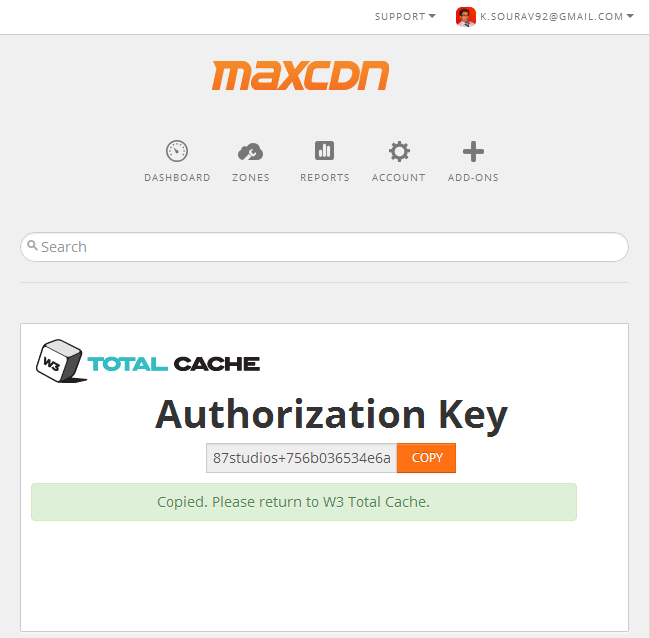
Copy the key and paste it in the Authorization key field in W3TC’s CDN settings page and click on the Validate button. You should see a message like this:

Connecting MaxCDN with W3 Total Cache
Once the authorization is successful, configure the remaining options as shown in the picture below.
- Select Pull Zone: Should be the new zone you just created
- Replace site’s hostname with: the CDN URL you copied right after you created the new zone (look for it in the other tab if you haven’t closed it)
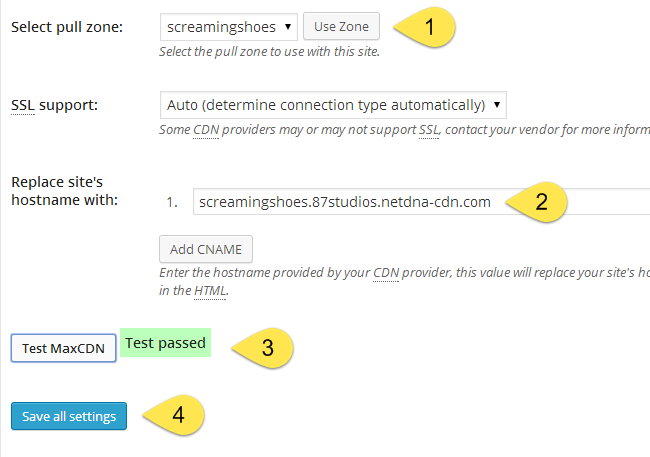
Once done, click on the Test MaxCDN button and you should see a green Test passed success message. At this moment, take a deep breath, exhale, stare into infinity and pat yourself on the back – you’ve successfully integrated MaxCDN in your WordPress site using W3 Total Cache.
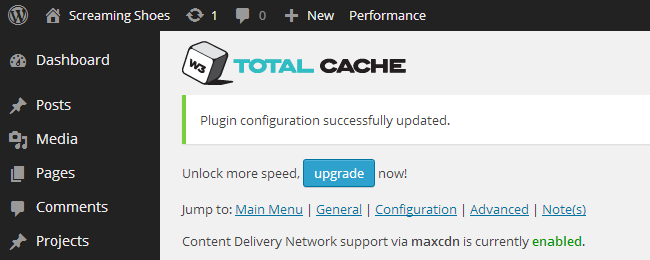
Finally click on the Save all Settings button. You should see this message on top once the page refreshes:
Conclusion
An experiment is deemed successful when relevant results are produced. So should be the case with a tutorial. I’ve showed you how to install and setup the CDN in your new or existing WordPress site. I’ve also benchmarked the experimental site before and after setting up the CDN using GTmetrix. Here are the results:


As you can see, using a CDN has a profound effect on the site’s overall performance. I encourage you to find out more by visiting MaxCDN’s official website.
I hope you have enjoyed this tutorial and would love to hear your thoughts on it. If you have you used a CDN before, I would love to know who is your preferred provider? Also, how much difference did it make to your website’s performance?
I’d love to hear your thoughts, so please leave a comment below if you can.
Thanks,
Sourav