The last few days I have spoke about my search to find the best email solution for me. I still have 7 months of my contract to run on my phone so I was looking for a good solution to tide me over til then, at which point I will try and get a good contract with unlimited internet.
At the moment I have a Nokia N95 8GB and although my contract has unlimited texts, it does not have any internet usage included. Through my orange account I can however add bundles to my contract such as Unlimited Evening & Weekend Browsing for £5 per month, 30MB of usage for £8 per month and 80mb of usage for a ridiculous £41.13 per month.
For over a year now I have been forwarding all of my business related emails to my Gmail account. This allows me to check my emails almost anywhere. Before I was using outlook express and had to transfer backed up emails and account details to my other laptop whenever I was travelling, a right pain in the butt!
So my research into ‘how to check my emails on the move’ should really have been ‘how do I check my gmail account on the move’.
Thankfully, with the N95, there are a few options :)
Mobile Gmail With A Browser
Google has a low bandwidth version of Gmail which you can use at m.gmail.com. There are no images or advertisements and the page loads really quickly. A good option to try out.
Nokia Default Mail Client
Nokia symbian phones have a mail client built into them. You can setup a pop mailbox or, more preferable, an imap mailbox.Once you set it up on your phone, you can view, send and receive emails in much the same way as text messages. Infact, the screen looks almost identical.
Google has good instructions on how you can set this up on a Symbian S60 phone :)
- Enable IMAP in your Gmail settings.
- Select ‘Messaging’ > ‘Options’ > ‘Settings’ > ‘E-mail’ > ‘Mailboxes.’
- If you have never set up email on your phone before, select ‘Yes’ to define a new mailbox. If you already have other mailboxes, select ‘Options’ and then ‘New mailbox.’
- Select ‘Start’ to begin the setup wizard.
- Select ‘IMAP4’ and then ‘Next.’
- Enter your full email address (including ‘@gmail.com’) as the email address and select ‘Next.’ Google Apps users, enter your full address in the format ‘username@your_domain.com.’
- Enter ‘imap.gmail.com’ as the incoming mail server and select ‘Next.’
- Enter ‘smtp.gmail.com’ as the outgoing mail server and select ‘Next.’
- Select the appropriate access point and then ‘Next.’
- Enter a descriptive name for the email account mailbox name.
- Once your mailbox is set up, select it from the email mailbox settings screen.
- Select ‘Connection settings’ > ‘Incoming e-mail.’
- Enter your address (including ‘@gmail.com’ or ‘@your_domain.com’) and password.
- Select ‘SSL/TLS’ for your security (ports) and define your port as ‘993.’
- Select ‘Back.’
- Select ‘Outgoing e-mail.’
- Enter your email address (including ‘@gmail.com’ or ‘@your_domain.com’) and password.
- Select ‘StartTLS’ for your security (ports) and define your port as ‘587.’
- Select ‘Back’ and change any other settings according to your preferences.
- Check our recommended client settings, and adjust your client’s settings as needed.
All Symbian also provide a good quick guide on how you can do it.
Google Gmail Mobile Application
 Google have a range of applications for mobile phone users. All you need to do is go to www.google.com/mobile/, select the type of phone you have and then select Gmail. You then have to enter your phone number (make sure you go to your regional google i.e. for the UK go to www.google.co.uk/mobile/).
After that Google will send you a download link to download the app to your phone.
Which Method Is Best?
I followed Googles Instructions and setup gmail through the default mail client on my Nokia N95 8GB. It works ok but it’s not perfect.
You can setup automatical retrieval so that your phone will check for new mail every 15 mins, 30 mins, hour or day or whatever. You can also set how many new messages you will download. I stupidly asked my phone to receive all mail and my N95 then tried to download every single email that I have on my Gmail. My phone froze and I had to switch off my phone as I couldn’t get it to stop. When I switched it back on I noticed that it had downloaded over 2,000 messages!
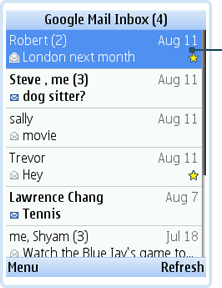
The mobile version of Gmail works pretty well but for me, the Google App was by far the best way to check my emails. It’s a scaled down version of Gmail but it still has all the major features like starring posts, something which the other methods lacked.
All the methods are fairly quick and until I get a new phone contract, I weill probably use a mixture of the default client and the google mail application.
If I’m out and about and want to check my emails I can logon via the Gmail Application. Unless you leave that on constantly though, you will not be informed of new posts. Therefore if for some reason I am out and need to know when I receive an email then I can use the default mail client that Nokia offers. I can set it so that I am informed of any new emails to my account and then I can go and check my email through the Gmail application.
This is the best setup for me and it won’t use much bandwidth either. Plus, I can always try and leech some free wifi if I’m at a friends anyways :)
Hope this helps some Gmail users out there :)
Kevin

