
Essential Grid is a premium WordPress plugin from experienced developers ThemePunch.
When I first heard about Essential Grid I assumed it was a gallery plugin that displayed images in a grid format. Whilst it can do that, the plugin can do so much more. ThemePunch market the plugin as an all purpose grid building solution.
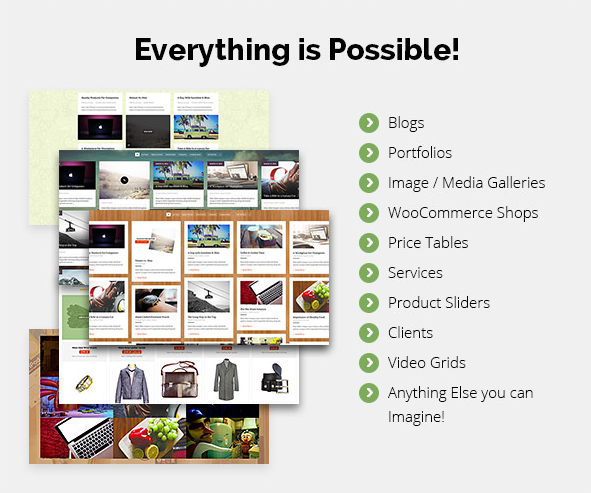
The plugin can be used to create a variety of things, such as blogs, portfolios, image galleries, sliders, and video grids.
ThemePunch kindly sent me a copy of Essential Grid so that I can take a closer look at what the plugin can do. So let’s put the plugin to the test and see how Essential Grid works.
Creating a Quick Grid
Once Essential Grid has been installed, you will see a new shortcode button for the plugin in your visual editor.
One slight annoyance about this is that this button is not displayed if the visual editor has been disabled through your WordPress profile. I always disable the WordPress visual editor when working with WordPress so I had to re-enable it in order to use Essential Grid. Hopefully the developers will update the plugin in future so that a button is available for those who use WordPress with the visual editor disabled.
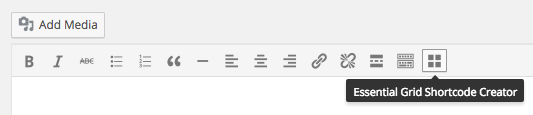
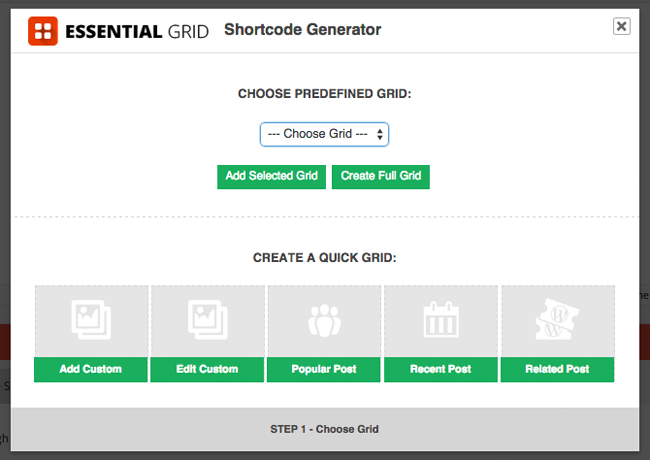
When you click on the Essential Grid shortcode button, the shortcode generator box will appear. From here you can select an existing grid you have created and insert it into your content area or create a new grid.
If you want to create a new grid quickly, you can select one of five options. You can add a new custom grid, edit an existing grid or choose popular post, recent post, or related post.
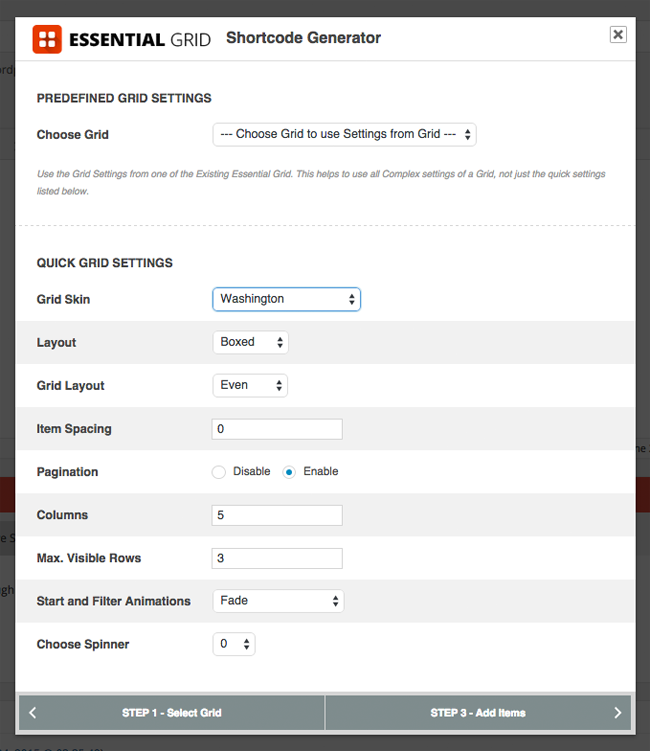
A total of nine settings are available when you choose to create a new custom grid.
A whopping 44 skins are selectable as a grid skin and you can choose a boxed or full-width layout. You can also define grid layout, item spacing, pagination, columns, rows, animations, and the animation spinner.
In the next section you can items to your grid. You can select images, an HTML5 video, videos from Vimeo and YouTube, or audio from SoundCloud. You can name each item and give it a unique skin. Some other settings are available for each item type too.
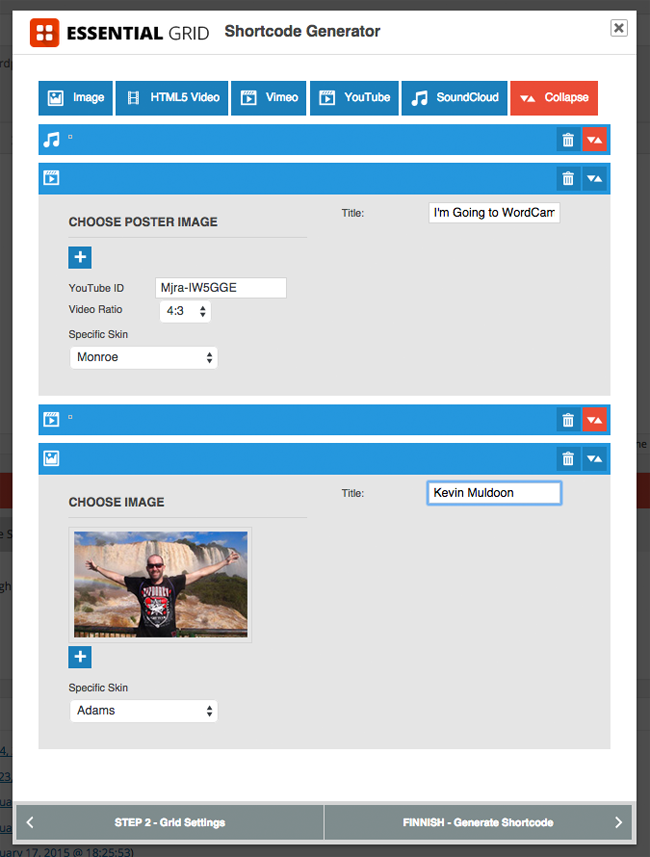
Essential Grid will then insert the necessary shortcode into your content area.
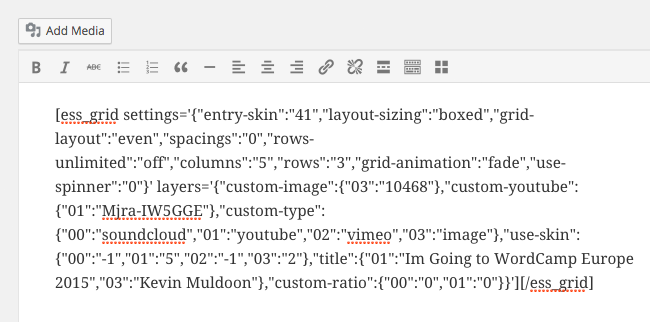
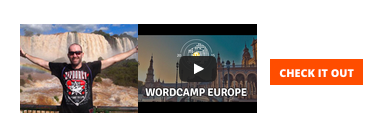
The example below shows the grid that I created quickly by just choosing the default settings and selecting a video and image. This example does not illustrate what Essential Grid is capable of, however this grid was literally created in seconds.
At this point in my review you are probably thinking that Essential Grid is a useful WordPress plugin that can be used to create grids quickly; but I have only scratched the surface about what it can do.
As the name suggests, the quick grid option is the fast way of creating a grid using Essential Grid. If you want to get the most out of the plugin, this is the option to choose.
Creating a Full Grid
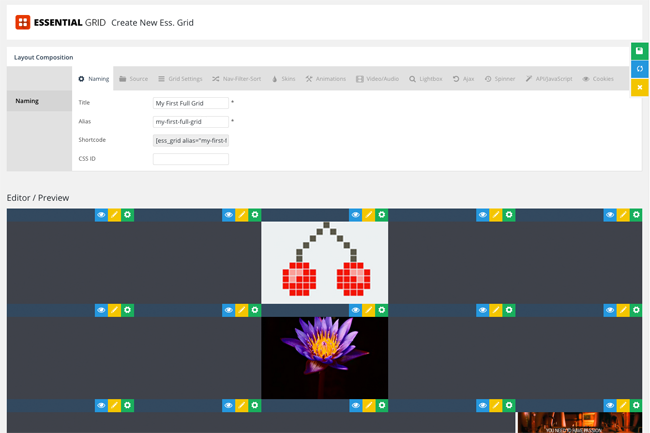
When you choose the “Create Full Grid” option, a new tab opens in your browser with 12 different sections. In the first section you can name your new grid. The alias you choose is used in the shortcode underneath to reference your new grid. You can also define the CSS ID of the grid.
At the bottom of the page is an editor that shows you a preview of your grid. This is visible at all times. You will also see options at the far right hand side of the page to close, refresh, or save your grid.
In the source section you decide whether you will be sourcing items from posts, pages, or another post type. Items can be filtered for posts that are assigned to one or multiple categories.
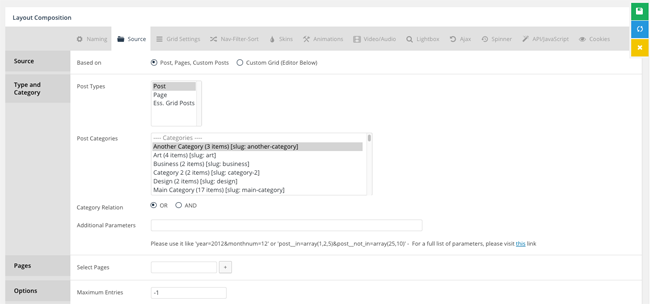
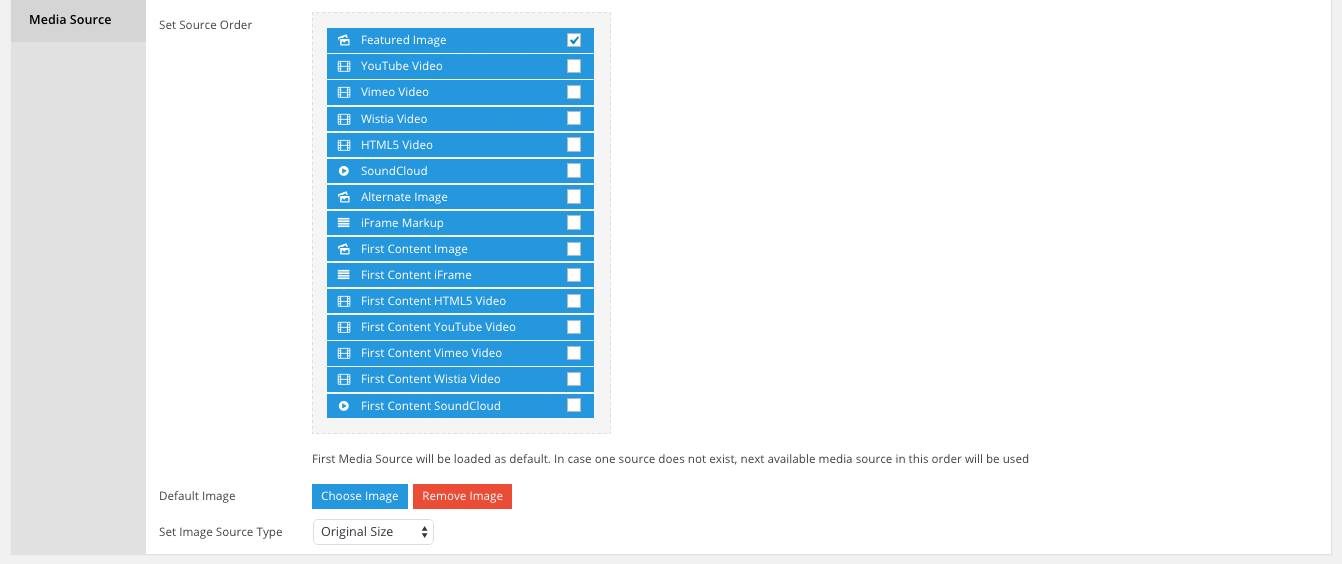
Underneath you can set the order for your media source.
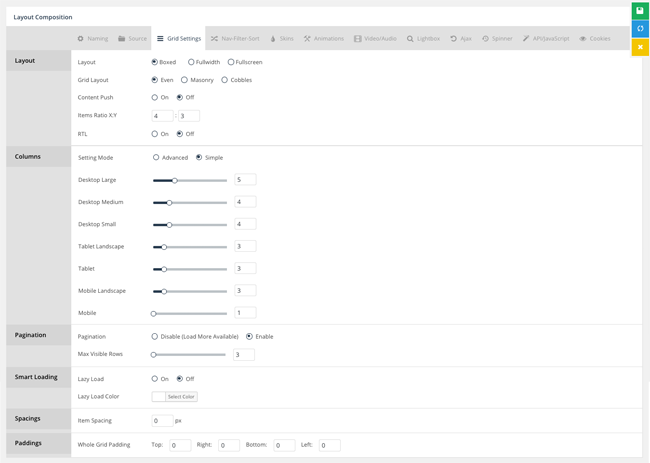
The grid settings section has a lot of different options. Various layout and grid settings can be selected at the top of the page. For example, you can choose even, masonry, or cobbles, for your grid structure.
The number of columns can be defined for various devices. If you switch to advanced mode, you can determine the exact number of pixels that a grid should have for each device, whether it be a desktop, tablet, or mobile. Pagination, lazy loading, spacing, and padding settings, are also available.
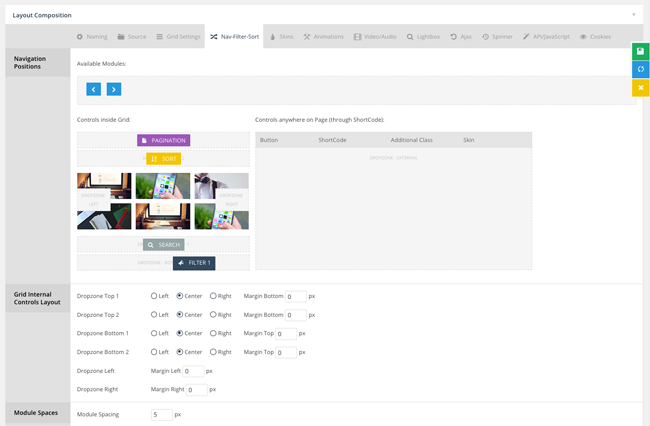
In the next section there are options for navigation. Navigation controls include pagination, sort, filter, and sort. Each module can be dragged and dropped into your layout in the area you wish (they call these areas dropzones). There are two positions above your content, two below, and one left and right.
Underneath you will find settings for each type of navigation. You can define the position of dropzones, define spacing and margins, and set filtering and sorting options. You can even change the text that is displayed in the search field.
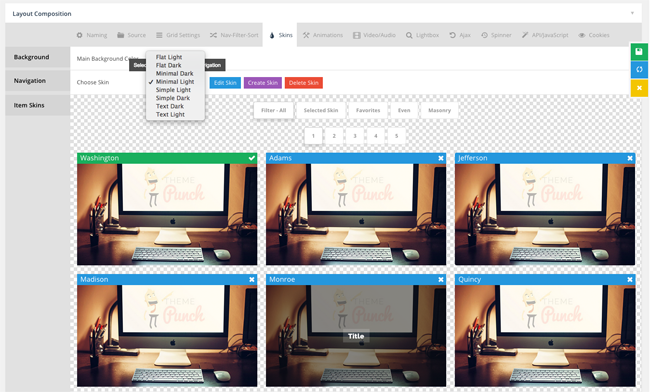
There is a great selection of skins. As I noted earlier, there are 44 skins available. There are also eight skins available for navigation.
In the skins section you can change the background colour and modify one of the eight available navigation skins. When you click to edit a navigation skin, a box will appear that displays all the CSS code for that skin and allow you to make changes and save them.
Underneath, you can select one of the 44 skins that are available.
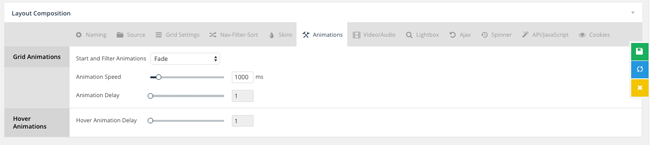
11 different animations are available for your grid. You can control the animation speed and delay. You can also control the animation hover delay.
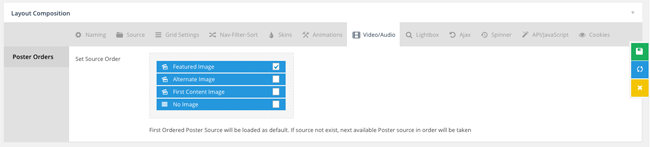
In the next section you can define the order of the poster source.
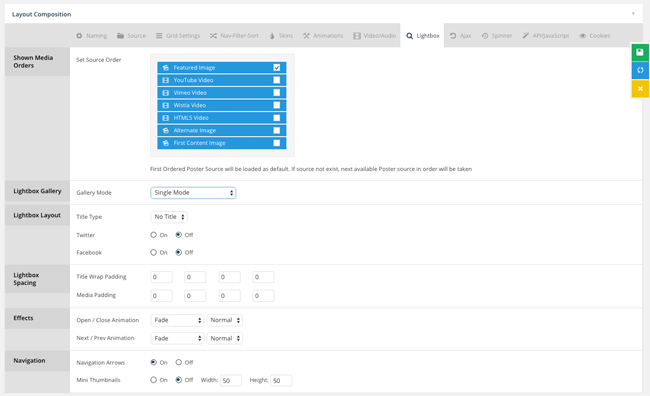
There’s a lot of useful options available for the grid lightbox. You can define the order of the media source, the gallery mode, layout, and spacing.
Animation effects can also be applied for opening and closing items and clicking next and previous. Navigation arrows and mini thumbnails can be defined too.
The Ajax container and navigation can be defined too. Content can be added above or below the container. Custom CSS can be added too.
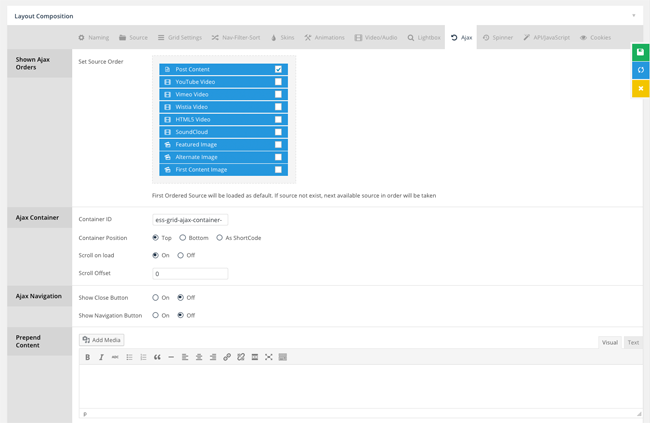
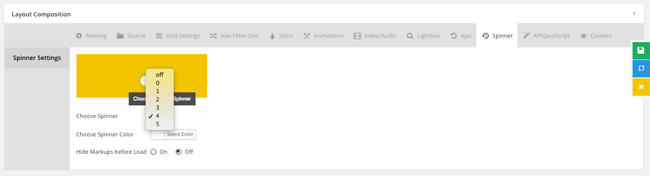
A loading spinner can be displayed when items are loading. Six different animation effects for your spinner are available and you can specify the colour of the spinner.
The spinner can be disabled if you wish.
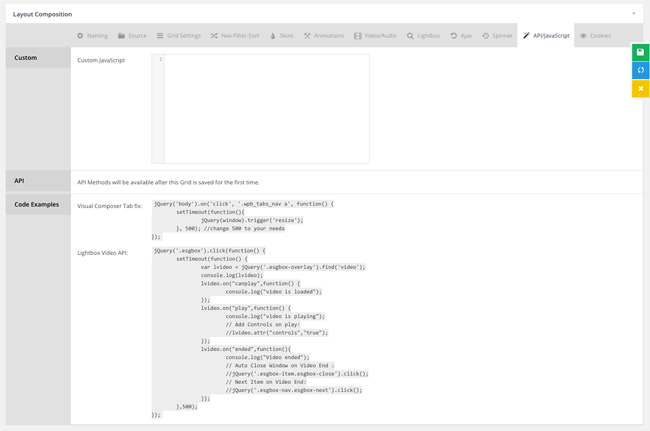
Custom Javascript can be added in the next section. API information is displayed here too.
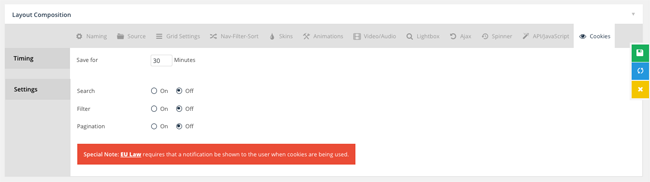
In the last section you can set the duration of cookies and select what is saved in cookies.
Once you have saved your grid, you will see it listed in the main administration page. From here you can see the shortcode that you need to insert into the content area of your post or page. You can also edit settings, edit the skin, delete the grid, and duplicate the grid.

As you can see, creating a full grid gives you so much more control over how your grid looks and works. I believe the quick grid option is better when you first start using Essential grid as there are fewer options to configure. You can then edit your grid further once you have a better grasp of what features are available to you.
Visual Skin Editor
One of the greatest features of Essential Grid is its visual skin editor. It allows you to modify any of the existing 44 skins or create a brand new skin from scratch.
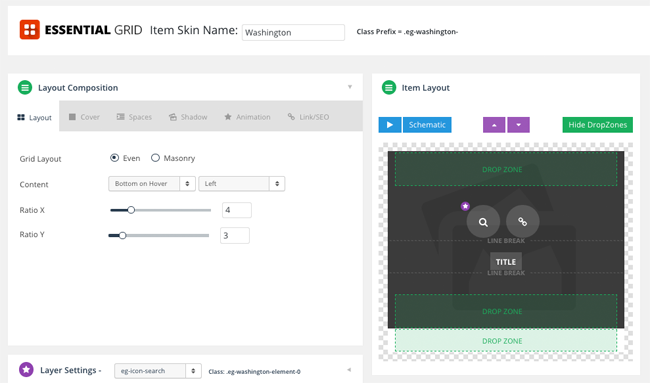
The editor is divided into four different sections: Layout composition, layer settings, item layout, and available layers.
The layout composition section has six tabs: Layout, cover, spaces, shadow, animation, and link/SEO. You can modify a variety of settings in these tabs, such as colours, padding, borders, shadows, and animations.
The item layout box shows you the structure of a particular skin.
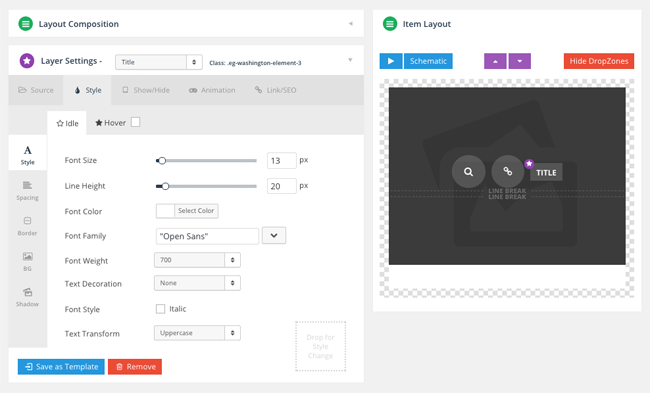
The layer settings section has five tabs: Source, style, show/hide, animation, and link/SEO. The style tab is divided into even more sub categories: five for idle and four for hover.
This section has a lot of interesting setting options. For example, in link/SEO you can link items to one of several places, such as a URL, lightbox, or video. You can also define the link target and whether the link is wrapped inside a div, paragraph, or header tag.
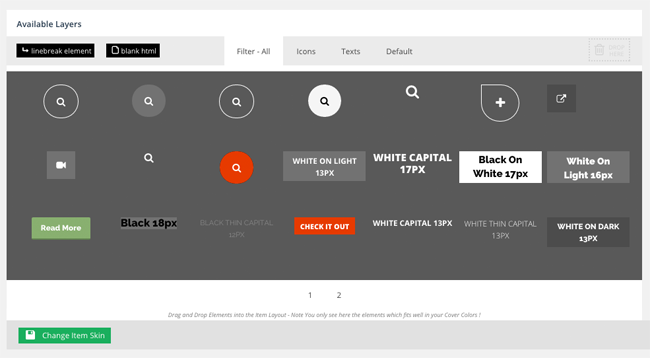
At the bottom of the page you will see all the layers that are available to you. You can drag and drop these layers into the item layout box.
The visual skin editor is easy to use once you understand what all the settings do. It’s a nice addition to a plugin that already has a great selection of skins.
Essential Grid Settings
There are a lot of other Essential Grid features and settings that I would like to talk about in this section.
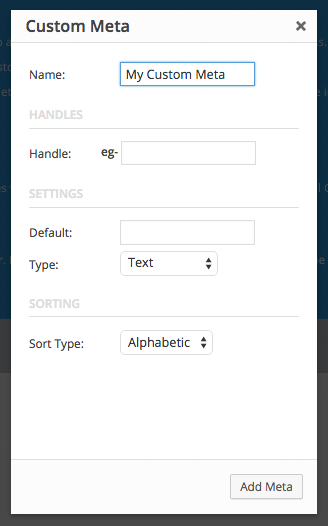
Underneath the post and page area in WordPress, you will see an Essential Grid Custom Settings box. The first tab in this box is for custom meta. Custom meta allows you to add your own custom data to posts and pages.
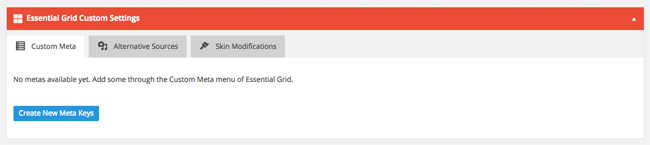
A few basic options are available for your custom meta data. You can define whether the custom meta is text, multi select, select, or image. Data can be sorted alphabetically or numerically.
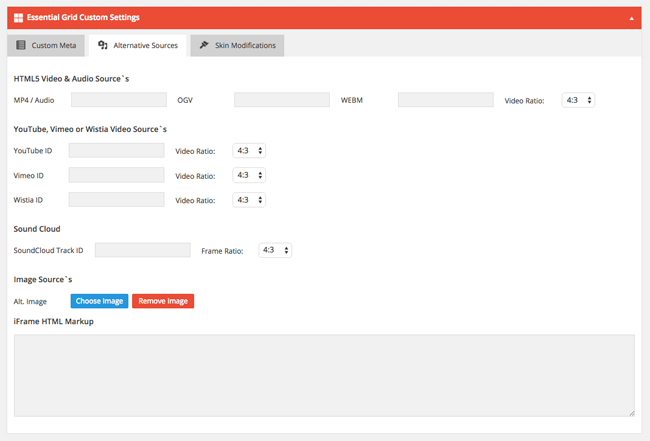
The second tab of the Essential Grid Custom Settings box lets you define a source for iframes, images, audio, and video. Video display ratios can be changed from 4:3 to 16:9.
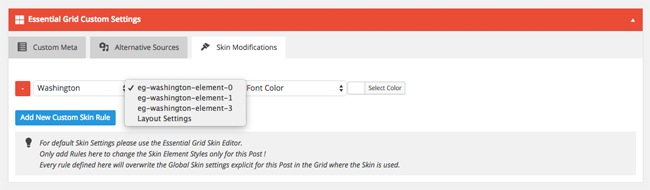
The skin modifications tab allows you to overrule the default skin settings. You can change things such as fonts, background colours, and borders.
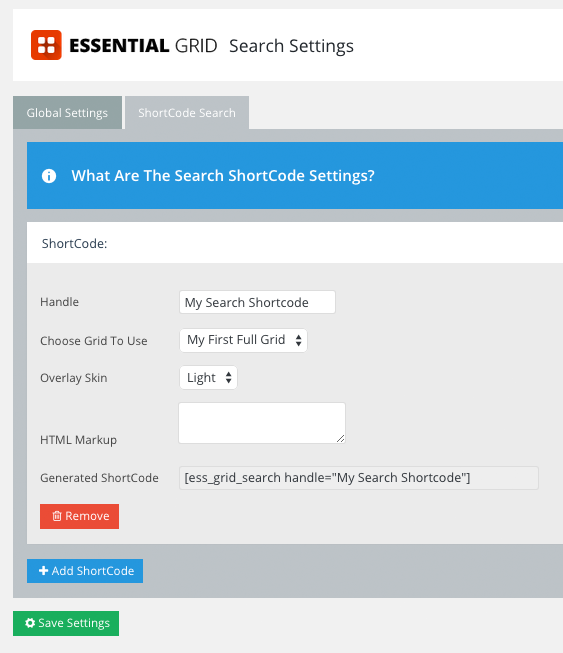
Essential Grid can be used to power a search results page. A shortcode can be created to utilise the search functionality of the plugin.
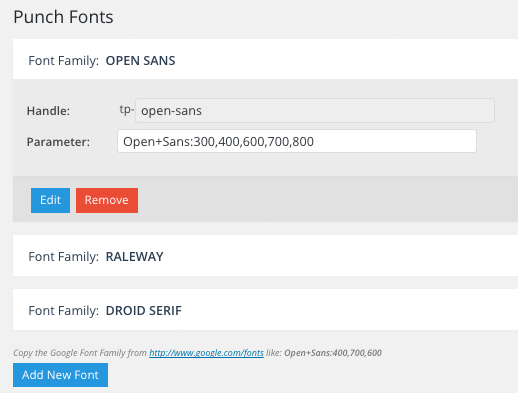
All fonts can be edited via the Punch Fonts page. Additional fonts from Google Fonts can be added through this page.
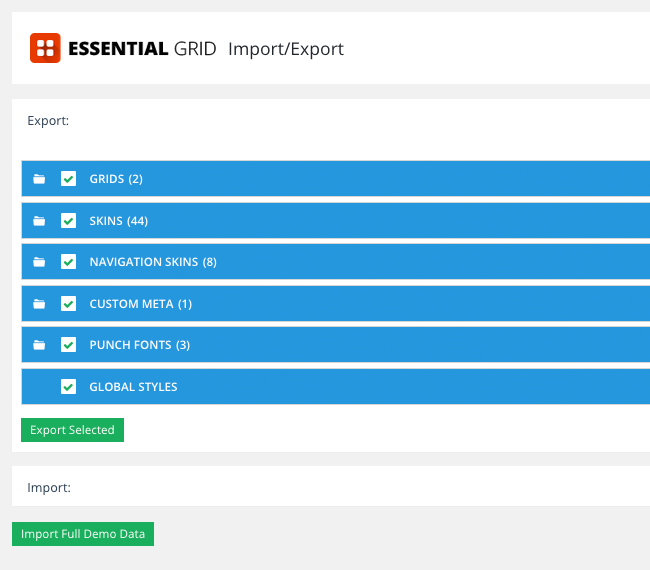
Everything in Essential Grid can be exported. This includes grids, skins, navigation skins, custom meta, punch fonts, and global styles. You can then import them into another website you own.
Demo content can also be imported into the plugin. This is something that is worth considering when you first purchase the plugin. It’s a great way to see what is possible with the plugin as you can look at the demo content and look at what settings were used to generate those grids.
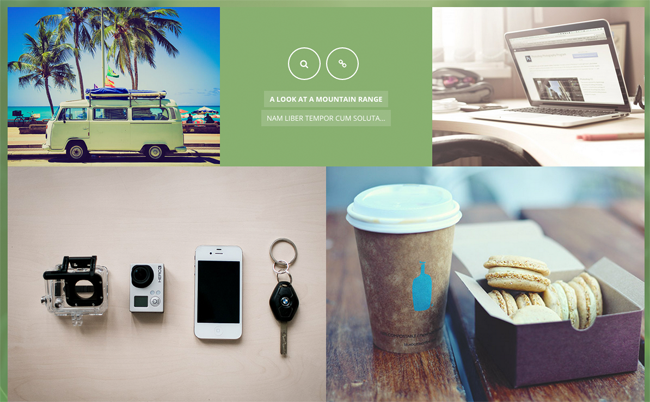
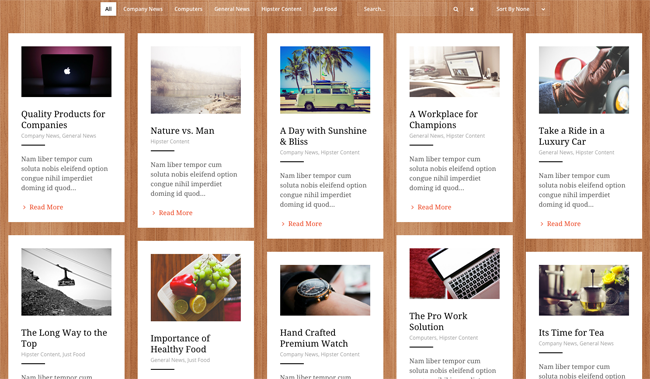
Examples of Essential Grid
The demo area of Essential Grid has some great examples of what the plugin can do. I recommend checking it out to get a good idea of what is possible using the plugin.
Here are some examples that illustrate what is possible:
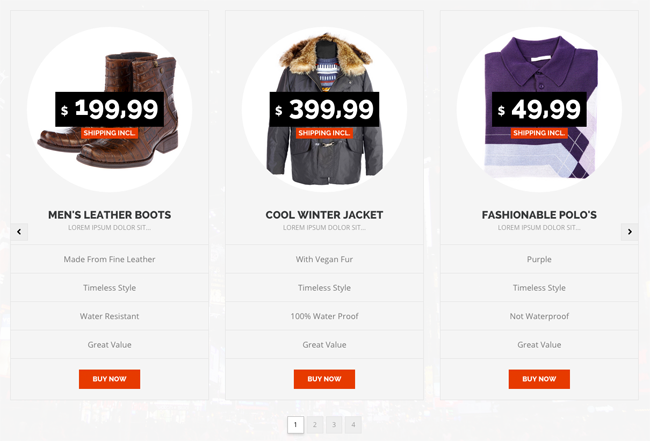
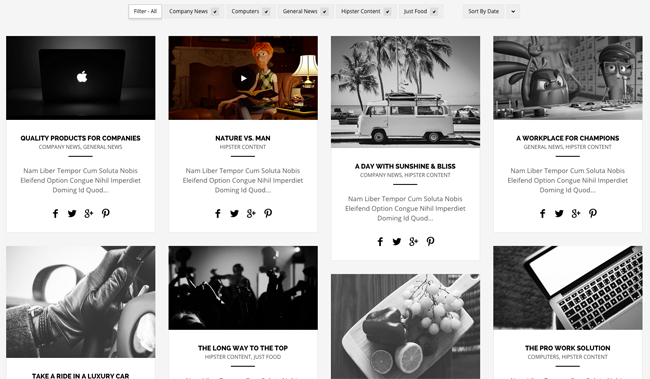
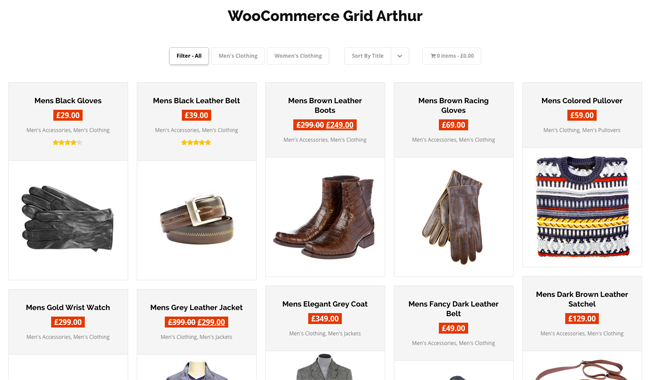
Be sure to check out the demo area to see more examples of Essential Grid galleries and grids.
Final Thoughts
Essential Grid is a fantastic WordPress plugin that can be used for a variety of things. It is available for only $25 from CodeCanyon.
The plugin is multisite compatible and supports the WordPress Multilingual Plugin and WooCommerce.
If you need support with Essential Grid, I recommend checking out the ThemePunch support center as it has a large number of tutorials and resources to help you use the plugin. You can also receive help directly by opening a support ticket or leaving a comment on CodeCanyon.
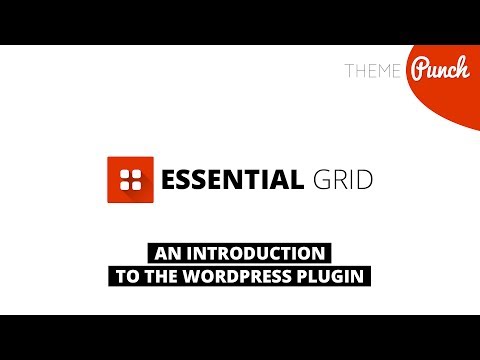
Be sure to check out their video tutorials too as it will walk you through how to use the plugin. You will find these plugins directly on YouTube as well.
To find out more about Essential Grid, check out their main information page or sales page on CodeCanyon.
I hope you have enjoyed this look at Essential Grid. If you have any questions about the plugin, please leave a comment below and I will do my best to answer them (though the comment area on their CodeCanyon sales page is probably the best place to ask in-depth technical questions about this plugin).
Thanks for reading.
Kevin