
How much time do you spend optimising your website?
2 hours per month? 30 minutes per month? Never?
I will freely admit that I do not spend enough time tweaking certain elements of this blog. For example, most of my articles were named after one or two minutes of thought. I never took time to analyse whether a particular headline was the best fit.
I also change my design from time to time, such as moving certain widgets lower down on my sidebar. However, my decision to do this is never based on facts; I simply move things to where I think they should be. What I really should be doing is testing every element of my blog.
One service that allows you to do this is Nelio A/B Testing. The service allows you to conduct experiments on your website to see what could be improved.
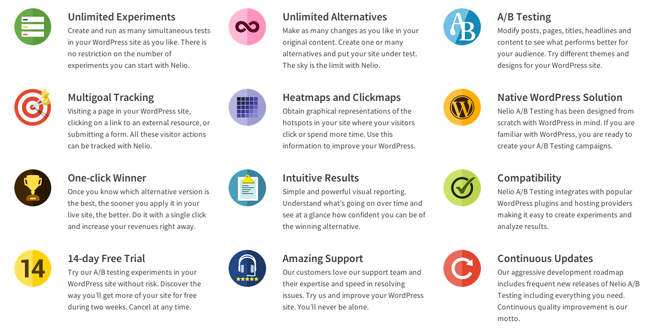
Nelio A/B Testing does this in a number of ways, including heatmaps to show where people are clicking, the best positioning of your widgets, and experiments that show which headlines are the best and which WordPress theme is preferred by visitors.
Their plugin is free to download from WordPress.org; however, you need to pay a monthly or yearly fee to use their service.
The company kindly gave me access to their professional license in order to test Nelio AB Testing. In this review, I would like to show you what Nelio AB Testing is capable of and how you can use it to improve your WordPress website.
Installing the Nelio A/B Testing WordPress Plugin
Nelio A/B Testing can be installed directly through your WordPress admin area by going to your plugin page and searching for Nelio A/B Testing. Alternatively, you can download the plugin from WordPress.org and upload it via file upload or FTP.
Once you have activated the plugin, you will see a new menu for Nelio A/B Testing in your admin menu.

I initially believed that the developers had followed the lead of Jetpack and placed their menu above posts, media, pages, and comments. This is a pet hate of mine.
Yes, I am aware that menu items can be reordered and hidden using a plugin such as Admin Menu Editor; however, we should not have to go the hassle of doing that. On a day to day basis, I will be regularly accessing my posts, media, pages, and comments. Therefore, plugin developers should not give their product priority over those menus. Ever.
But my assumption was wrong.
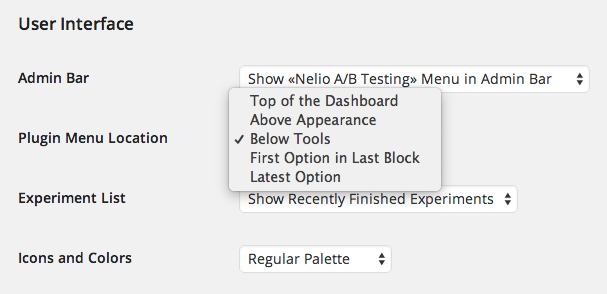
Yes, Nelio A/B Testing does initially place it’s menu at the top of your admin menu; however, the plugin allows you to change the position of their menu through the settings area. You can place the menu near the top, middle, or bottom of your admin menu.
I think the option of where to place a plugin menu should be standard with all WordPress Plugins; however, I am not aware of any other WordPress plugins that actually allow you to do this. Therefore, the developers of Nelio A/B Testing should be commended for adding this functionality. Hopefully it inspires other plugin developers to do the same.
When you click on the main dashboard of the Nelio A/B Testing menu, you will be taken to a page with a welcome message. At the top of the page it advises you to clear your caches if you have a cache plugin installed on your website. It’s a welcome notice as I sometimes forget to do this after installing a new plugin on my website.
You’ve recently upgraded to Nelio A/B Testing 3.3.7. If you’re running a cache system (such as W3 Total Cache or WP Super Cache) or if your server is behind a CDN, please clean all your caches. Otherwise, you may serve old versions of our tracking scripts and, therefore, the plugin may not work properly.
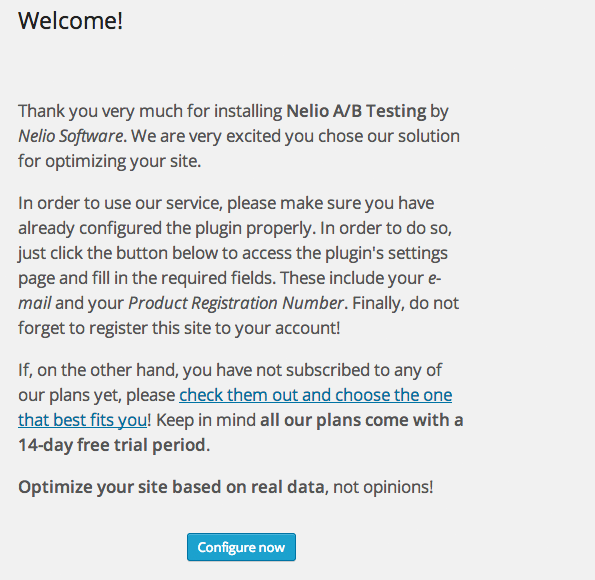
Underneath the notice you will see a welcome notice that thanks you for using Nelio A/B Testing. At the bottom is a link to the main configuration page.
In order to use Nelio A/B Testing, you need to sign up for one of their plans. Their 14 day trial should be sufficient time for you to decide whether the plugin is suitable for you.
Once you have signed up, simply enter your account information on the My Account page.
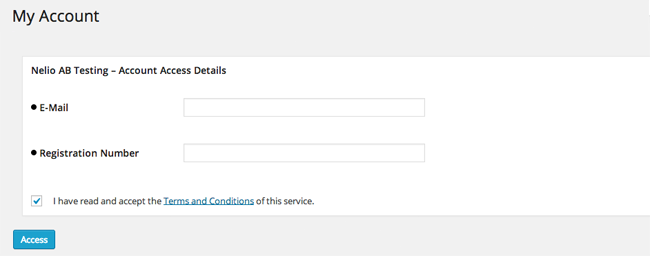
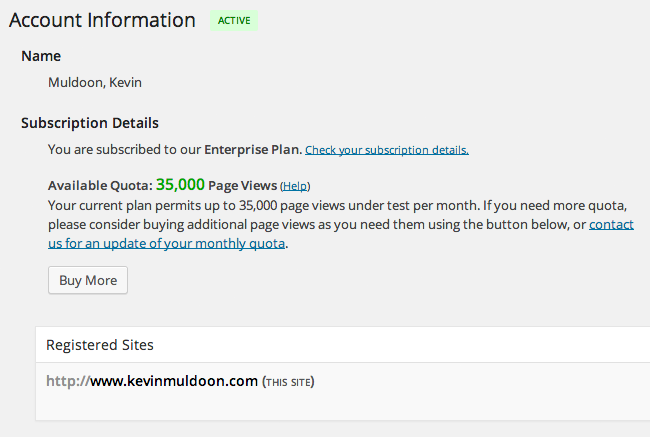
After logging in, the account page will display the plan you have purchased and the available views per month that your account permits (more on this later in the pricing section). You also need to click on the register site option at the bottom of the page in order to register your site with them.
That’s all you have to do to install Nelio A/B Testing and register your account.
Configuring Nelio A/B Testing
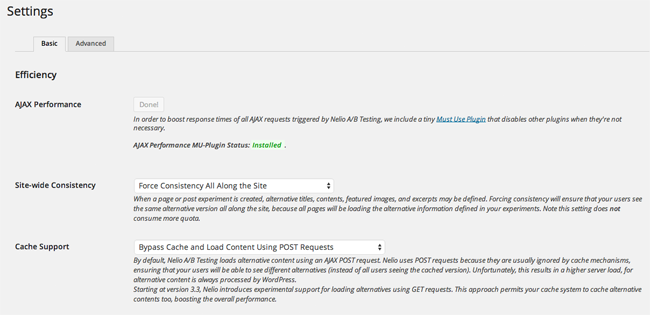
The plugin settings page has two tabs: Basic and Advanced.
On the basic settings page you need to install an AJAX Performance MU-Plugin. All you have to do is click the button and it will be installed in seconds.
There is a setting for site wide consistency. Say, for example, you want to test which theme is preferred by visitors. This setting will ensure that the experiment will be displayed to a visitor throughout your visitor’s time on your website i.e. no design elements are changing from page to page. The setting can be changed so that changes are only applied to test elements.
The next setting option is relevant to those who use caching. Rather than create a new cached version of a page, the plugin will process the request using a WordPress AJAX POST. This ensures that the original cached version of your page remains the same. If you prefer, you can choose to create a cache version of your experiment page.
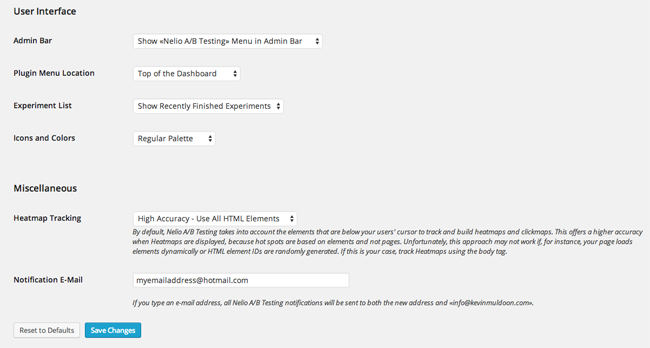
The bottom part of the basic settings tab lets you hide the admin bar and change the menu location (as noted before). Other settings include what experiments are displayed on your dashboard and your notification email address.
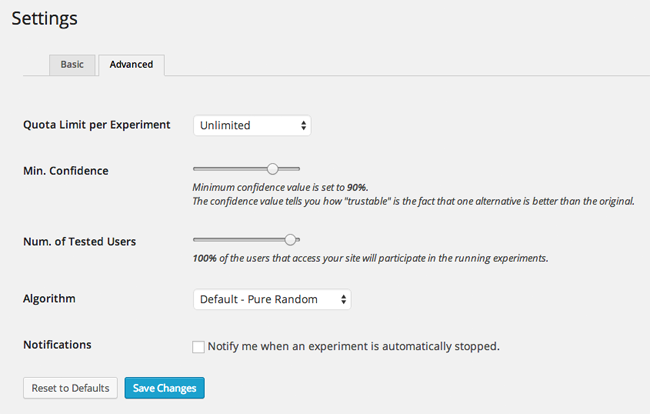
The advanced settings area focuses on experiment settings.
Each Nelio A/B Testing plan allows a set number of impressions for your experiments. The plugin allows you to limit the number of impressions that are used per experiment. This ensures that you do not use your month’s quota on one test.
You can also modify the confidence level, number of tested users, and algorithm. An email can also be sent to you once an experiment has ended.
Most users will be happy with the default settings that Nelio A/B Testing uses; though it is good to have the option to change general settings to suit your own campaigns.
Setting Up Experiments
Nelio A/B Testing offers seven types of experiments. A description of each experiment is displayed on the Add Experiment page.
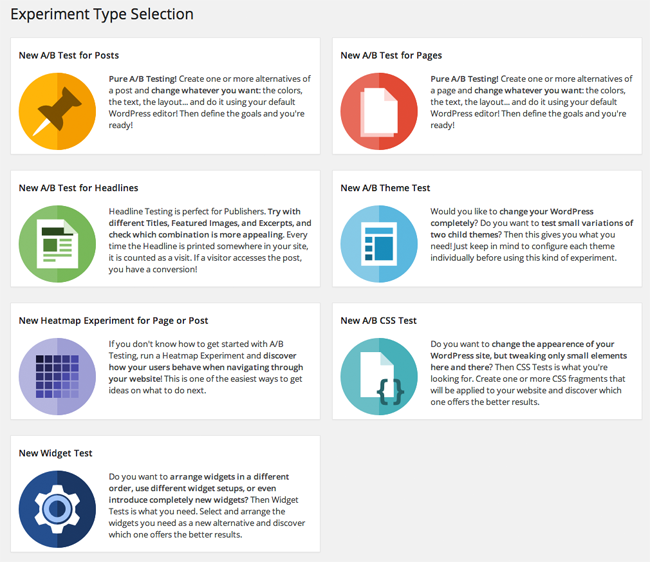
For reference, below you can find the seven experiments that are available through the plugin:
- New A/B Test for Posts – Lets you change a blog post. You can change the colours, text, and layout.
- New A/B Test for Pages – Same as above, but for pages.
- New A/B Test for Headlines – This experiment allows you to test your headlines. You can change the title, featured image, and excerpt of an article. You can then see which performs the best.
- New A/B Theme Test – Lets you test variations of two WordPress themes.
- New Heatmap Experiment for Page or Post – Can be used to see what visitors are clicking on when they visit a page.
- New A/B CSS Test – Tweak elements of your WordPress design by changing some CSS on your website.
- New Widget Test – Can be used to test the best order of widgets on your website.
For the purpose of this review, I implemented three experiments over five days:
- The Heatmap Experiment
- The Widget Experiment
- The Headline Experiment
This blog unfortunately does not generate sufficient traffic for me to do a proper experiment for all of you.
I was, however, keen to show you the steps that are involved in creating an experiment as it helps illustrate what the plugin can do. Just remember that my results may not do the plugin justice as I did not generate sufficient traffic for me to do a proper experiment.
The Heatmap Experiment
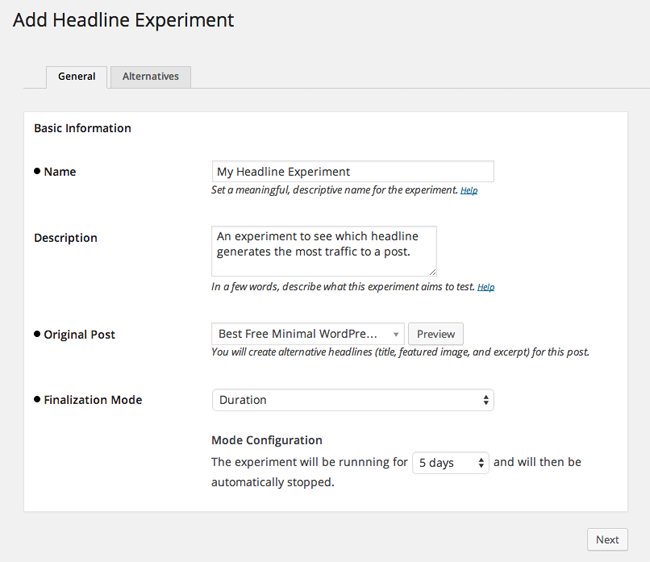
You can name each experiment and add a description. It’s worth taking the time to add a good description as when you have created many experiments, it may start to become difficult to remember which one is which.
For the heatmap experiment, I had to choose the post or page I wanted to monitor. I then had to choose the Finalization Mode i.e. how the experiment would end. If you choose manual, the experiment will continue until you stop it. Alternatively, you can set a defined period of time (days, weeks, months) or set a defined number of views.
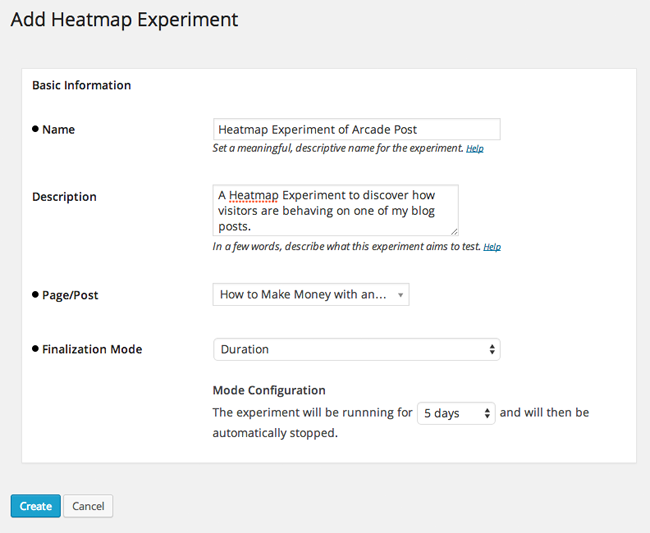
That is all you need to do to create a heatmap test. After clicking the create button, your experiment will have prepared status.
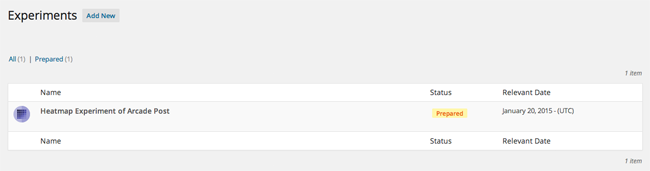
Hovering over the experiment listing will present you with an option to start the experiment. Click start to commence the experiment.
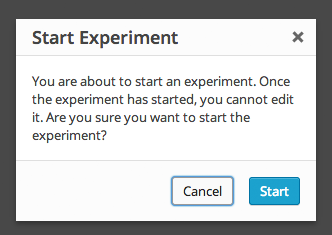
This additional step to start an experiment may seem a little pointless at first, but it is actually quite useful. It allows you to spend time creating multiple experiments and then start them all at the same time.

Sadly, I was not able to collect sufficient data for the heatmap experiment. I was a little disappointed by this as I was curious to see what the heatmap and clickmap offered. However, my blog does not currently have the traffic level necessary to perform the test.
The Widget Experiment
My next experiment was with widgets. Setting up this experiment took a few minutes more than the heatmap experiment.
Again, I had to name the experiment and add a description. Then I had to choose the finalization mode.
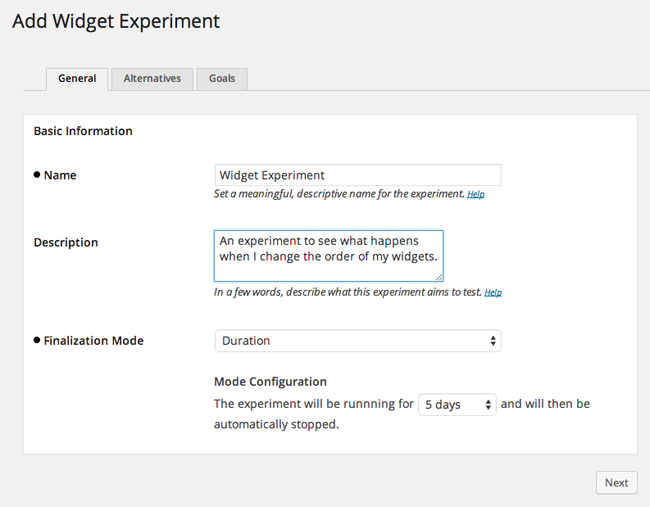
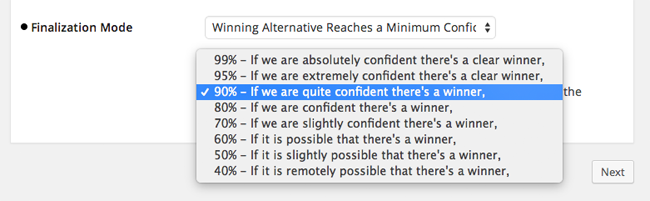
In addition to manual, duration, and number of views; you can also end the widget experiment after a winning alternative has reached a certain confidence level. This is a value in which Nelio AB Testing looks at how trustable an alternative configuration is better than the original.
In other words, if they are sure that a different order of widgets is better, the experiment will end and your new widget layout will be adopted.
In the next step, you can create a new widget set. First you need to name your new widget layout.
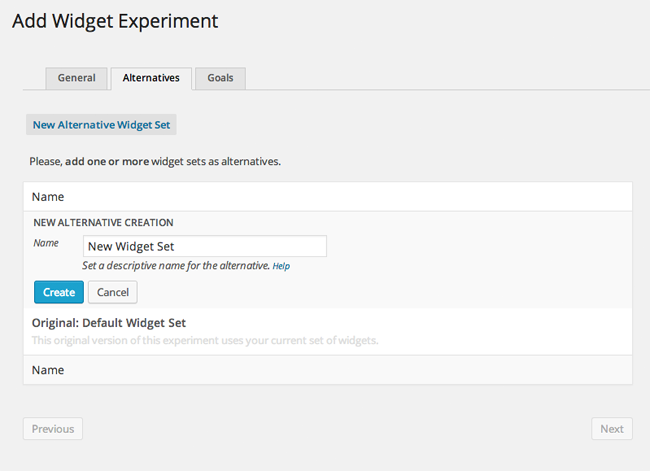
Next, you need to save experiment and edit widgets.
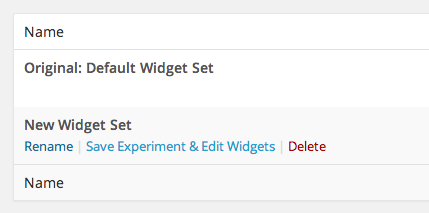
You will then be brought to your widget page. All of your widget areas will be blank.
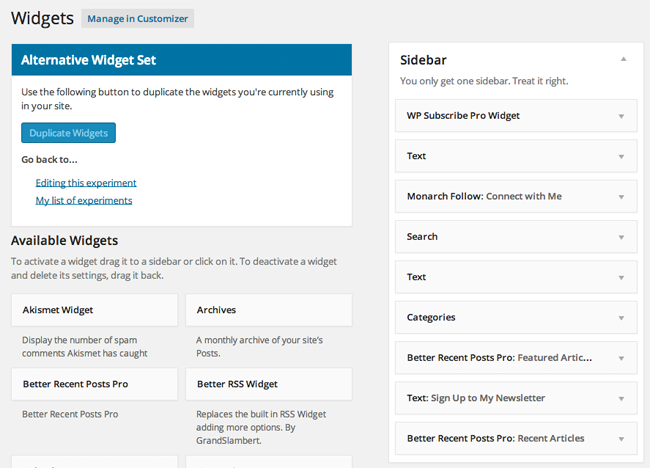
If you want, you can start from scratch and create your new widget layout by dragging and dropping your widgets into place. Alternatively, you can duplicate your existing widget layout by clicking on the Duplicate Widgets button.
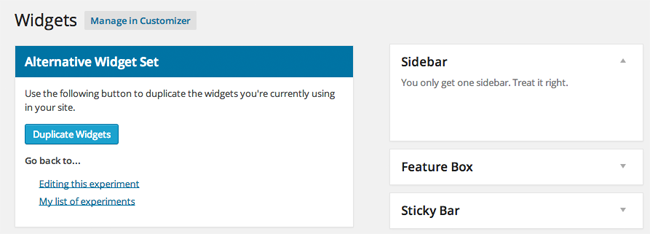
I duplicated my widgets and mixed the order of them. For example, I put my subscription box at the top with my Rise Forums banner underneath. Then I displayed my social media follow buttons and my blog search bar.
The top of a blog sidebar is seen by most visitors, so it is important you give priority to your most important widgets.
Once you have created your widget layout, you click on the Editing This Experiment link and return to the Nelio A/b Testing interface.
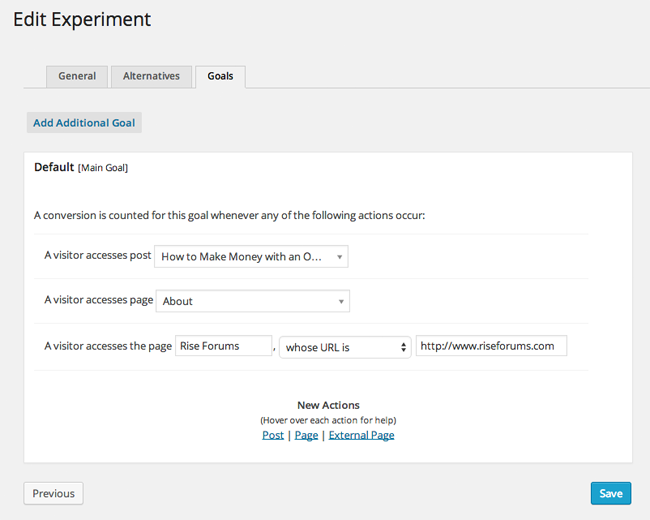
The last page is about goals. You can define as many goals as you want.
For my experiment, I counted a conversion as when someone visited my blog post How to Make Money with an Online Arcade, when someone visited my about page, or when someone clicked on my Rise Forums banner.
In hindsight, I should not have set visiting my blog post as a conversion, as the article is linked in both of my widget layouts in the same position.
After creating the experiment, I then clicked start to ensure it commenced.
Five days was not enough time for me to produce relevant data, but it was enough time to let me see what the report shows.
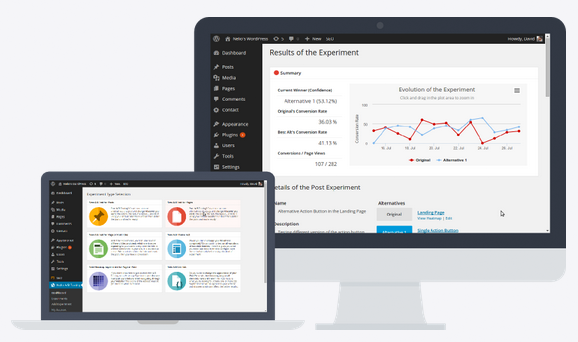
The experiment summary displays a timeline that highlights the number of conversions over time. A conversion rate is calculated from the number of conversions and page views.
Underneath, you will see details of your experiment. There is an option to “Apply and Clean” each layout. By clicking this option, you can automatically make a specific widget layout the new default layout on your website.
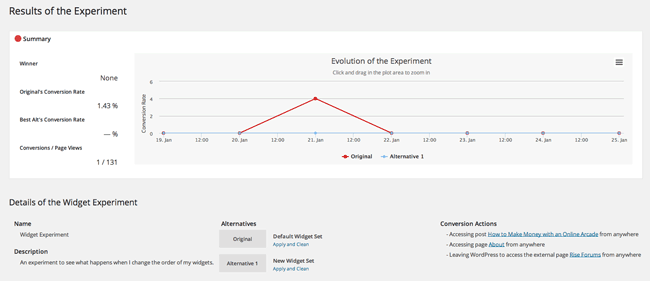
Detailed results are showed underneath. Graphs are displayed for page views and conversions, conversion rates, and improvement factors. The same information is displayed underneath in a table.
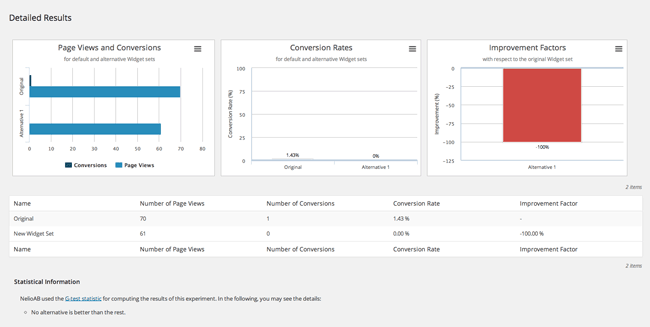
At the very bottom of the page is a note about whether one alternative is better than the rest. I only managed to display 131 page impressions for this experiment. This was not enough data to declare a winner, therefore the plugin advised me that “No alternative is better than the rest”.
The Headline Experiment
For my last experiment, I chose to test different headlines for my theme list post “Best Free Minimal WordPress Themes for 2014“.
For finalization mode, you can choose manual, duration, views, or when the experiment reaches a specific confidence level.
On the next page you need to define your alternative headlines. You can set as many as you like.
In addition to changing the headline, you can also change the excerpt and featured image for the blog post.
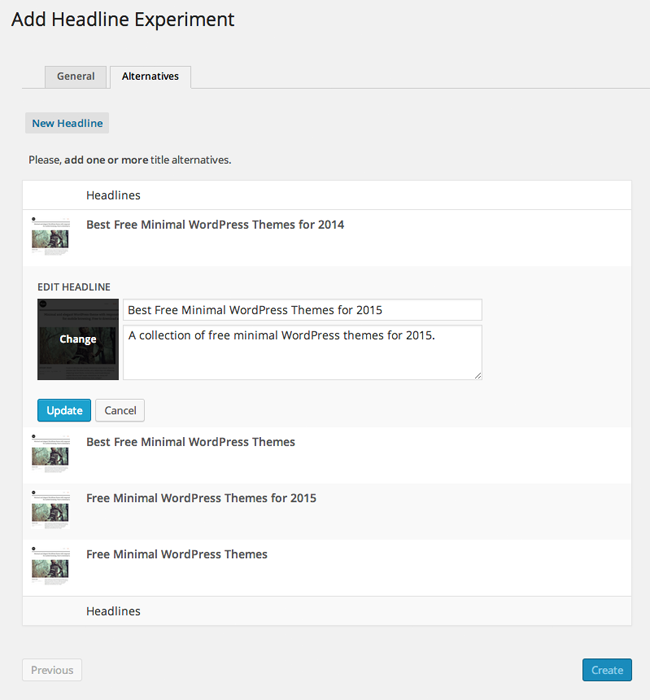
For my experiment, I decided to focus on the headline and excerpt alone. I did not want the featured image to be a factor.
The original title for my blog post is “Best Free Minimal WordPress Themes for 2014” and the original excerpt is “A collection of free minimal WordPress themes for 2014”.
I created four new headlines and gave each one a new excerpt.
- Best Free Minimal WordPress Themes for 2015 – A collection of free minimal WordPress themes for 2015.
- Best Free Minimal WordPress Themes – A collection of the best free minimal WordPress themes available for the WordPress platform.
- Free Minimal WordPress Themes for 2015 – A list of minimal WordPress themes for 2015 that can be downloaded free of charge.
- Free Minimal WordPress Themes – A huge collection of free minimal WordPress themes.
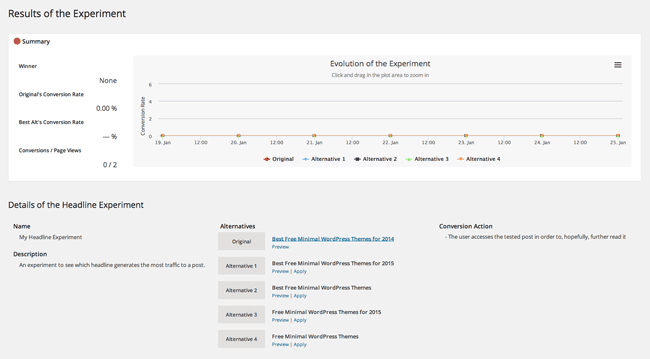
From a testing point of view, my headline experiment was a complete failure. Only two page views were tested in total. Yes….only two! Clearly, I chose to test the wrong blog post.
On a positive note, this experiment did allow me to see what was involved with a headline experiment. As you can see, the structure is the same as my widget experiment.
The evolution of the experiment is displayed at the top of the page with details underneath. In the details section are options to make an alternative headline the new default headline for the blog post.
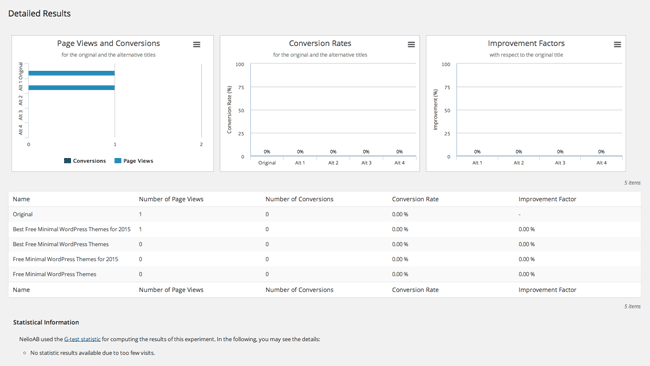
I was disappointed that I did not generate sufficient page impressions for this test as it looks like a useful experiment. At the bottom of the page I was informed that “No statistic results available due to too few visits”.
Despite not generating enough data for this experiment, I was pleased with what Nelio A/B Testing can show. If I had ran this test over a longer period, or chosen a blog post that receives more traffic, I may have seen some interesting results.
Pricing
Nelio A/B Testing offers three different subscription plans. Each plan permits a different volume of tested page views.
A tested page view is any page view that is involved in an experiment. For example, if your blog received 50,000 page impressions per month and you want to test 10% of your traffic using experiments, then you would use 5,000 test page views.
The basic plan retails at $24 per month if you pay annually or $29 per month if you pay monthly. It permits up to 5,000 tested page views, use of the plugin on one website, unlimited experiments, and unlimited email support.
The professional play retails at $74 per month if you pay annually or $89 per month if you pay monthly. This plan allows 35,000 tested page views and use on up to five websites. It also adds WordPress multisite support and priority email support.
The last option is the enterprise plan. That retails at $214 per month if you pay annually or $259 per month if you pay monthly. This plan increases your tested page view allowance up to 200,000 and use on up to ten websites. It also adds advanced developer support and experiment scheduling.

All plans come with a 14 day trial to let you test the service. While the more expensive plans do have a few extra features, most features are standard across all plans.
Additional tested page views can be purchased at a rate of $10 for 5,000. For example, you could use 15,000 tested page views in a month with the basic plan for a total charge of $44.
Final Thoughts
Nelio A/B Testing would be an excellent solution for businesses, eCommerce stores, and other types of websites that sell products and services. I have no doubt that bloggers would love to use the service too; however, they find the monthly fee might be a bit too high.
I used the plugin over the course of five or six days, however I did not find any bugs or errors. This surprised me a little as the majority of WordPress plugins I review on this blog have a few little bugs that need resolved. So top marks to the developers for ensuring the plugin runs like it should.

Nelio A/B Testing is compatible with many popular WordPress plugins, such as OptimizePress, Gravity Forms, and Contact Form 7. And it seems to play nice with WordPress websites that have caching active too.
If you would like to know more about the service, I encourage you to check out their official website.
Good luck,
Kevin