Optimus Image Optimizer is a WordPress plugin that greatly reduces your image files. It prides itself in reducing image sizes without losing image quality.
Smaller image files will help your website pages load quicker. It also means you will be using up less storage in your hosting account.
In this article, I would like to show you what the plugin can do.
Setting Up Optimus Image Optimizer
After activating the plugin, you will see a message that states that the premium version of the plugin “can handle several image formats, compress larger files and connects through HTTPS”.

You can install Optimus free of charge directly from WordPress.org. If you do choose to upgrade the plugin, you need to enter the license code in your main plugins page, not the plugin settings area.

From a usability point of view, there is not much between the free version and the premium version of Optimus. The only difference in the settings page once you have upgraded the plugin is that the message “The size limit of the free version of Optimus is 100 KB. Do you want to compress larger images? Get a license for Optimus HQ.” is removed.
At the top of the page the plugin highlights what image sizes will be optimised. Image sizes are defined through your WordPress theme’s functions.php file.
In the screenshot below I have the default WordPress theme Twenty Fifteen activated. The image sizes on offer are: thumbnail, medium, large, and post-thumbnail.
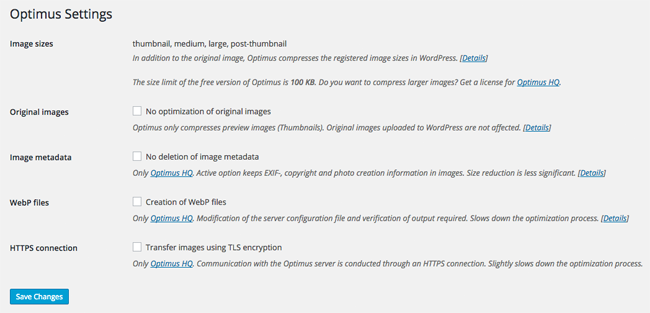
If you check the setting for original images, previously uploaded media files will not be optimised. Only newly uploaded files will be modified.
The final three options are image metadata, WebP files, and HTTPS connection. These features are only offered in the premium version of the plugin (aka Optimus HQ).
Jpeg images store a lot of data about the image, such as copyright details, the camera that was used, and when the photograph was taken. By default, this information is removed during the optimisation process, but you can choose to retain this information. Be aware that this means that the total file reduction size will be considerably smaller.
WebP is a new image format that was developed by Google which supports lossy and lossless compression.
If you enable HTTPS connection, the communication with the Optimus server is made through an HTTPS connection.
Using Optimus Image Optimizer
Optimising images that have been already uploaded to your website is one of the biggest selling points of Optimus.
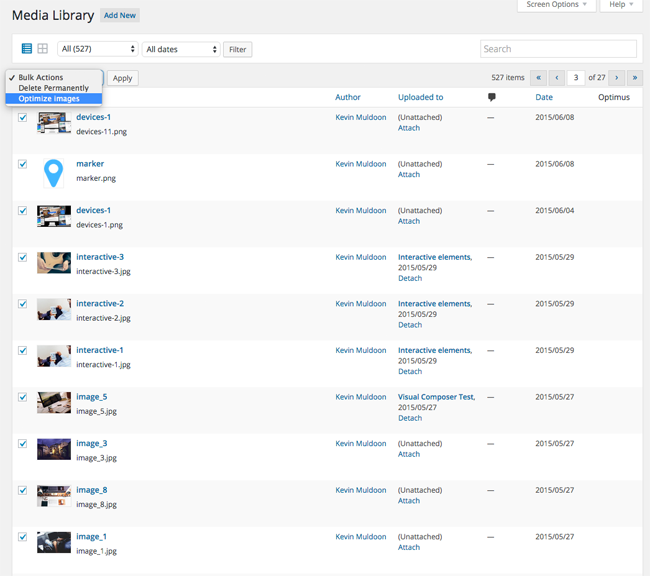
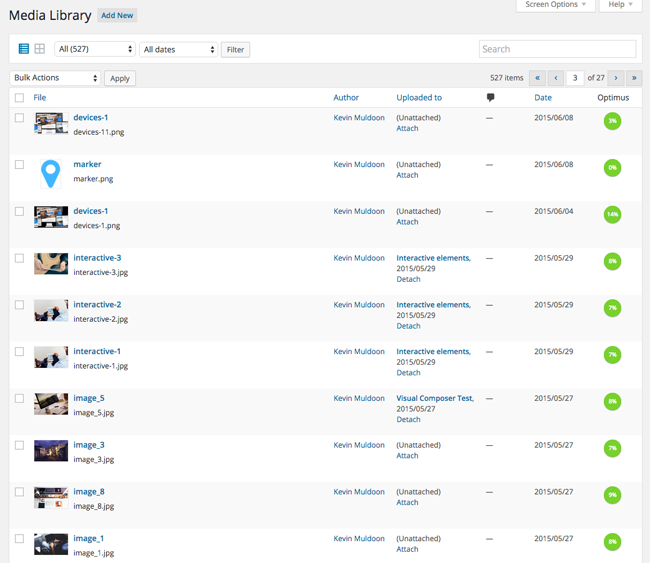
When you visit your media library, you will see a new option to “Optimize Images”. You will also see a new column displayed in your media library for Optimus.
Unfortunately, the current version of Optimus does not have a bulk optimisation option that just goes through your whole back catalogue of images. You therefore need to select the images you want to optimise. You can, of course, increase the number of images displayed per page using the screen options menu at the top of the page.
Those of you who have used image optimisation plugins in the past (such as the old Yahoo Smush.it plugin) will be aware that the process of optimising images takes time.
It took four or five minutes to optimise the 20 images I had selected. I assumed this was normal, however when I optimised images the following day, each image was being optimised in around a second or two. I assume there was a connection or slowdown issue during the first optimisation.
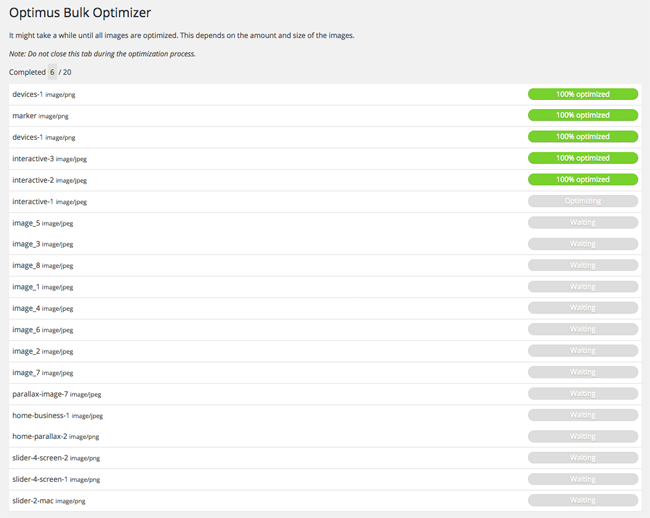
When the process has completed, you will see a message stating that “All images have been optimized”. One tiny annoyance about this is that once everything is finished, you are left staring at a page full of “100% Optimized” messages. You are not returned to the media library.
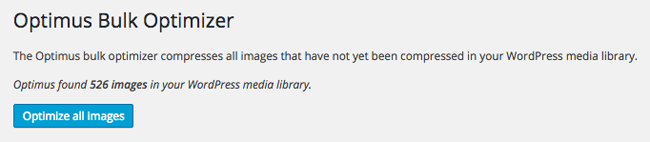
Initially, I believed that this would prove to be quite frustrating as I would have to locate the last pate as I was on. However, it is not necessary to go back and optimise each page manually as there is an option in the tools area to “Optimize all images”.
Optimus places a green circle in your media library next to all images that have already been optimised. Inside the green circle you are informed of how much the image has been optimised e.g. 7%, 14% etc.
Although the task of optimising images can take a lot of time, the process is straight-forward, and the option to optimise all of your images at once is a real time-saver.
Pricing
Optimus is a GPL friendly plugin that has native support for WordPress multisite and WooCommerce.
While Optimus is free to download, the free version is limited to a maximum file size of 100 kb for JPEG files. You will need to upgrade in order to increase this limit to 5 MB. The premium version also supports the WebP image format, secure connections to the Optimus server, and access to the developer API.
The biggest drawbacks of the free option is the file size limit of 100 kb and the fact that PNG images are not supported.
Most of the screenshots in this article, for example, are PNG images that are between 50 kb and 150 kb in size. This means that the vast majority of my images could not be optimised if I used the free version.
Thankfully, the developers of Optimus have adopted a fair pricing scheme.
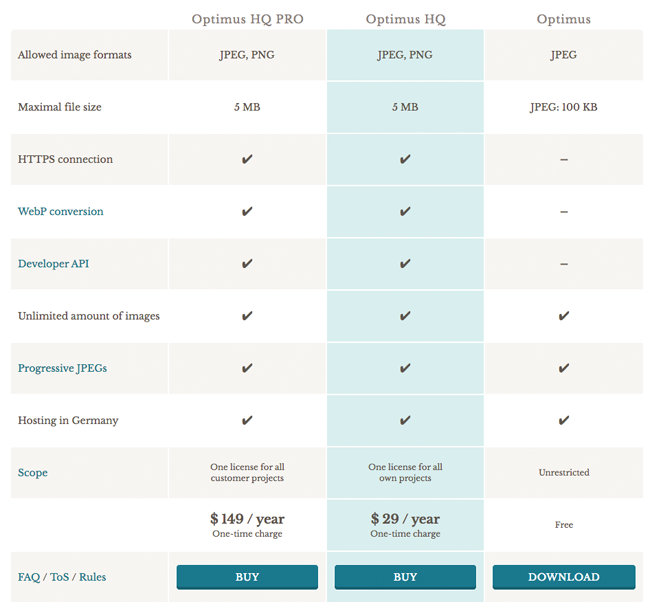
Optimus HQ retails at $29 per year and allows you to use the plugin on as many websites you own. Optimus HQ Pro is aimed at website designers. It costs $149 per year and allows you to use the plugin on your websites and your client’s websites.
A 14 day money back guarantee is provided with every purchase and there is no automatic renewal so you don’t have to worry about an unexpected payment coming off your credit card the following year.
Final Thoughts
Optimus is a great solution for optimising image file sizes and improving page loading times.
The reduction in file sizes varies. I optimise all images for the web in Photoshop before uploading, however I still saw a reduction of 5% to 15% in most cases. However, I saw huge reductions of 63% and 66% with files that had not been optimised (these were images that had been added by WordPress themes and plugins). This highlights the benefit of using a solution such as Optimus.
If you would like to know more about the plugin, I recommend installing Optimus Image Optimizer from WordPress.org or via your WordPress admin area. You should also check out the official website of the plugin.
Good luck.
Kevin
Hi Steven.
I tested the plugin on my test WordPress website and not on this blog, however I did notice a large reduction in file sizes. Even images that had been optimised for the web via Photoshop reduced in file size by at least 6% or 7%. Images that had not been optimised reduced in size by over 60%. These smaller image files would help decrease loading times.
Glad you liked the review. I try and be fair and look at the good and bad points about a product. If something is not working the way it should, it is my duty to report that.
Kevin
Hi Kevin,
Have you noticed any improvement on page loading times and is it enough to be noticable to the visitor? I’m not a heavy graphics user and ofter struggle to even remember to add graphics to my site sometimes (grin). I have a premium SEO plugin that finds stuff for me although its sources are limited.
Thanks for your real review. It actually is very refreshing to see a more ‘warts and all’ post rather than continual gushing praise (something I’m sometimes guilty of!)
Long may these great posts continue.
Regards,
Steven Lucas
Thanks for the recommendations Eric.
I like the idea of a plugin automatically resizing images. I always resize images to a maximum width of 650 pixels using Photoshop.
Hi Kevin,
To avoid limitation in size AND enable PNG support… for free, one could consider https://wordpress.org/plugins/ewww-image-optimizer/ that I use myself on any website I setup.
Another good one if you do not resize your pictures before uploading them : https://wordpress.org/plugins/imsanity/ which automatically resizes the original file to a maximum you define.
I must say I run those on a VPS and a dedicated server. They might use a lot of resources on a shared mutualized hosted website (the same could apply to the one presented in the above article).
Have a good day !
Just a quick note to say I updated the article to reflect something I missed.
Initially, I missed the tool to optimise all images. This can be found in the tools section in the admin area.
Additionally, when I first optimised images, it was taking around five minutes to optimise twenty images. However, when I ran the tool to optimise all images today, images were being optimised in seconds. I suspect there was a connection problem yesterday.
Kevin
The only limitation with the free version is the lack of PNG support and the file size limit of 100 kb. Apart from that, it’s a solid solution.
Hi Kevin, I am strange to this plugin and I am actually using SEO friendly Images and WP Smush it plugin as of now. Is this plugin with free version is anything better than the ones Iam using now? Thanks for the beautifully carved post though.
Hi Kevin,
For the first time I hear about Optimus WP plugin for image optimization. Thanks for sharing its settings details, I’ll get it for my blog. Have a good day!