PlanSo is a WordPress contact form solution that has a user-friendly drag and drop interface.
The plugin was launched in February this year using the freemium model. That means that you can download a free version of the plugin from WordPress.org, but you need to upgrade to the pro version in order to unlock all features and gain support from the developers.

I am a big fan of this business model as it allows WordPress users to test a plugin thoroughly before they click the buy button.
The developers of PlanSo sent me a copy of the pro version of the plugin so that I can look at what it offers. In this article I would like to show you what the free version can do and what additional features you gain by upgrading to the premium version.
I hope you enjoy the review.
PlanSo Forms – The Free Version
There is a right way and a wrong way to adopt the freemium model.
The wrong way is to remove so many features from a plugin that what’s left is a crippled version that is unusable. This means that users cannot get a chance to see what the plugin cannot actually do.
The right way is to limit features, but ensure that the plugin is still usable.
Developers need to get the balance of what features they remove right as if they offer too much, there is little incentive for users to upgrade.
I was pleased to see that PlanSo has the balance just right. The free version of the plugin is a great plugin in its own right and arguably better than some premium alternatives that are out there.
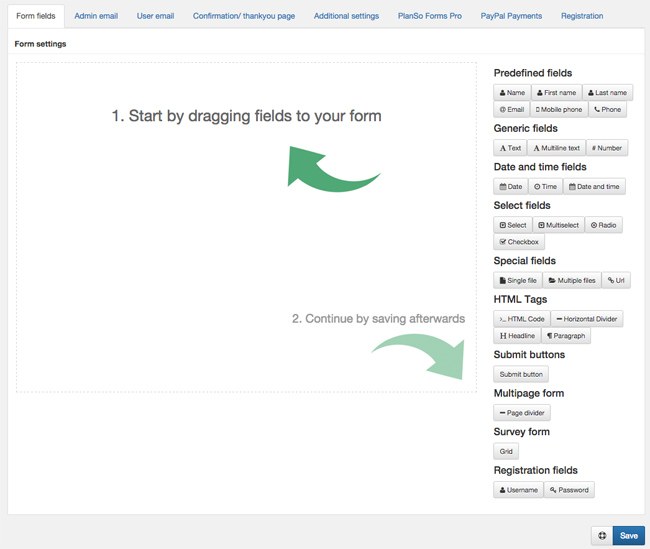
After installing and activating the plugin, you should create your first form.
PlanSo presents you with a blank canvas in the main content area and lists all available form fields down the right hand side of the page.
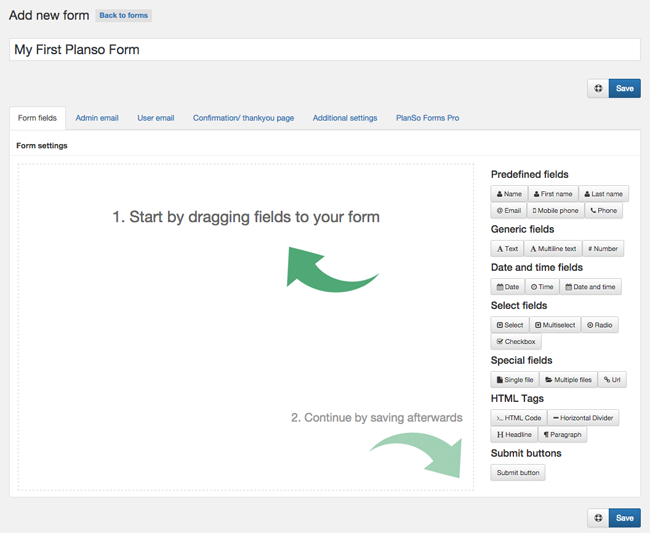
As you can see above, all fields are categorised. The fields available are:
- Predefined Fields – Name, first name, last name, email, mobile phone, and phone
- Generic Fields – Text, multiline text, and number
- Date and Time Fields Date, time, date and time
- Select Fields – Select, multiselect, radio, and checkbox
- Special Fields – Single file, multiple files, and URL
- HTML Tags – HTML code, horizontal divider, headline, and paragraph
- Submit Buttons – Submit button
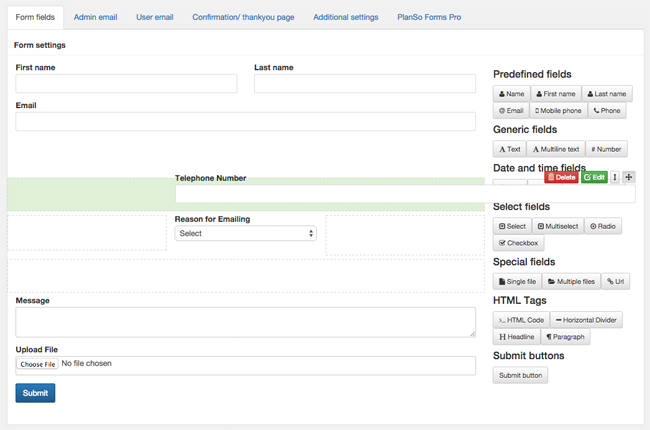
One of the first things you will notice about PlanSo is how easy it is to use the drag and drop interface to create forms. You can easily move fields up and down, drag them around, delete them, or edit them.
If you want to position a field into a column, all you have to do is drag it next to an existing field. There is no limit to the number of fields you can place in one row.
I have used hundreds of contact forms over the years and this is certainly one of the areas where PlanSo excels over the competition.
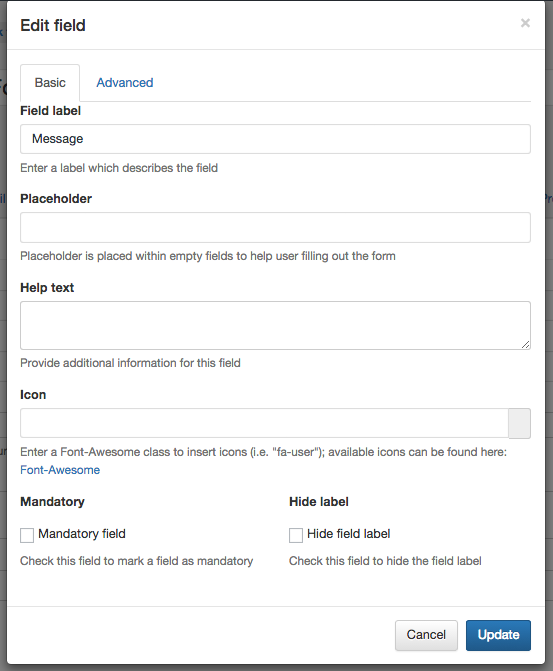
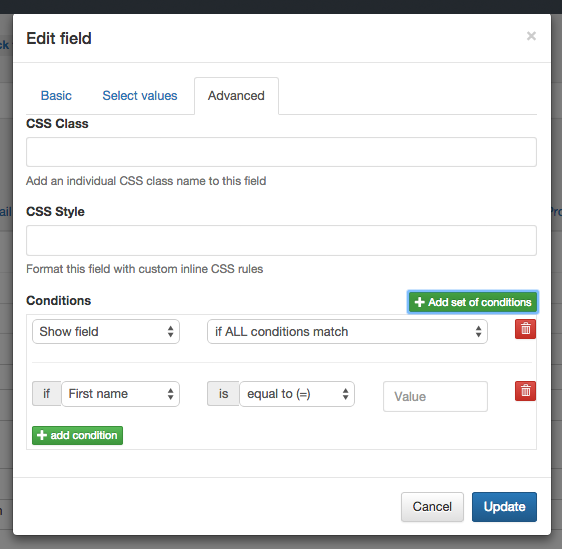
When you click on the field edit button, you are presented with an options box. Some fields, such as the select field, have additional tabs for adding your values.
In the basic tab you can change the field label, add help text to explain what a field is for, and define a Font-Awesome icon. You can also make a field mandatory. This means that your form cannot be submitted unless that particular field is completed.
Field labels can be hidden if you wish and in the advanced tab you can define a CSS style and class.
The email that is sent to you after someone has submitted your form can be modified. This is a feature I find extremely useful as it means I can structure the information I request in any way I want.
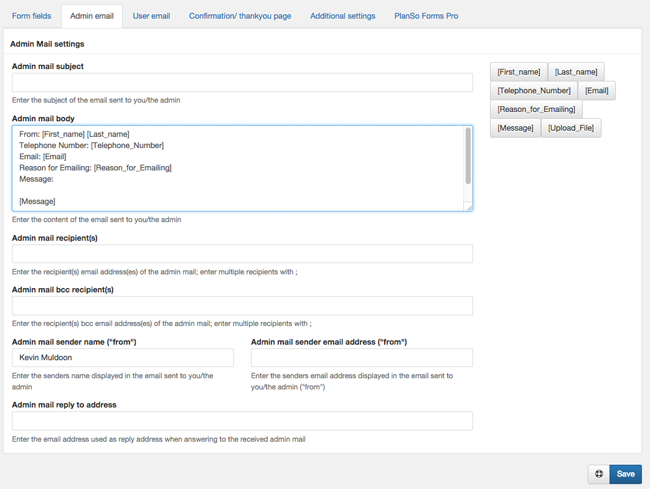
A notification email can also be sent to the person who submitted your form.
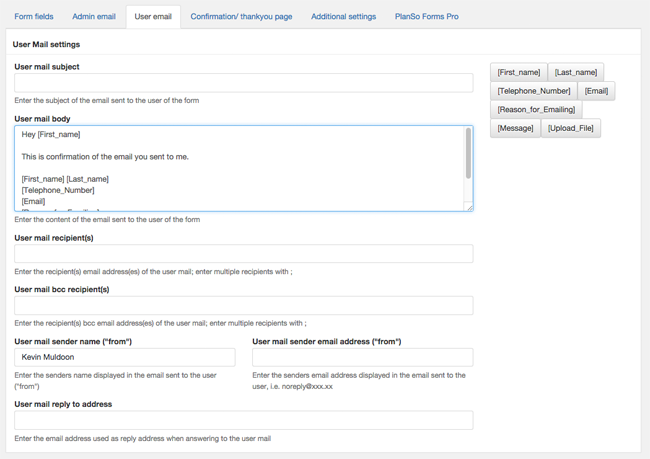
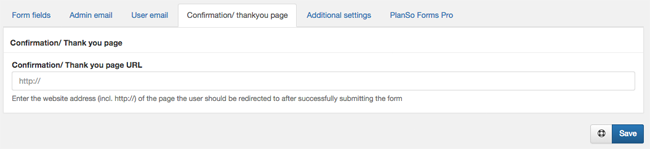
After submission, you can redirect the user to a specified URL. You can enter any URL you want i.e. you are not restricted to WordPress blog posts or pages.
This is a great way of thanking the user for sending an email and advising your turnaround time for responding to their email.
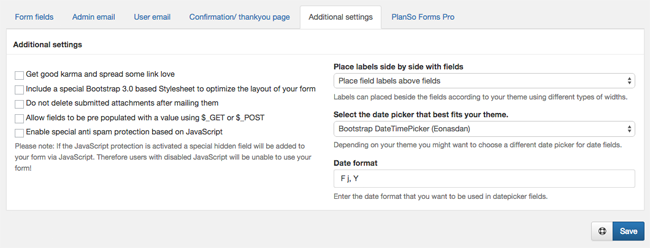
The additional settings page has a lot of useful options. This includes enabling Javascript anti-spam protection, whether attachments are deleted after being sent to you, the date format, and the position of field labels.
There is also a Bootstrap 3.0 stylesheet that optimises the layout of your form and an option to link to PlanSo.
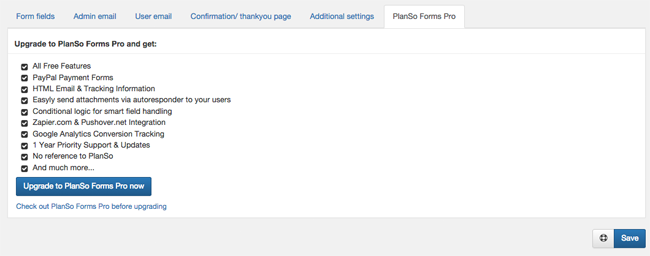
The last tab displays information about PlanSo Pro and provides a link to the PlanSo Pro pricing page.
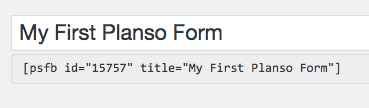
Once you have saved your form, a shortcode will be provided. You can your form to any blog post, page, or custom post type, using this shortcode.
A PlanSo button will be added to your visual editor too. When you click on the button, a list of the forms you have created will be displayed. Clicking on a form will automatically insert the shortcode into your content area.

As you can see, the free version of PlanSo has a lot of great features. Those of you who are searching for a simple contact form should definitely check it out.
PlanSo Pro – The Paid Version
The pro version of PlanSo requires the free version of the plugin to be activated at the same time.
The cheapest PlanSo Pro license comes with a PayPal Payments extension and the more expensive license options also come with a login and registration forms extension. That means that in order to use all features of PlanSo, four plugins need to be activated.
I appreciate that this allows developers to organise things better with updates etc (i.e. only update the payments plugin), but from a user’s point of view it is a little annoying that someone who buys the pro version of the plugin has to have four plugins activated instead of one.
When all four plugins are enabled, you will see additional tabs for PayPal payments and registration.
In the form fields page you will see a few extra fields available. These are page divider, grid, username, and password.
One feature that normally separates free contact form plugins from premium contact form plugins is conditional logic. I am pleased to advise that PlanSo Pro does offer conditional logic.
Conditional logic allows you to change what fields are displayed if certain conditions are met or if they are not met.
For example, if a user advises you through your form that they earn a certain amount of money every year, you could add additional fields that are specific to high earners and hide fields that are not relevant.
In the pro version of PlanSo, the admin email tab gains an option to add an attachment to outgoing emails and the user email tab gains an option to send email in HTML format. If the registration extension is activated, you will also see a field to include an auto generated password for users.
The additional settings tab has no additional options in the pro version.
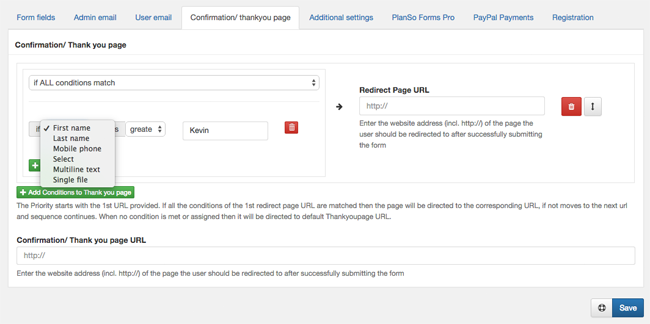
However, PlanSo Pro adds a great feature to your confirmation page. It allows you to use conditional logic to redirect users to different pages.
All you have to do is define the criteria a submission needs to meet and then send it to the appropriate URL. For example, if you have a dropdown select field with three different options, you could send visitors to a thank you page that is dependent on the option they selected.
The page divider field allows you to break your forms into multiple pages. In the main PlanSo Pro tab, you can modify the settings for these pages. For example, you can include pagination and you can assign field labels to next and previous buttons.

The PlanSo Pro settings tab also contains API fields for Pushover and Zapier.
Pushover is a notification service that provides real-time notifications on your mobile phone, tablet, or desktop.
Zapier is a service that allows you to integrate different applications together. You can find out more about Zapier here.

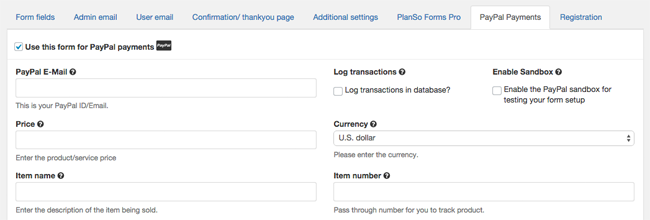
PlanSo Pro lets you accept payments via PayPal in the forms you create. You can specify the price and currency and log items in your WordPress database. Sandbox functionality is available for testing.
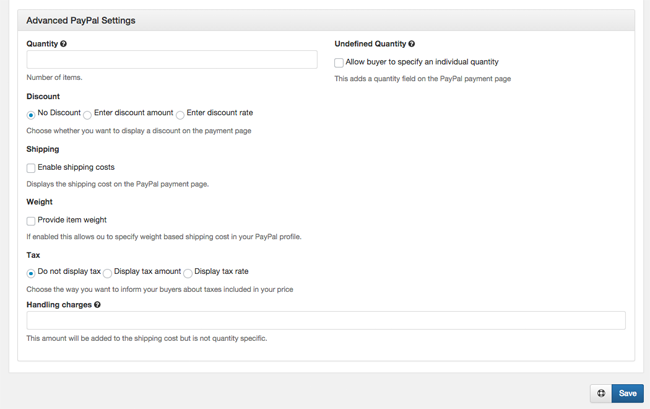
The advanced PayPal settings area allows you to add discounts and define shipping costs and the weight of a product. You can also define tax and handling costs.
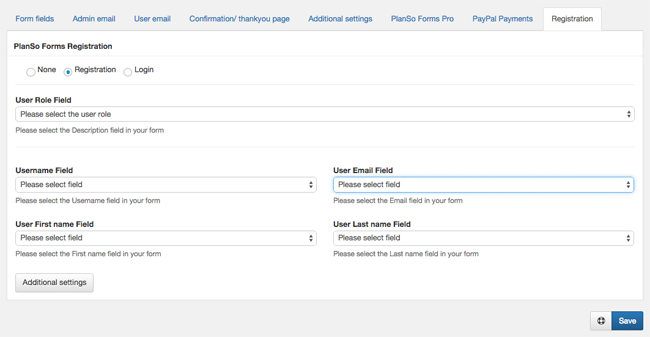
WordPress accounts can be created directly through form submissions. One thing I like about this feature is that the plugin lets you assign the user to whatever user role you desire.
PlanSo Pro certainly offers a lot more than the free version. Let’s now talk about how much the pro version costs.
Pricing
PlanSo have adopted a fair pricing policy for the premium version of their plugin.
The personal edition retails at $29 and offers support for one website. The business edition retails at $89 and offers support for up to six websites. The most expensive option is the agency edition, which retails at $499 for support up to fifty websites.
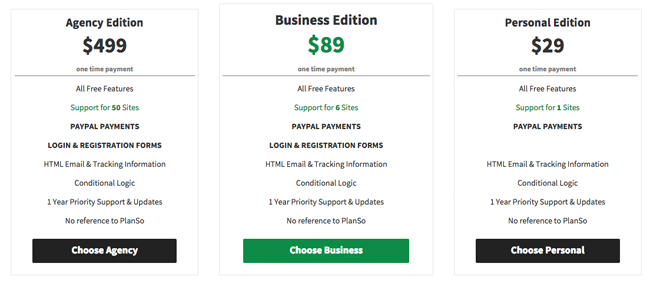
All pro licenses come with the PayPal payments extension, HTML email & tracking information, conditional logic, and one year of priority support and updates.
The pricing options are a little misleading. All licenses are advertised as being a one time payment, however there is no note on their website as to how much it costs to renew support and updates beyond the first year. I spoke to PlanSo about this and they confirmed that renewal costs cost 50% of the initial fee. Therefore, yearly renewals fees for the personal, business, and agency licenses, will cost $14.50, $44.50, and $249.50 per year, respectively.
Be aware that if you choose not to renew the plugin, you can still use the existing version you have for as long as you like.
My one criticism of their pricing options is that there is too much of a jump between the business and agency editions. A website owner who wanted support for the plugin for say, ten websites, would have to upgrade to the agency edition at $499.
I believe they would be increase sales if they introduced another license at around $150 to $200. Or perhaps even reduce the cost of the agency edition or replace it with a license that supports unlimited websites (but let’s be honest, there cannot be many companies that want support for more than fifty websites anyways).
Final Thoughts
Every website owner needs to provide visitors with a way of contacting them. There are a number of ways to do this. You could display your email address for everyone to see, display a contact form, offer a ticket support system, or a live chat box.
I believe a contact form is the most practical solution:
- It reduces spam since malicious bots cannot see your email address
- It is a quick and easy way for visitors to contact you (in comparison to a displaying an email address, that forces someone to open their email client, and a ticket support system that forces a person to register an account)
- It allows you to control the information that is sent to you by specifying what fields need to be completed before the form is submitted
There are a lot of contact form options available to WordPress users, but in my opinion, PlanSo is one of the best options available. It’s incredibly quick and easy to set up multiple forms using the plugin and is arguably one of the best plugins available for creating multi-column and multi-page forms.
Is it the perfect contact form plugin? No, but that is because there is no such thing; it’s very subjective. Every contact form plugin offers something different so it is up to you to see if you like the interface and whether PlanSo does what you need a form plugin to do.
My recommendation to those of you are looking for a contact form plugin for your WordPress website is to give the free version of PlanSo a try. The free version should be more than sufficient for most users and it will show advanced users what they can expect from the pro version.
I hope you found this review useful. If you have any questions about the plugin, please ask below in the comment area :)
Thanks,
Kevin