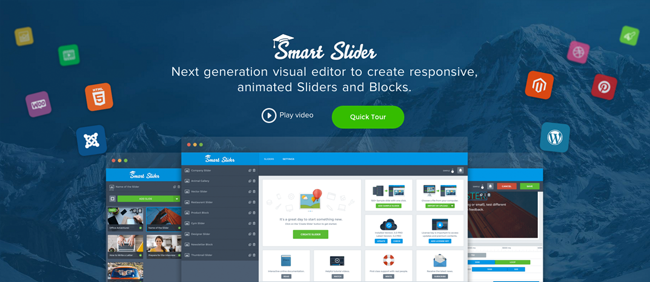
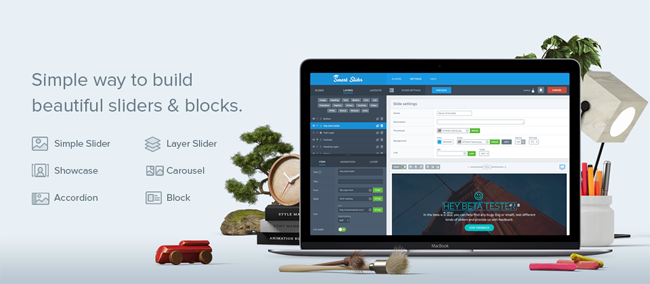
Smart Slider is a stylish slider solution that helps you create beautiful sliders and blocks for your websites. All content created by Smart Slider is responsive, therefore it looks great on any device.
It features a user-friendly visual editor with a drag and drop page builder and an option to preview your creations before you add them to your website. Smart Slider also allows you to pull content from external sources.
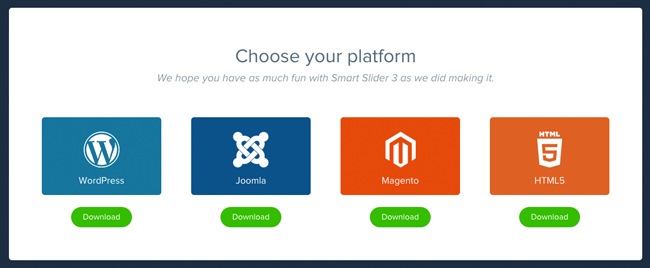
Smart Slider is available for WordPress, Joomla, and Magento. Alternatively, you can download an HTML5 version of the solution. This is useful if you want to add a slider or block to a page that was not created by your content management system.
As you know, I am a WordPress user, therefore in this article I will be reviewing the WordPress version of Smart Slider.
Two versions of Smart Slider are available; a free version and a premium version. I will be reviewing both, however since the most practical thing for users to do is to test the free version first, I will be doing the same in this article :)
The Nextend Framework
The free version of Smart Slider is called Smart Slider 3. Their previous iteration, Smart Slider 2, has over 20,000 active installations and still appears to be actively maintained.
Once you have installed and activated Smart Slider 3 on your website, you will see two new top level items in your WordPress admin menu. One for Nextend and one for Smart Slider.
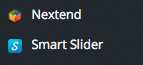
Nextend are the developers of Smart Slider and a number of other WordPress plugins and Joomla extensions.
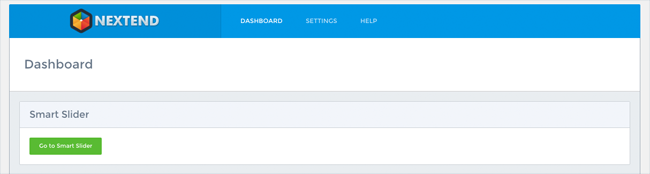
When you click on the Nextend menu item, you are taken to a dashboard that displays all Nextend plugins that have been installed on your website. Since Smart Slider was the only Nextend plugin activated on my website, it was the only one listed.
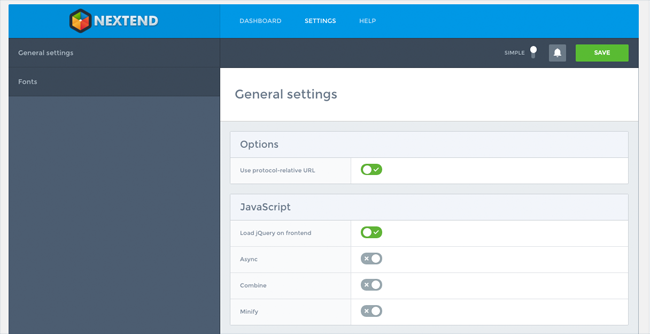
The settings page is divided into two sections. On the general settings page there are a lot of options for advanced users such as disabling protocol-relative URL and various Javascript options.
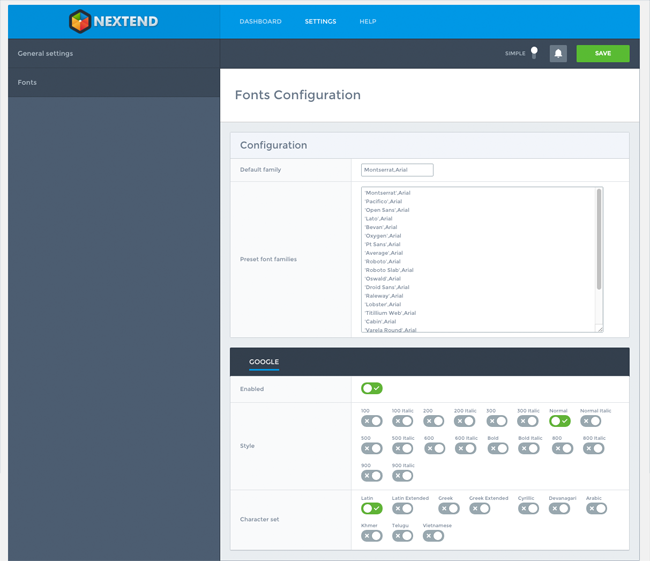
Fonts can also be customised. You can change the font family, style, and character set, at the click of a button.
A help page is also listed in the navigation menu, but the page simply displays the Nextend framework version and the platform you are using (i.e. WordPress).
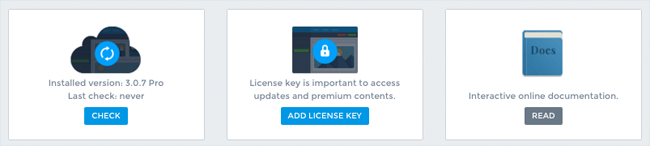
There is also a notification icon for messages and a switch that changes from simple to expert. Initially, I did not see anything change when I changed the difficulty setting. I later discovered that this is because expert mode is only available in Smart Slider Pro.
Smart Slider 3 – The Free Version
The Nextend framework has a great style and is very easy to use. It hits home how well they have developed it when you visit the Smart Slider main dashboard. It looks very professional.
From the dashboard you can create new slides. You will also find online documentation, video tutorials, and other support related links.
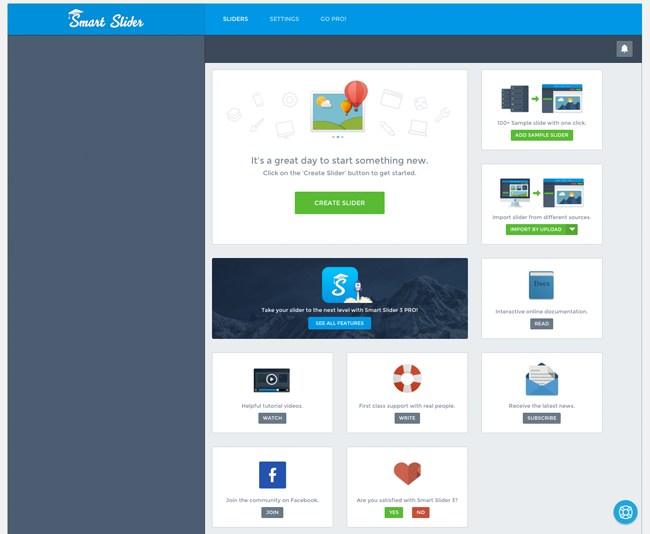
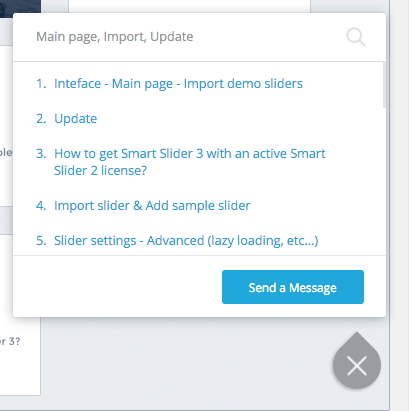
A blue icon with a lifebuoy symbol inside it floats at the bottom right of the page. Clicking on the icon will bring up an FAQ pop up window that allows you to search for answers to solutions. You can also contact the support team directly from this box.
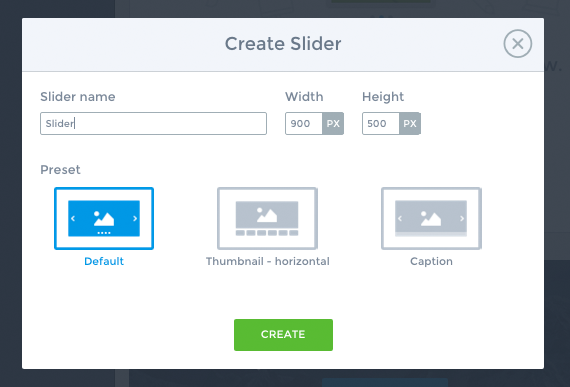
When you click on the create slider button, a pop up will appear. From here you can name your slider, define its width and height, and choose from one of three slider designs. You can select from a default slider, a slider with horizontal thumbnails displayed underneath, and a slider with captions displayed underneath.
You will then be taken to the page where you can configure your slider. There are a lot of settings that are available for configuration. This surprised me a little as I expected the free version of Smart Slider to be limited in most ways.
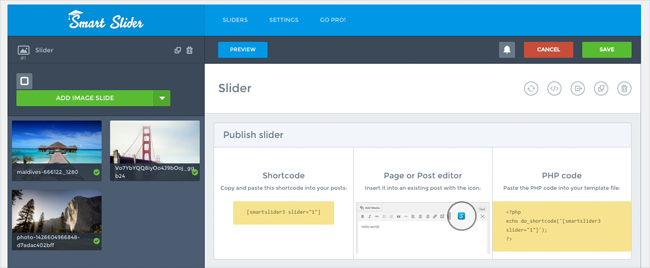
On the left panel you will see the name of your slider and options to change to another slider or delete the current slider. Underneath are options to add images to your slider using the WordPress media gallery.
At the top of the right hand side panel you will see options to preview your slider, cancel changes, and save changes. Underneath are five icons to clear slider cache, export slider as HTML, export your slider, duplicate slider, and delete slider.
Smart Slider gives you a couple of ways of integrating your slider into your website. The create slider page displays the shortcode you should insert into your content area. Alternatively, you can insert this shortcode by using the Smart Slider icon that is added to your WordPress editor.
You can also add a slider to your website using PHP. This is useful if you want to hard code a slider into a certain part of your design, such as your header or sidebar.
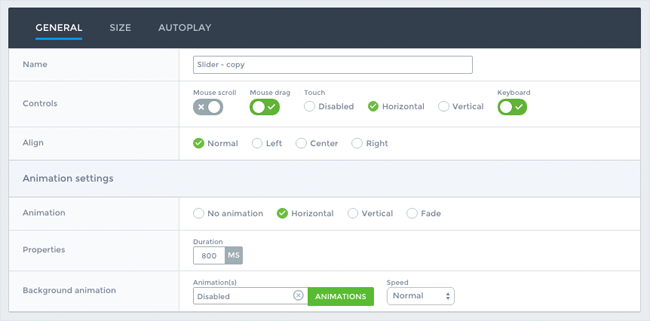
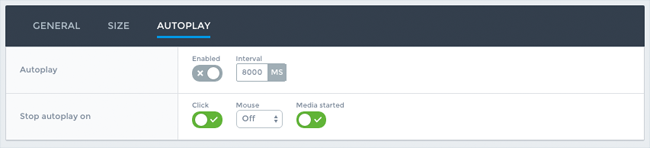
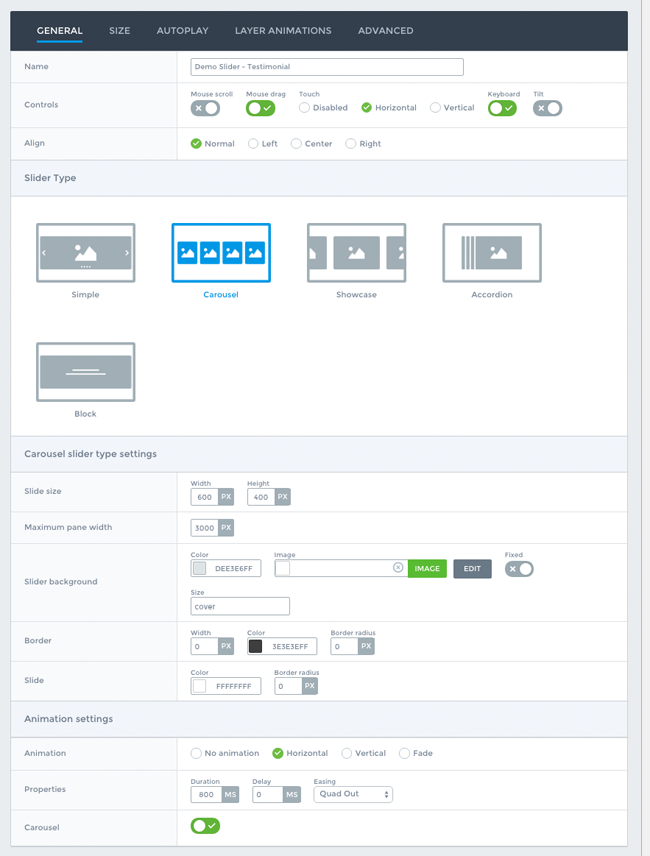
Underneath are two settings boxes with multiple tabs in each box. The first settings box has tabs for general, size, and autoplay settings.
In general settings you can rename your slider and adjust mouse and keyboard controls. Alignment and animation settings can also be modified.
The exact size of your slider can be defined. You can also add a margin around your slider.
Two responsive modes are available: Auto and fullwidth. Both modes allow you to modify the height and width of slides.
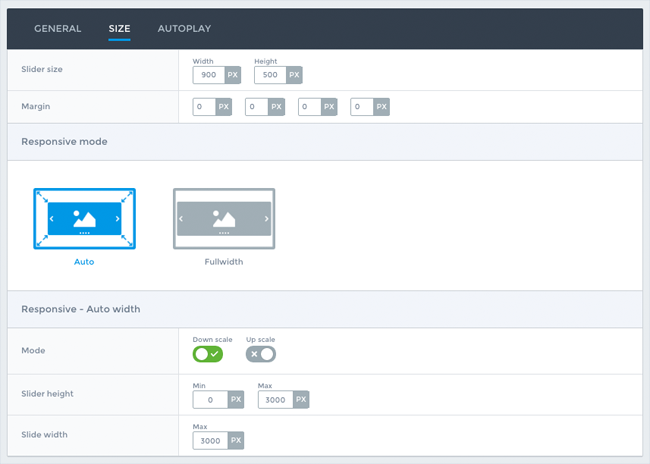
A couple of autoplay settings are available too.
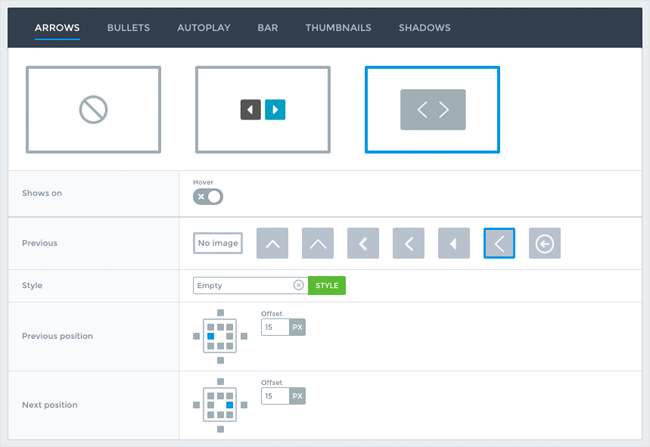
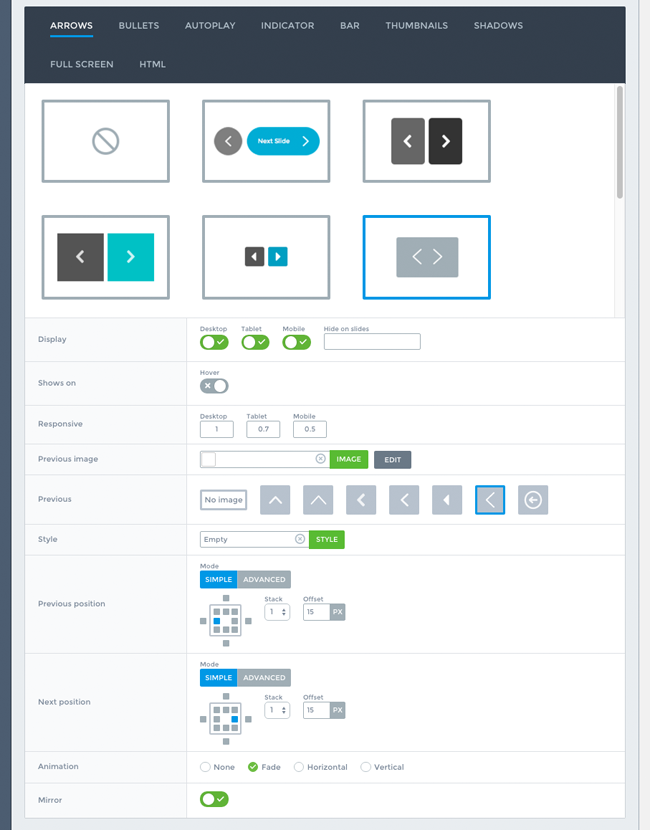
The second settings box has tabs for arrows, bullets, autoplay, bar, thumbnails and shadows.
In this section you can change a lot of styling and positioning of elements and icons.
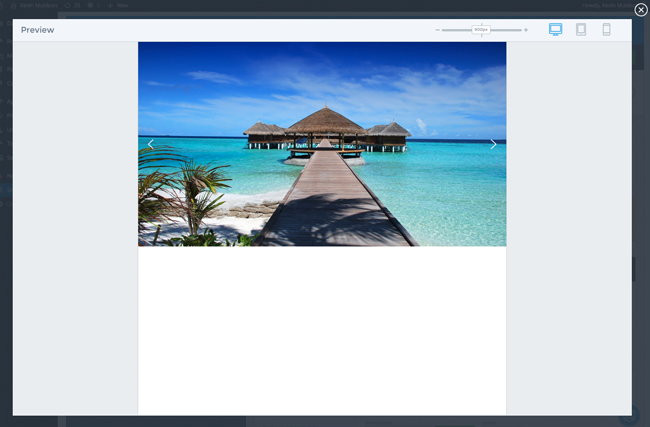
The preview button near the top of the page lets you preview your slides. It is useful to do this when customising your slide as it allows you to see the changes you have made before you integrate a slider into your website.
A sliding scale at the top of the preview page lets you change the width of the slide area in pixels. Three predefined modes are available that switch the slider to a particular width for desktops, tablets, and mobiles.
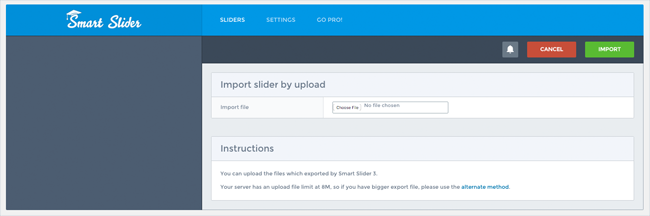
Another feature listed in the main dashboard is the option to upload a slider you have backed up previously.
One thing that sets Smart Slider apart from alternatives is its sample slide system. Four sample slides are provided in the free version of the plugin.
You can choose one of these sample slides as a starting point for your slider.
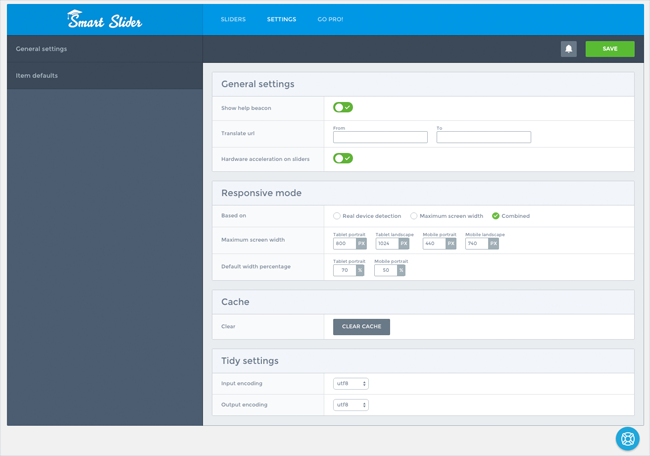
There is a settings page for the Smart Slider main panel. Just like its parent Nextend framework, the settings page is divided into two sections.
In the general settings section you can disable the help icon that floats on each page, translate URLs, and disable hardware acceleration. You can also adjust the responsive settings for your sliders and blocks. For example, you can define the maximum screen width for each device and the default width percentages for tablets and mobiles.
Cache can also be cleared and you can adjust tidy settings.
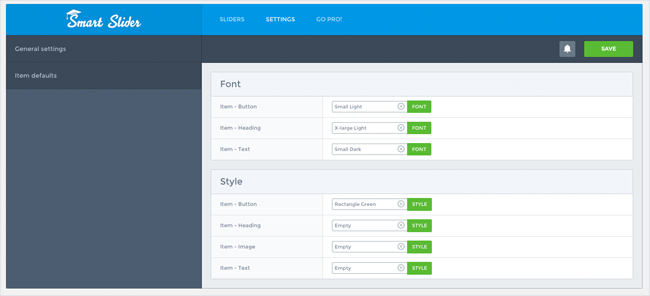
In the item defaults section you will find options to adjust the font for buttons, headings, and general text. You can also modify the style of buttons, headers, images, and text.
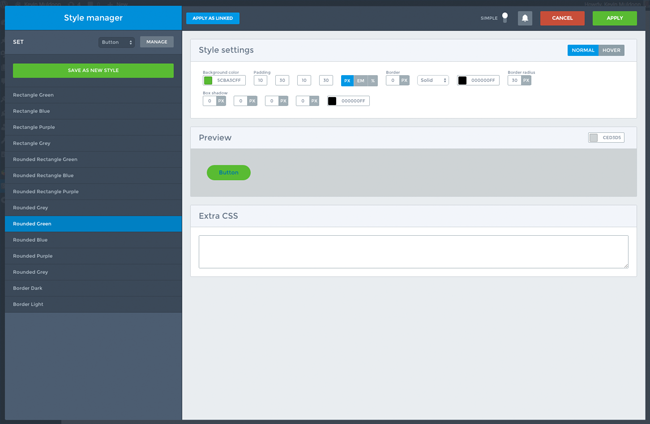
When you click on any of the item defaults, you are taken to the Smart Slider styles manager. You can choose from a variety of predefined styles. Colours, shadows, borders, padding, margins, and more, can all be defined.
Underneath is an area where you can preview your changes and add extra CSS to style the item further.
As you can see, the free version of Smart Slider has a lot to offer. It is certainly one of the best free slider solutions available to WordPress users.
Smart Slider Pro
The pro version of Smart Slider boasts many more features. As you would expect, all of the slides that you created in the free version of the plugin are available when you upgrade to the premium version.
The main dashboard looks much the same. The only real difference is the addition of a license key box.
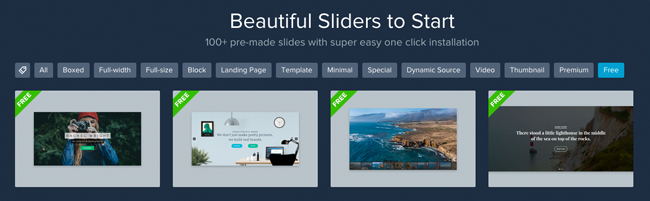
In the free and premium versions of Smart Slider you will see a box in the main dashboard for sample sliders. This feature is a little limited in the free version as there only four templates available.
There are over 100 pre-made slider templates available for selection in Smart Slider Pro. This includes full width slides, landing pages, minimal slides, slides for videos, and much more.
I am a huge fan of developers including pre-made templates in their products as it is sometimes difficult if you do not have a good eye for design. The standard of slider templates that are included with Smart Slider are very high. All you have to do is select one you like and then modify it to suit your needs.

Each template can be previewed before it is imported into your website. You will quickly appreciate the high quality of the slider templates that are available.

After importing a template, you can begin to modify it in the same way as any other slide.
The Smart Slider interface looks the same in the pro version of the plugin. However, there are around three to four times as many options available in the settings boxes. There are also five different slider types instead of one. In addition to the simple slider type that is available in the free version of Smart Slider, the pro version also includes carousel, showcase, accordion, and block slider types.
When you load up a different slider type, a whole new set of settings are loaded. There are dozens of options for each slider type. There are also additional options for setting the size of your slides, autoplay, and a huge number of layer animations.
There are a lot more styling settings in Smart Slider Pro too. It gives you a lot more control over how your slides look and feel. If you find these additional options overwhelming, I recommend switching back to simple mode.
The developers advise that the pro version of Smart Slider offers five slider types instead of one, sixteen layer types instead of six, and all dynamic slide generators instead of two.
It also adds advanced controls, expert mode, layer animations, background animations, and a lightbox and image editor.
Pricing
The free version of Smart Slider 3 is a fantastic product in its own right, but the premium version is fairly priced. I have no doubt a lot of users will upgrade because of this.
There are two premium plans available. A license for one website only costs $25 and includes support and updates for one year. To renew the plugin for a further year is only $15. Please note that this personal plan provides a copy of Smart Slider for one platform e.g. WordPress or Joomla.
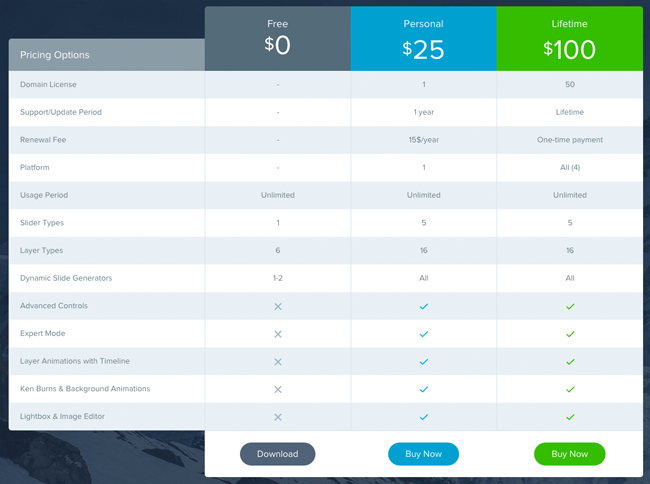
The lifetime plan offers tremendous value for money. In addition to offering support and updates for up to fifty websites, it also provides a copy of the product for all four platforms. No renewal fee is required since this license is valid forever.
Smart Slider has a huge documentation area and a great archive of video tutorials that explain how to use the plugin.
Final Thoughts
I was incredibly impressed with Smart Slider. It is very easy to use and the quality of slides it helps you produce is fantastic.
The developers have built an enticing business model. The free version is packed full of features, but the premium version has many more and is priced fairly to encourage users to upgrade. So many developers get this balance wrong and cripple the free version or do not offer much in the premium version to encourage people to upgrade.
Since Smart Slider is free to use, I do not have to really stress how good a plugin it is because you can download it yourself and see for yourself. I highly recommend you all do this. Even though the premium version is great, I still think it is prudent to download the free version primarily to make sure it does everything you need.
Whilst the additional settings are obviously welcomed, the feature that would make me upgrade is the large selection of pre-made templates. For me, this feature alone transforms Smart Slider from a good plugin to a great one.

To find out more about Smart Slider, please visit their official website.
Thanks for reading.
Kevin