Give your store a distinct look from page to page. Not only you should create attractive product pages, but you should also make a beautiful WooCommerce login. Excite customers with elegant login and registration pages.
These will sure add to their pleasant experience in your store. Moreover, create login and registration pages that pop up, so they stay on the page while logging in and can quickly carry on shopping right after. In addition, you can show off your branding when customizing your login and registration pages.
Creating Beautiful Woocommerce Login and Registration Pages
This article will show you exactly how to easily create a beautiful woocommerce login and registration page using the plugin, WooCommerce Login Popup and Shortcodes. This plugin lets you create a pop-up login area. No need for customers to navigate to a new page, thus reducing their wait time to get signed in.
With WooCommerce Login Popup and Shortcodes you can opt for a registration page that pops-up, too. Aside from making your sign-up page eye-candy, you let your customers register more quickly. They sure don’t want to wait too long to go shopping.
Customers prefer quick-and-easy login, and when they forget their passwords, they feel like being punished for taking extra steps to regain access to their accounts. With WooCommerce Login Popup and Shortcodes, you can let them regenerate their own password quickly and easily with the ”forgot password” popup feature.
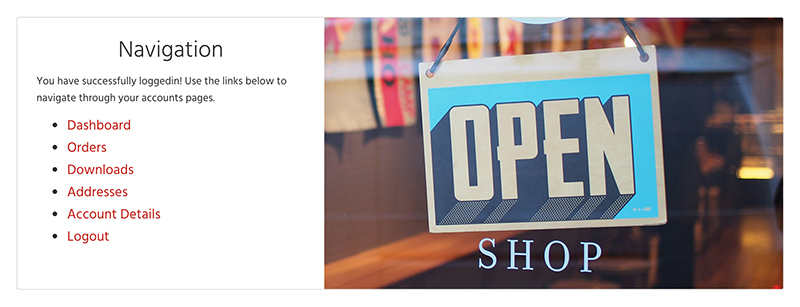
WooCommerce Login Popup and Shortcodes completes your customers’ shopping experience with a navigation dashboard which shows up when they’re logged in to their accounts.
Step by Step Guide
Create Popup Login Page
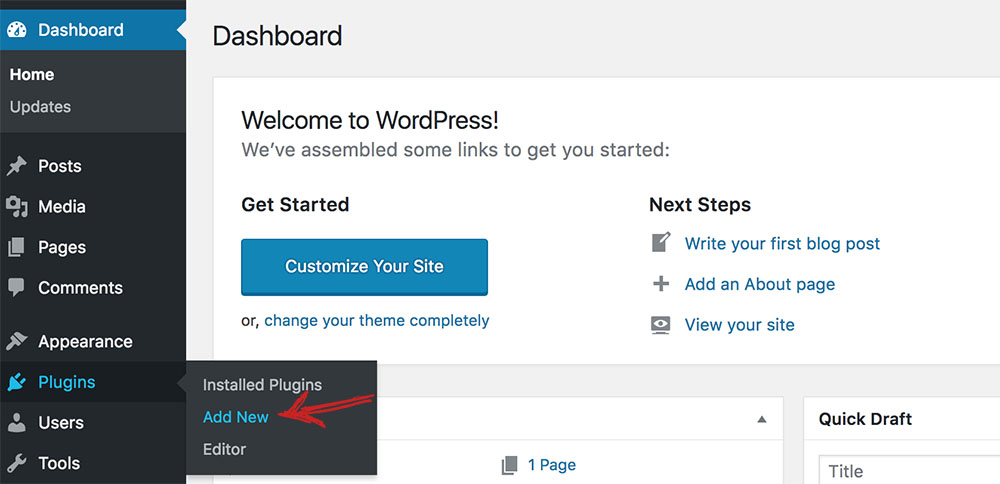
Step 1
From your WordPress dashboard, go to “Plugins > Add New”. In the “Add Plugins” page, type “WooCommerce Login Popup and Shortcodes” into the Keyword Search field. Next, click “Install Now”. Finally, click the “Activate” button after the download is complete.
Step 2
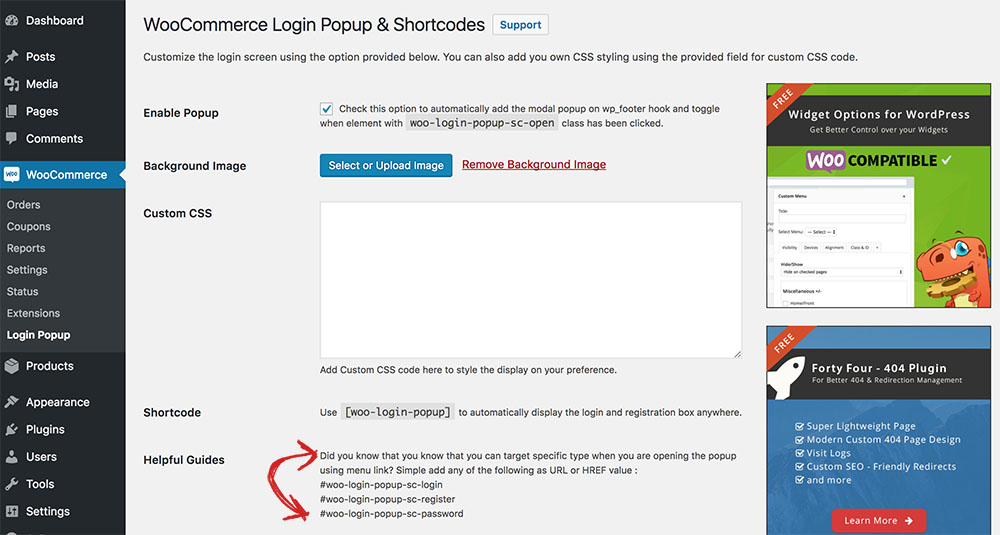
Go to WooCommerce > Login Popup. Next, on the settings page, enable popup.
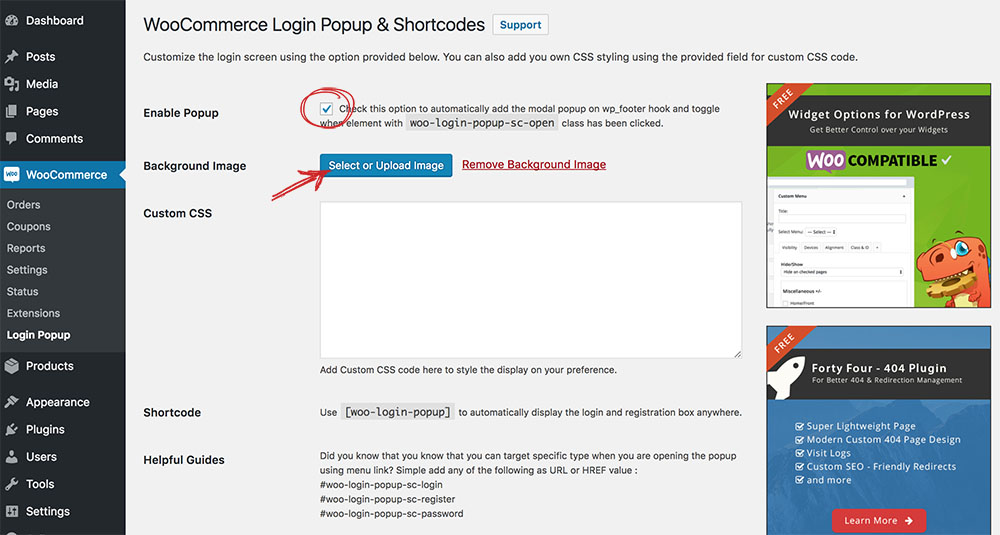
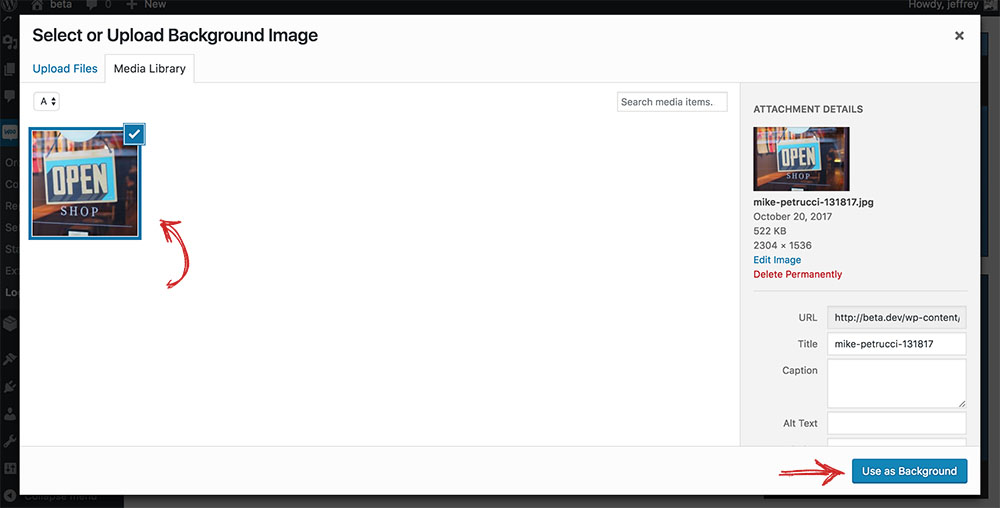
Then, click the “Select or Upload Image” button. Select or upload your login page image, and click the “Use as Background” to exit back to the settings page.
Your chosen image must now be visible. Don’t forget to save changes.

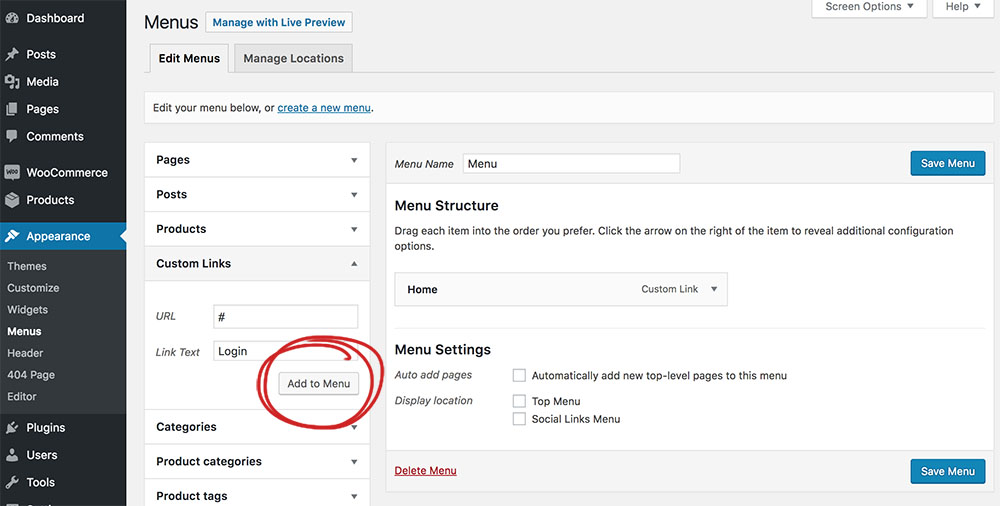
Step 3
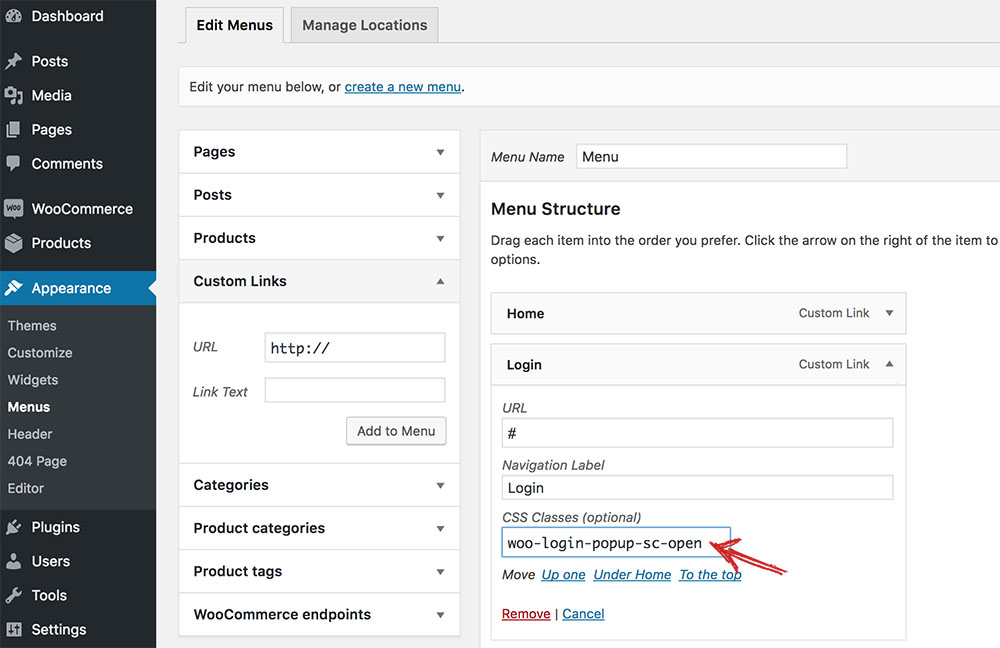
Copy the CSS code found on the “Enable Popup” area.

After that, go to Appearance > Menus. On the “Pages” list, click “Custom Links”. On the URL field, type in #; then, on the Link Text, type in “Login”. Finally, click the “Add to Menu” button. You will notice that “Login” is added among the items listed in the Menu Structure.
Step 4
Click the “Screen Options” tab found on the upper-right hand corner of the Menus page to reveal the advanced menu properties; then, tick “CSS Classes”.
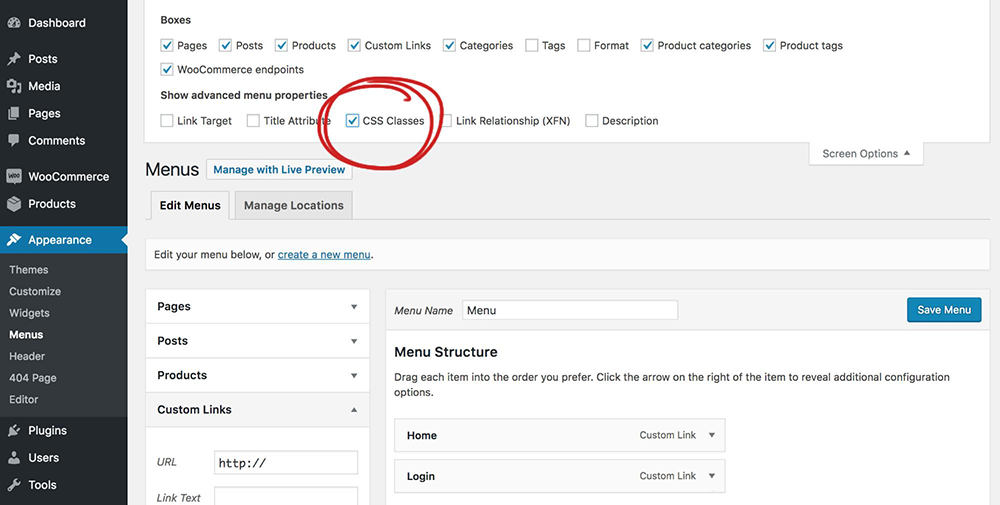
After that, under the Menu Structure, click “Login”; then, paste the code you copied earlier into the “CSS Classes” field. Lastly, click the “Save Menu” button.
You should be able to find the “Login” link at the front end. Next, click it to see that it pops up.
On the page you will find the registration and forgot password links, but you want to add a registration link to the menu. Go through the steps below.
Add “Register” Link to the Menu
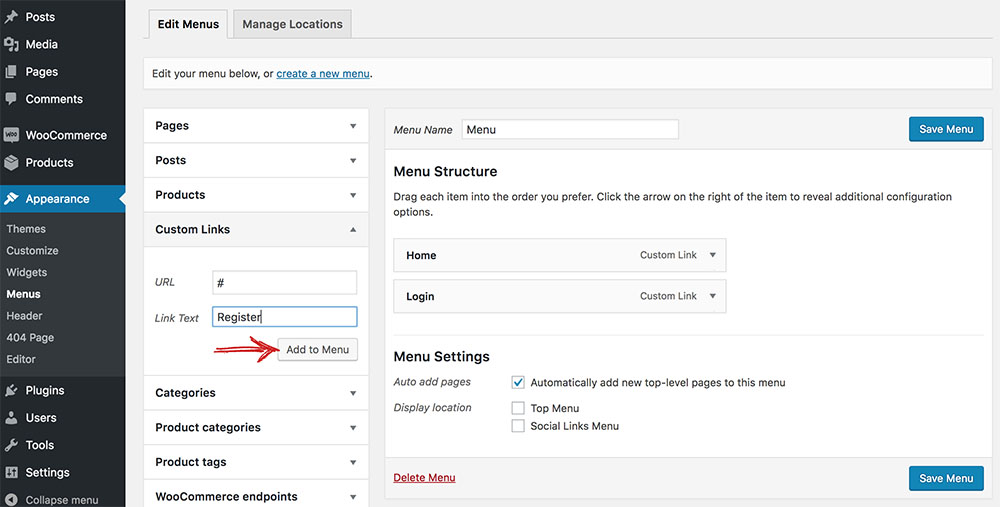
Step 1
Go to “Appearance > Menus”. On the Pages list, click “Custom Links”. On the URL field, type in #; then, on the Link Text, type in “Register”. Click the “Add to Menu” button.
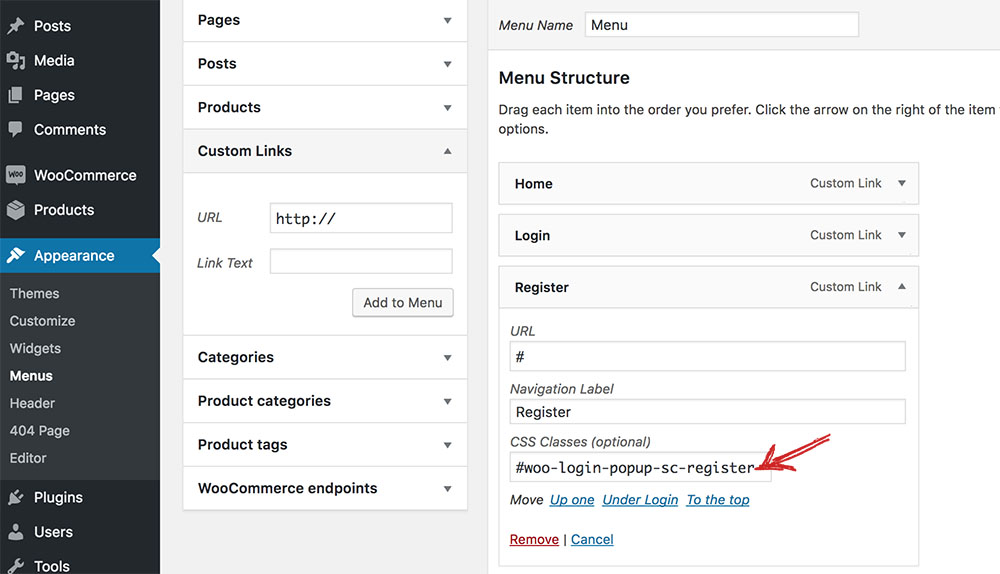
Step 2
Then, under the Menu Structure, click “Register” and paste the code you copied earlier into the “CSS Classes” field; then, click the “Save Menu” button.
Step 3
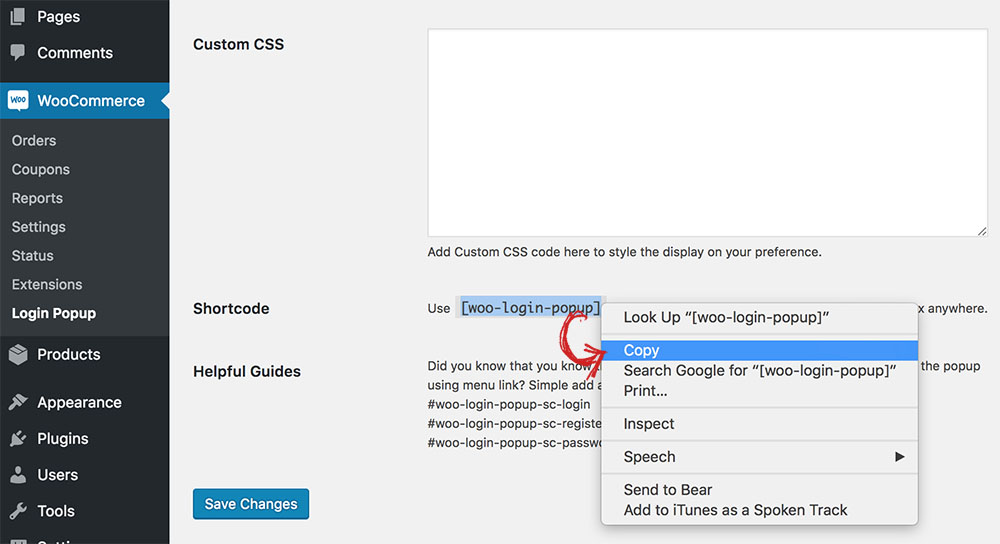
Go to WooCommerce > Login Popup. On the Helpful Guides section, copy the register URL.
Step 4
Go back to Appearance > Menus. Under the Menu Structure, click “Register” again, but this time, paste the link into the URL field. Click “Save Menu” to finish; then, go to the front end and find that the Register link is added to the menu.
Now that you have both the Login and Register links in place, what you want to do next is to be able to access the login box anywhere you want. Follow these simple steps:
Create a Login/Register Page Link You Can Share Anywhere
Step 1
Click WooCommerce > Login Popup and then copy the shortcode.
Step 2
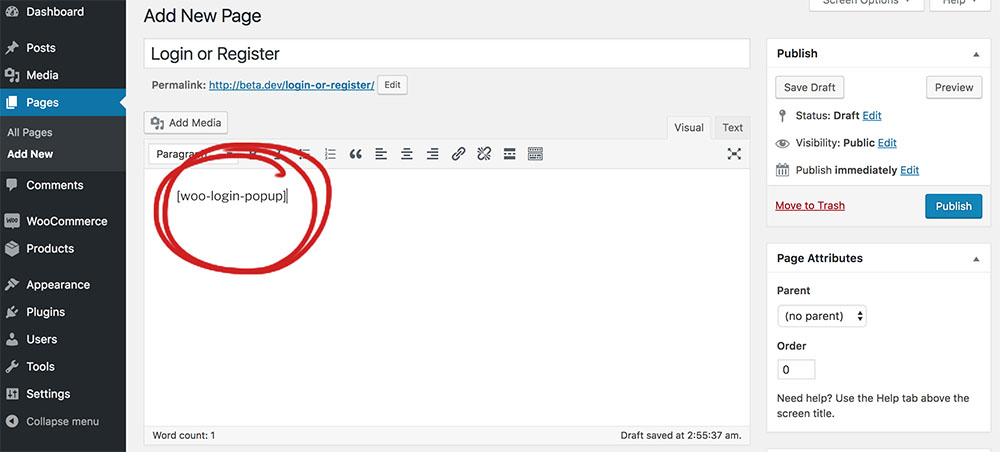
Go to Pages > Add New. On the Title field, type in “Login”; then, paste the shortcode into the Text field. Click the “Publish” button.
Once it’s published, the “View page” link appears. Right-click on it to copy link address.
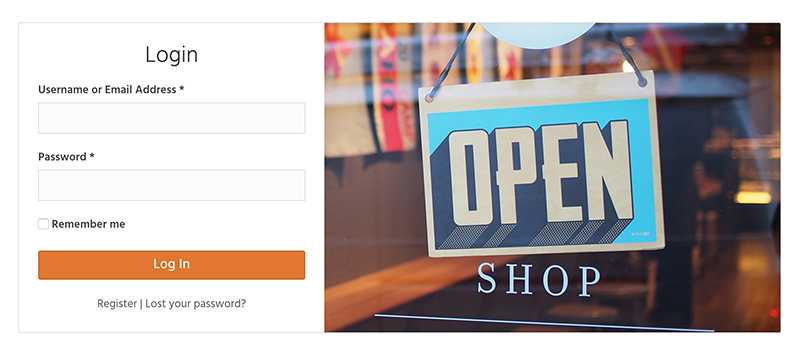
Pull up a new browser window and open the page. Your login page appears complete with “register” and “forgot password” links.
When logged in, navigation links will be shown to the user.
That’s all there is to it.
All you need to do is download WooCommerce Login Popup and Shortcodes from your WordPress admin area or from WordPress.org. You can then start creating a beautiful login and registration popup form for your store.
Also are you able to add recaptcha to it. Doesnt seem real secure without it.
Did you work this out?
I same question as Christine
Thank you. This is a great plugin. Is it possible to redirect to a page other than the Navigation menu?
i have the same question
How to make it run automatically as soon as the page loads?