Companies spend a lot of time tweaking their landing pages and testing results to see what helps increase sales and what does not. One of the most effective ways of increasing sales to your product or service is to adopt a professional looking pricing table.
Pricing tables are common place online. Every website hosting company uses them to showcase their available plans. You will also see them used by other services in which the company presents the customer of a number of different pricing options.
I spent a couple of days testing out pricing tables for my advertising area last month. There are a lot of good free and premium pricing tables solutions available to WordPress. I couldn’t decide what to use at the time so I chose a free solution first and then continued my search.
The plugin I chose was ARPrice. ARPrice is an advanced WordPress pricing table plugin by Repute InfoSystems that has generated over a thousand sales on CodeCanyon since its release last year.
In this article I am going to explain what ARPrice can do and show you how I used it to improve my advertising page and (hopefully) increase sales.
* The version I used for this review was 2.5.
My Previous Pricing Table Setup
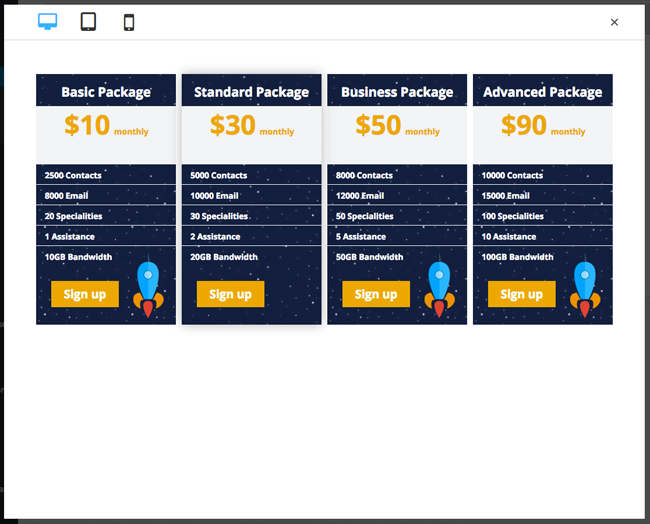
Before I came across ARPrice I was using the free WordPress plugin Responsive Pricing Table by WP Darko on my review information page.
Responsive Pricing Table is a good free option, but I was looking for something a little different as I found it was time-consuming to setup new tables and there was some small design issues such as columns not aligning correctly.
Repute InfoSystems also offer a free version of ARPrice. It uses the same interface as the pro version though as you would expect it does not offer as many features.
Let us take a closer look at the features of ARPrice.
What ARPrice Offers
ARPrice is a pricing table solution that works with any WordPress theme. It is responsive so your tables will look great whether visitors are viewing them on a desktop browser, tablet, or smartphone.
One of the key selling points of ARPrice is how tables are built. It uses a drag and drop interface to help you build tables. This helps you build pricing tables quickly and effectively.
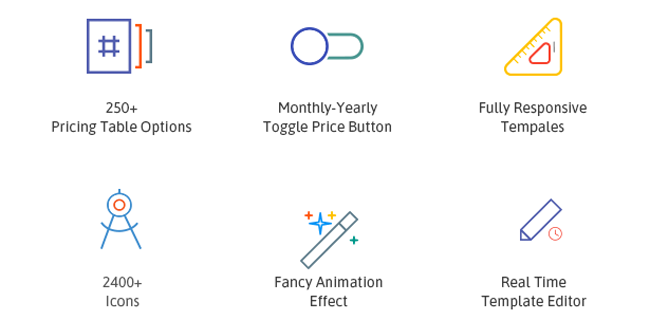
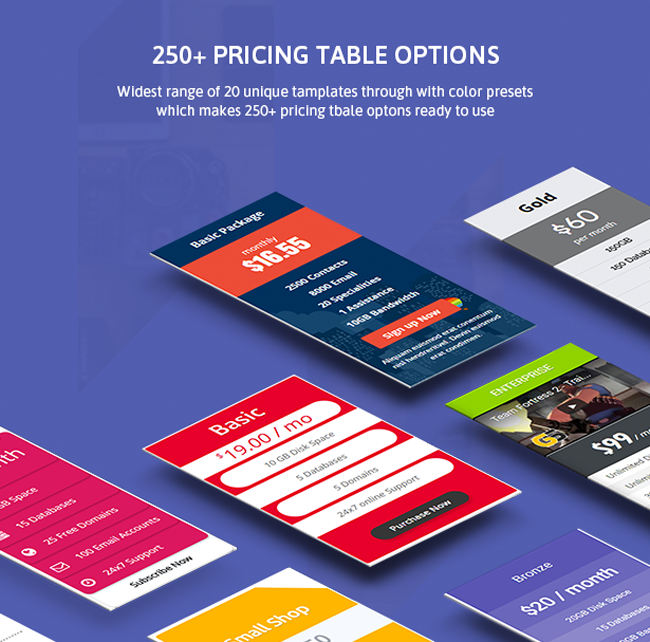
By far my favourite feature of ARPrice is its adoption of a templating system. Most other solutions give you a few templates and styling options, but ARPrice gives you twenty-two pre-made templates. Even the free version offers nine templates.
Once a template has been chosen, you can easily change the colour scheme and customise how it looks.
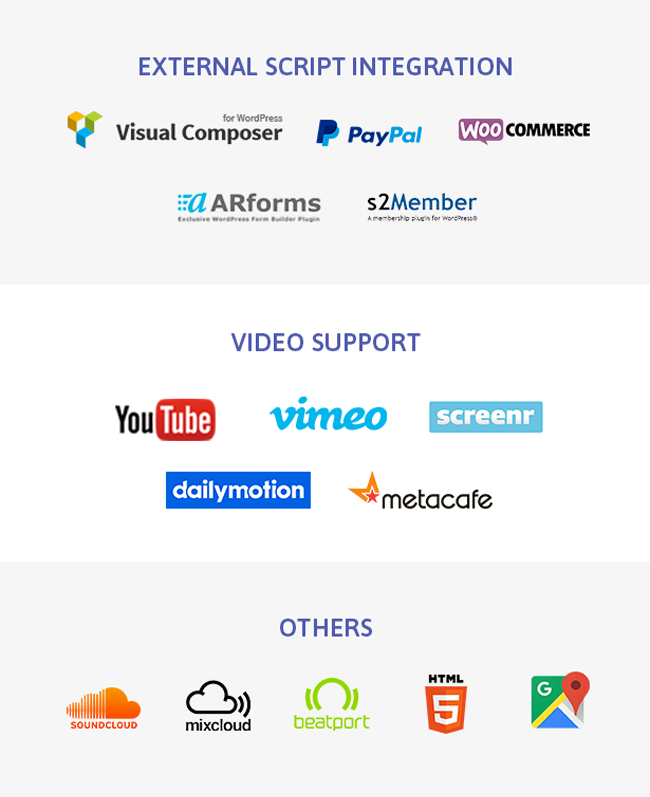
ARPrice has been designed to work with Repute InfoSystems’ other plugin ARforms. It also works with the drag and drop page builder Visual Composer, the membership plugin S2Member, and the eCommerce plugin WooCommerce.
Video and audio services are also supported. This allows you to integrate videos directly into your pricing tables. There is also support for Google Maps.
The premium version offers so much more than its free counterpart.
Additional features include:
- Toggle pricing (This lets you display different pricing plans e.g. monthly, yearly etc)
- Full customisation of the pricing table
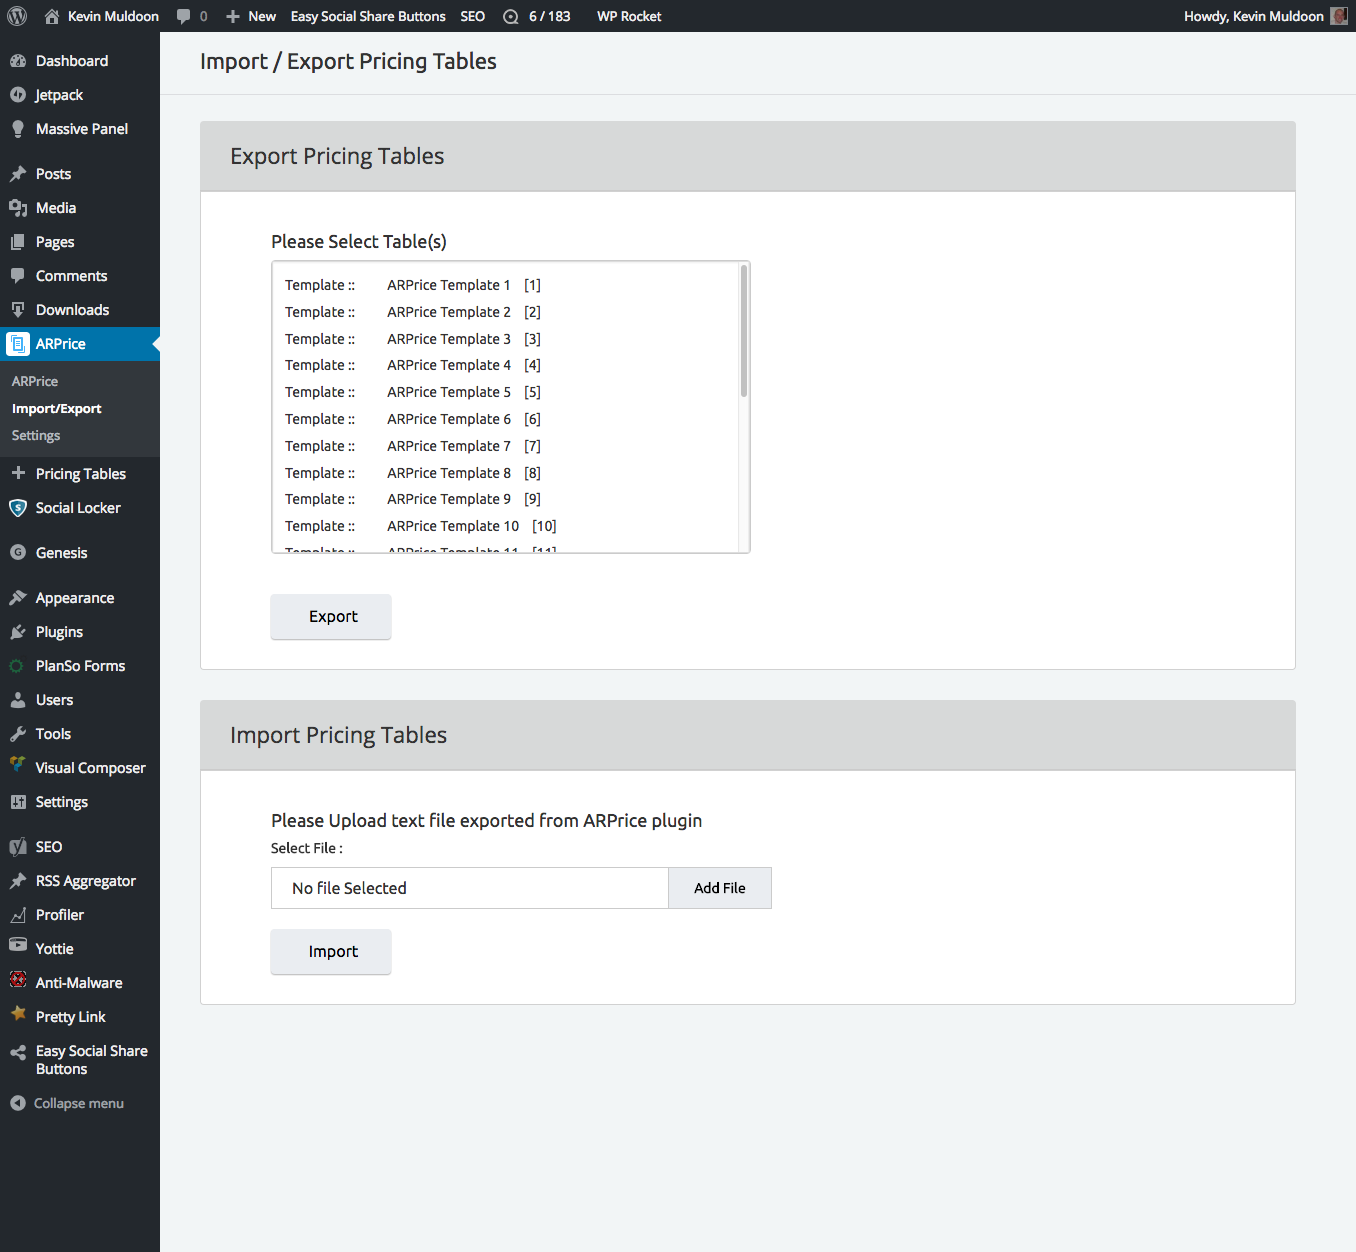
- Import and export functionality
- Analytics
- CSS based ribbons
- Custom CSS for table columns
- Column hover effects
- Dedicated ticket support
I purchased the premium version of the plugin from CodeCanyon to unlock all of the above features. Unless you are on a budget, I would recommend opting for the premium version so that you gain this additional functionality.
Configuring ARPrice
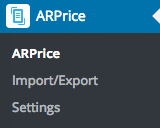
Once you have purchased ARPrice and uploaded the plugin to your website, you will see a new menu displayed in the WordPress admin area.
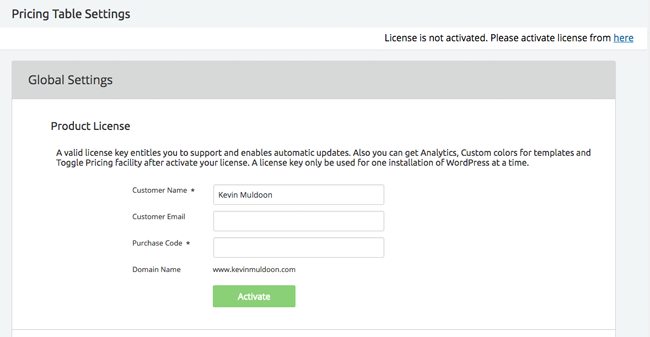
Whatever menu item you select, you will see a notification to add your product license details in order to get support and automatic updates.
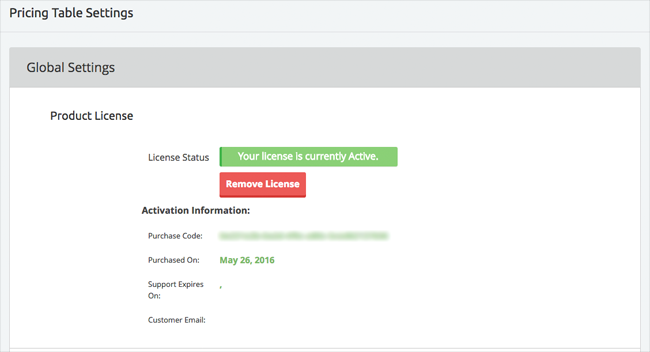
Once you have activated the license, you will see a message displayed at the top of the settings area that shows the status of your license.
I initially assumed that there was no way of changing your associated name or email address once you have activated your license, but all you have to do is select “Remove License” and then activate your license again with your new details.
Unfortunately, ARPrice does not fully adhere to the GNU General Public License that WordPress was released under. Premium WordPress products may limit updates and support to a certain number of domains, but they should not restrict the plugin itself.
Many features of the pro version of ARPrice are not available unless you activate your license. The problem with this is that if you activate ARPrice on a second domain, you will not be getting access to the full product you paid for.
Many plugins on CodeCanyon do the same thing, which is disappointing as I strongly believe in the GPL and believe all WordPress developers should support it. I brought this issue up with the developers and they appear keen to resolve this issue so I hope that they will remove these restrictions in a future version.
Since license information is displayed at the top of the plugin settings page, we may as well check out the settings available on this page.
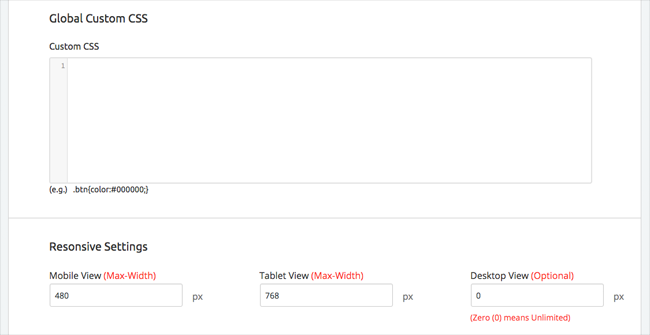
The first section displays a global CSS box that allows you to add custom CSS classes. Underneath is the responsive settings area that lets you define the maximum width for mobiles, tablets, and desktop browsers.
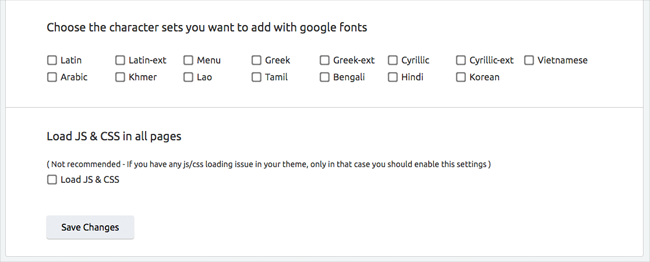
ARPrice has full support for The WordPress Multilingual plugin. At the bottom of the settings area you will see options to change the character set that is being used.
Optimisation has clearly been in mind when ARPrice was being developed as the plugin only loads the necessary Javascript and CSS code it needs on the pages pricing tables are displayed. Many WordPress plugins do not do this which means that pages have more weight than they need.
The developers have included an option to load the Javascript and CSS code across your whole website. I am not sure why anyone would want to do this, but it is there nevertheless for those that do.
Tables can be exported as text files. This allows you to backup your tables and import them into another website.
The settings area of ARPrice is admittedly small, but this is by design as all options have been placed inside the table creation area.
Creating an ARPrice Pricing Table
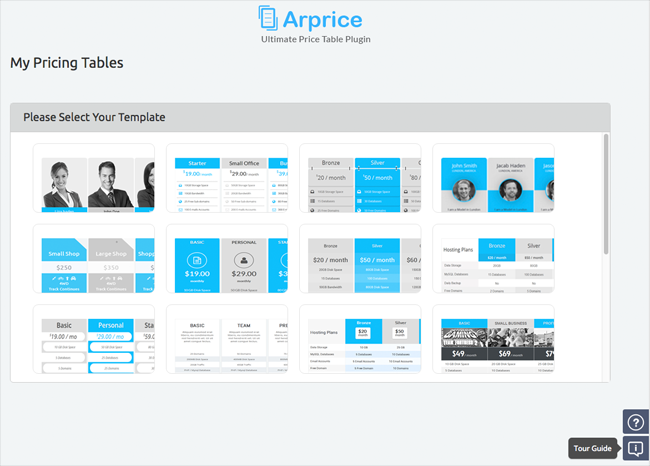
The process of creating a pricing table is fantastic. On the main page you are presented with twenty-two different templates. You simply need to select a table that closely fits your needs.
ARPrice is mainly sold as a way of displaying pricing tables and service plans, however there are templates available that help you use it in other ways. For example, there are templates to help you design a staff team page and one to help you display videos at the top of each column.
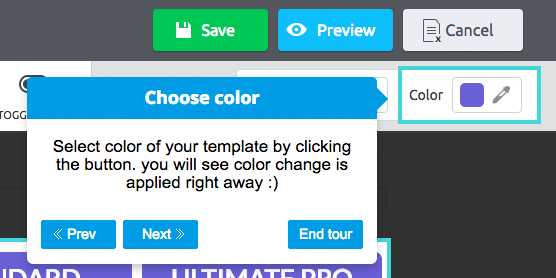
When you first launch ARPrice, a pop-up box appears asking if you want to start a tour. If you do not see the box, click on the “Tour Guide” bottom at the bottom right-hand side of the page. You will also find a link to the plugin documentation page in this area.
I recommend doing the tour of ARPrice as it walks you through its main features and shows you the important parts of the interface.
Once you have completed the tour, return to the home page of the plugin in order to select a table template.
The template selection box suggests that the default colour of all templates is light blue. That is not the case. Only the thumbnails are coloured this way.
When you hover over a template thumbnail you will see an option to select the template or to preview the template. I encourage you to preview each template before you select one.
When you click to preview the template, a box will appear that shows you the table in full. You can see how the table looks on desktops, tablets, and smartphones.
My only criticism of this process is that there is no option to select the table directly from the preview box. None of the templates are named or numbered so when you close the preview box you are unsure about which table you previewed and have to go through and find the table again.
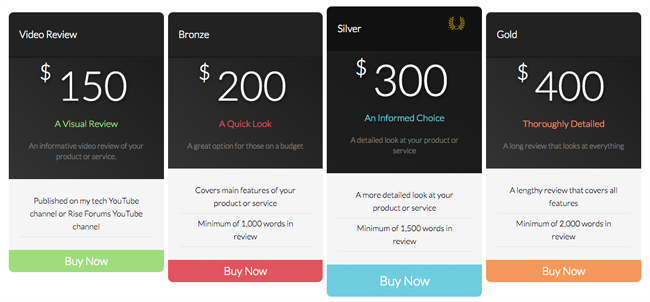
There is a good variety of tables on offer. Some incorporate images and video, others use animations. I chose a clean template that had a black and red colour scheme.
Once I selected the table I was taken to the main pricing table creation screen and after a few minutes I felt comfortable customising the table.
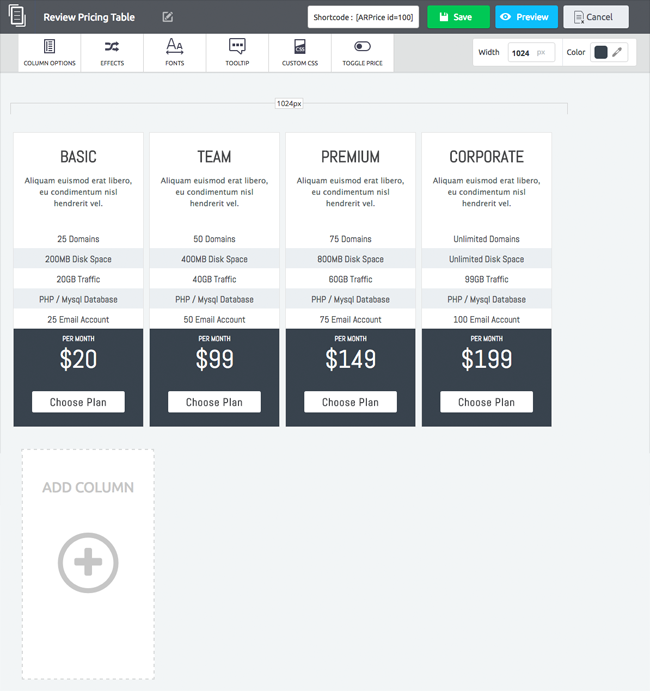
At the very top of the interface you will see the name of your table, the shortcode for inserting your table into a post or page on your website, and buttons to save your table, preview your table, and cancel modifications. Clicking on the preview option loads the preview pop-up box you saw previously so that you can see how the table looks across different devices.
Six different settings panels can be loaded: Column options, effects, fonts, tooltip, and toggle price. To the right is an option to change the general colour scheme and adjust the width.
I really love the tool that lets you change the width. It helps you see whether adding additional columns to your table will force those columns into the next row. With other pricing plugins, you need to constantly save the table and then see how it looks in your browser by jumping to the frontend of your website.
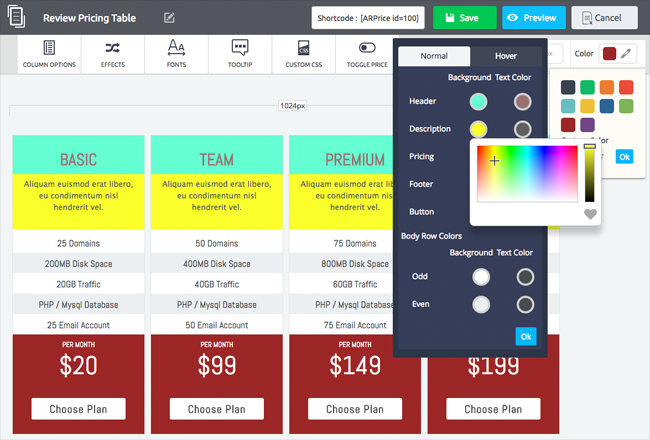
Ten different colour schemes can be selected from the colour drop-down menu at the right-hand side of the page.
Alternatively, you can create your own custom colour scheme. You can modify the background colour and text colour of every part of your pricing table. Hover colours can also be changed and there is an option to save colours as favourites so that they appear at the bottom of the colour picker.
I was pleased to see that you can return to one of the default colour schemes at any point as I created a table with some bizarre colours.
The drag and drop interface works great. You can change the order of columns at any time by simply clicking on a column and dragging it to another part of the table.
Double clicking on any part of the column allows you to change its content. For example, the header or the main description area. You can then change the text, add an image or video, or assign an icon from a selection of over 2,400+ icons.
When you insert an item, such as an image, or video, or icon, the code is added to the content area. This lets you position the item and style it the way you want. The size of items can be adjusted too, though there is not any option to change the colour of icons.

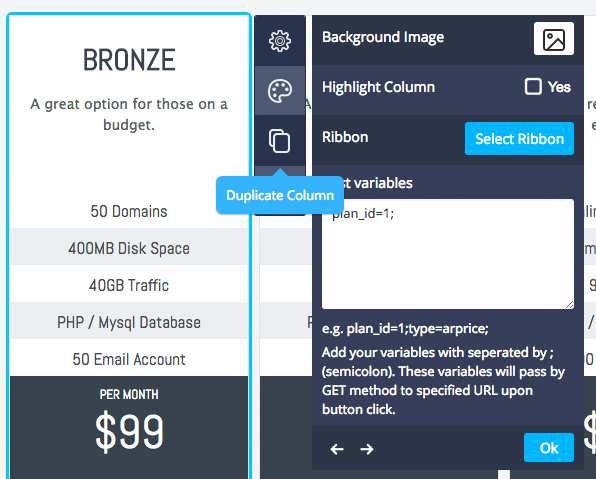
Clicking once on a column brings up a little sidebar with four options (five options are displayed if the CSS class information option is enabled, but more on that later).
The bottom two options let you delete the column or duplicate it. A good way to configure a table could be to delete all columns except one and then duplicate that column once you are happy with it.
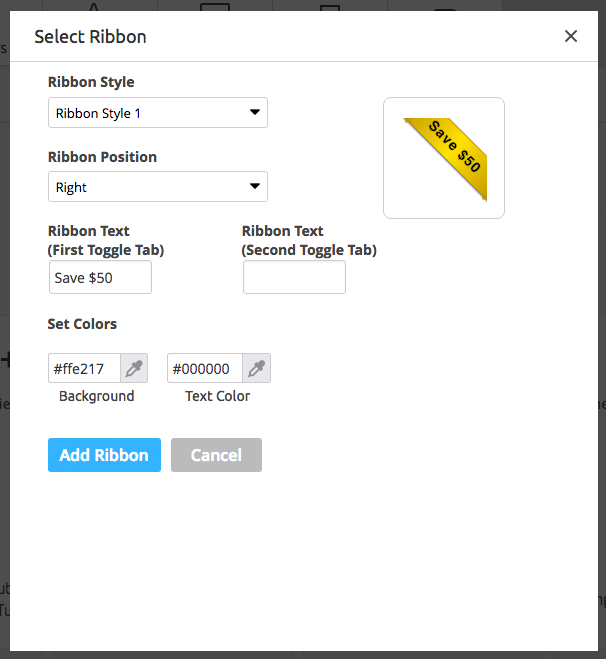
The column settings option allows you to define a background image, highlight the column, add a ribbon, and add post variables.
The background and font colours option lets you customise the colour scheme of a particular column in the same way the general colour scheme option does. In other words, you can change the look and feel of every single column.
I did notice one small limitation in the current version. The colours panel allows you to define the background colour and text colour for odd and even rows. You cannot, however, change the background of rows on an individual basis. Hopefully this feature will be added in a future version of the plugin as it would be good to single out certain rows in columns.
Ribbons are an effective way of showing off offers. You can change the ribbon style, position, text, and colours.
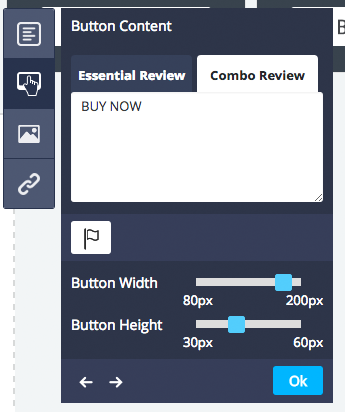
There are some great settings for the main button too. You can change the button text, use an icon or image, change the size of the button, define the button link, and embed a script.
When you start configuring your pricing table and adding your own text and descriptions, you start to realise that the developers have spent a lot of time refining ARPrice. There is an attention to detail that you will not see in many competitors.
For example, with the previous pricing table plugin I used, all of the columns had a different height because the descriptions in some columns were a few words longer than in others. I had to spend a lot of time adjusting the length of my descriptions to get them closer in size to each other, but in the end I ended up with a table with four different heights.
It may seem like a small detail though little things like this are what separates a good WordPress plugin from a great one.
ARPrice does not give you this headache as it automatically adjusts the table so that everything remains aligned. My only grievance with this is that the wrong heights are displayed initially and then it pops into place (I suspect this is a CSS issue).
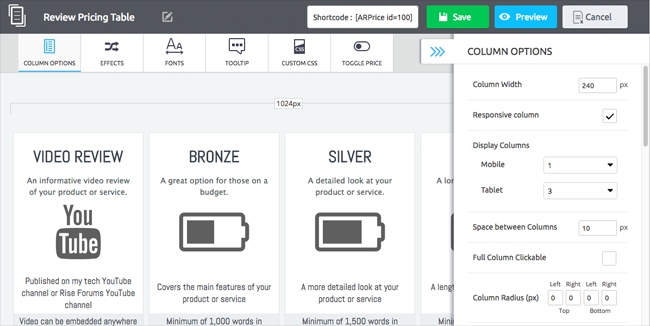
Clicking on one of the six buttons at the top of the ARPrice interface will launch a panel at the right-hand side of the page.
In the column options panel you can adjust the column width, the number of columns displayed on mobiles and tablets, the space between columns, and the column radius.
Individual column sections, such as the header or body, can be hidden via this panel. You can also change the column borders, row borders, and button style.
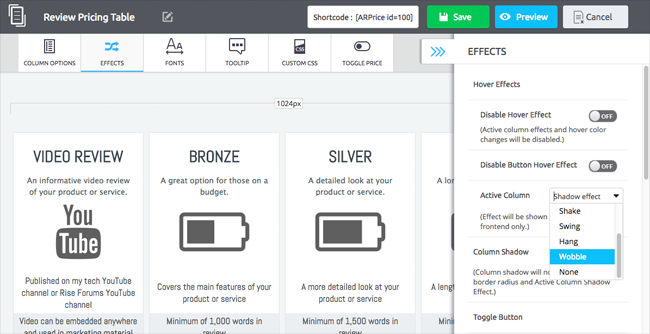
Seven hover effects are available for when a user hovers over a column or a button. This includes hover effect, shadow effect, pulse, shake, swing, hang, and wobble. By default these effects are switched off.
Other options in this area include a spin effect on the toggle button and column rotation.
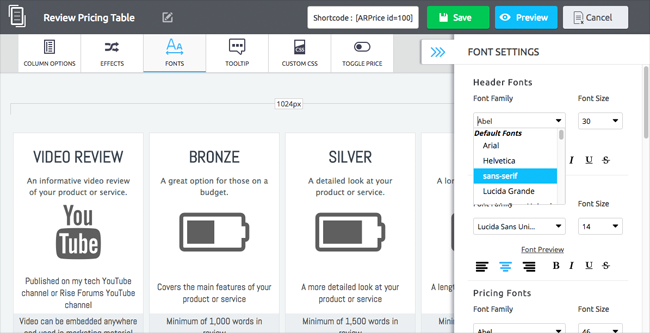
The font settings of each section can be modified. You can change the font family, the font size, the alignment, and apply bold, italic, underline, and line-through (which is useful for showing discounts).
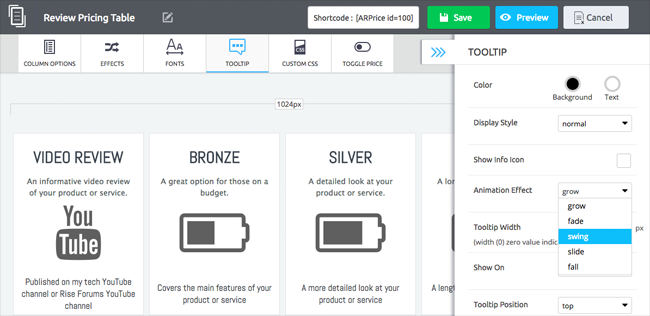
Three different style of tooltip are available: Normal, alert, and glass. An icon can be displayed and you can define the position of tooltips.
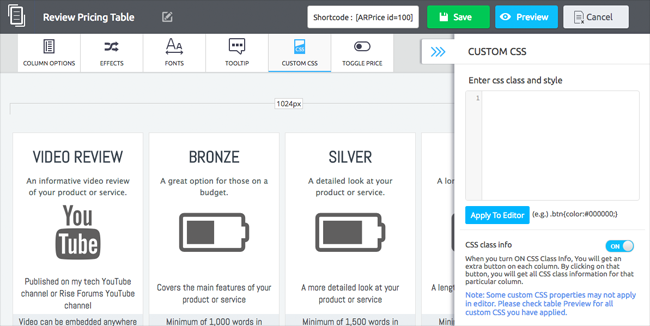
Custom CSS code that is used exclusively for a particular pricing table can be added via the Custom CSS box. There is an option underneath to display CSS class info.
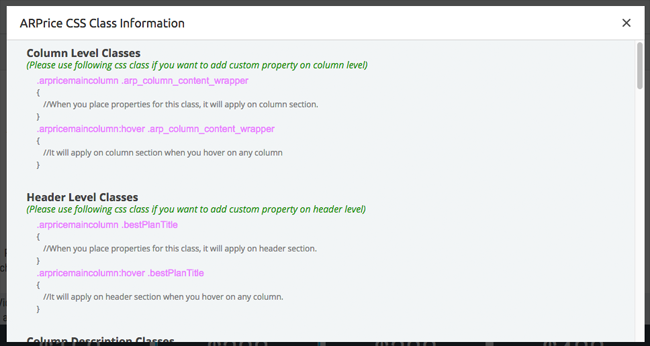
Enabling the CSS class info option adds a button to the bottom of the column sidebar to show CSS class information. When you click on the button a box will appear that explains what CSS classes are being used for that particular column.
The toggle price feature really helps ARPrice stand out against its competitors as it allows users to add additional pricing options for each plan.
You can enable two steps or three steps. Two steps could be used for showing different pricing options for monthly and yearly plans. Three steps could show pricing for monthly, quarterly, and yearly. These are just examples as you can name the steps anything you wish.
A switch style or radio style toggle can be displayed and you can define the background colour and text colour for active and inactive tabs.
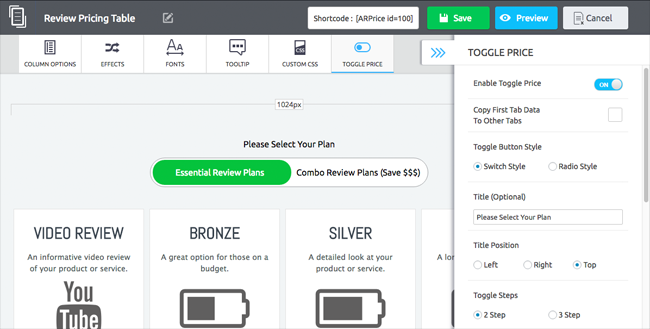
Initially, the columns that are displayed in the additional tabs are blank, but if you use the copy option at the top of the toggle price panel you will copy over all content from your original tab.
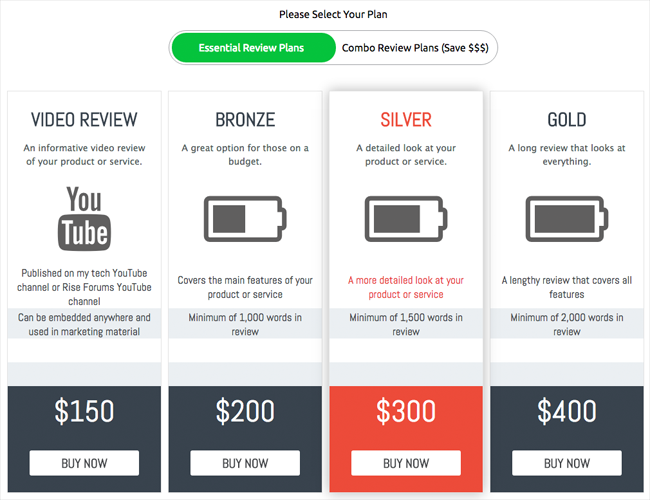
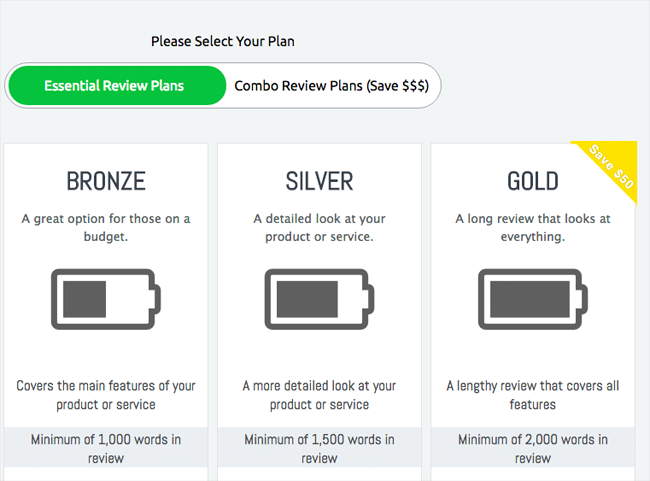
The Completed Pricing Table
You can see the first draft of my pricing table below.
This may not be the version you see on my review information page when you are reading this article as I am planning on tweaking it as time goes by. I may change colours and descriptions and add additional pricing plans.
Once you have saved a table, it will be added to your list of tables on the main ARPrice page. From here you can preview tables, select tables, clone tables, and delete them.
I welcome the inclusion of the cloning feature. This is very useful during testing. For example, if you have a table that is live on your website, you can clone the table and play around with the design until you have it the way you want. Then once you are happy with it you can use the updated table on the frontend of your website.
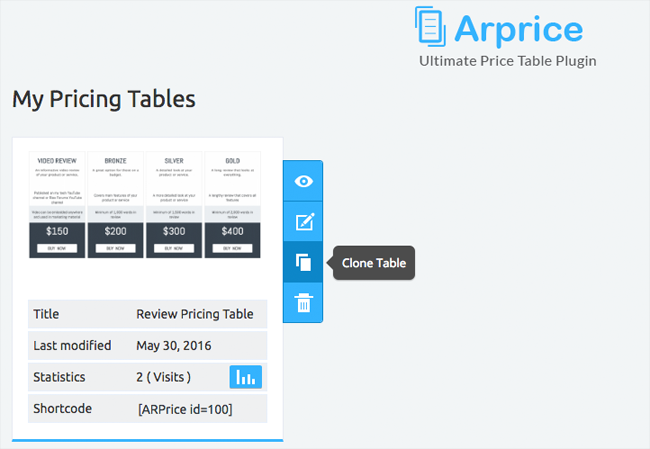
Clicking on the graph icon on the table list loads up analytics for the table.
You can see stats on a daily and weekly basis across any date range. Views, clicks, and conversions, are all tracked. It also informs you of the day of the action, the browser being used, the user’s IP address, and what plan the user clicked (if any).
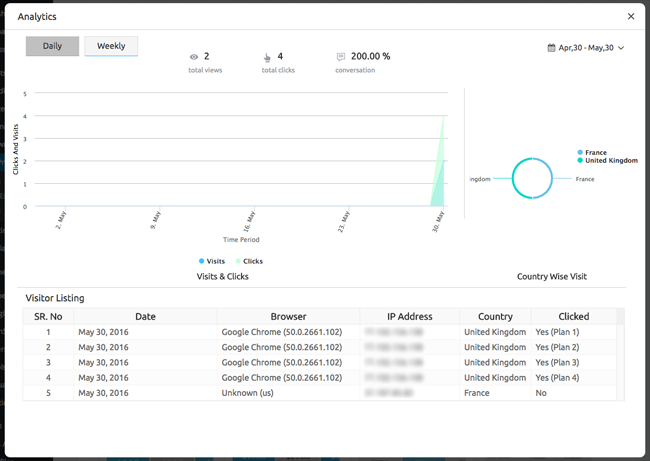
The inclusion of statistics is a nice touch. Moving forward, I will be able to how often my pricing table is viewed and what plans people are clicking. I could track the total number of conversions by checking the sales figures in my PayPal account, but this is much more user-friendly and it will also help me see whether would-be customers are clicking to buy a review and then changing their mind.
Small Bugs and Suggestions on How ARPrice Can Be Improved
Overall I am happy with the plugin, though there are some areas in which ARPrice could be improved.
I found toggle price to be a great feature, but it did not work exactly the way I wanted it to.
What I wanted to do was offer four pricing plans in the first tab and three in the second. Unfortunately, that is not possible. Each tab has to have the same amount of columns.
As the name suggests, “Toggle Price” lets you change the pricing of plans when the user chooses a different payment schedule or structure. I had wrongly assumed that it would be possible to simply use a second and third tab to display completely unique pricing tables.
The problem I encountered is that the columns from one tab are connected to the columns in another. This was obviously by design, but I did still find it to be a little bit of pain.
When you move your columns into a different position, they will be moved in the other tabs as well. If you change the background colour of column rows, they will be changed in all tabs.
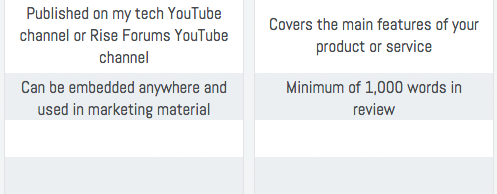
I found it a little frustrating that the columns in each tab had to have the same number of rows. The columns in my first tab display two rows of features while in the second tab they have four rows. This results in the first tab displaying four rows despite there only being two rows of content.
Here is an example of the feature rows in the second tab of my pricing table.
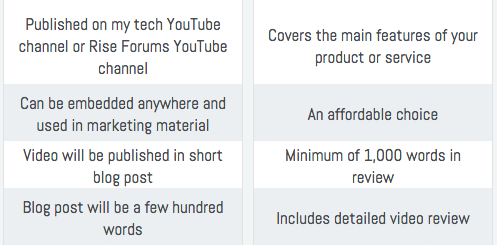
In the first tab, only two rows of features are published. Despite this, four rows of content are shown.
None of these issues are deal breakers and I realise I am trying to use the plugin in a way it was not designed.
I would however love to see an option to remove the connection between tabs and disable the association of columns between tabs. This would allow users to take advantage of additional tabs and gain full control over how the content is displayed in their tables.
One error I did find was with the application of ribbons.
Ribbons look really great on columns. I wanted to display them in the columns of my combination pricing plans as buyers save a little money.
I went through the process and added the ribbon via the column settings sidebar.
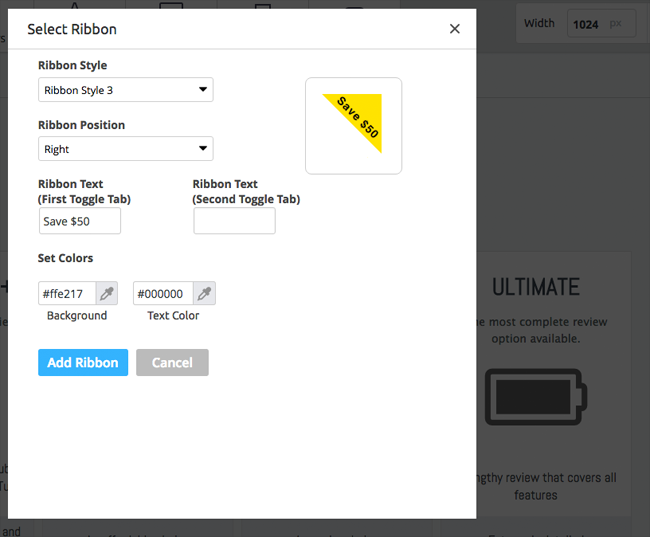
Despite adding the ribbon to the column in my second tab, the ribbon is added to the column in the first. This means that the ribbon is promoting a saving in a pricing plan where there is no saving.
I tested this several times to make sure I was not doing something wrong, but it is clear that this is a bug that needs addressed in the next version.
One of the plugin’s greatest features is its templating system, however it is also an area in which I think the plugin needs to be improved.
As it stands, the table creation process requires you to select from one of twenty-two templates, build your pricing table, and then customise the styling and colours and effects.
This process works really well though the problem with this setup is that you cannot simply switch from one template design to another.
If I decide to change my pricing table to another table template, I cannot simply change the design. What I need to do instead is create another pricing table from scratch using another template and then copy over all the content. This includes header text, descriptions, button modifications, the buy it now links, and more.
It could take me more than thirty minutes to copy all the structure and content of my pricing table to a new table template.
Ideally, ARPrice needs to introduce an option in which an existing table can use a different template at the click of a button. I do appreciate that some ARPrice templates have a different structure than others, but there needs to be a way to speed up the process of changing the design of an existing pricing table.
Please note that those of you who use a caching plugin such as WP Rocket will need to clear your cache if you make any modifications to your pricing tables. This is caused by your caching plugin, not by the ARPrice plugin.
All in all, there aren’t too many gremlins in the ARPrice system. From time to time the user interface clicked away when you didn’t want it to, but this is a problem that most drag and drop interfaces suffer from. By and large the interface works exactly in the way it should.
Pricing and Support
ARPrice is available from CodeCanyon for only $21. Your purchase allows you unlimited updates forever and support for six months. An additional six months of support can be purchased for $10.50.
ARPrice is a user-friendly WordPress plugin that is easy to use. I found everything to be self-explanatory, but if you are unsure about anything you can refer to their extensive documentation area for the plugin. Alternatively, you can open a support ticket and get direct help from Repute InfoSystems.
I did find some spelling mistakes in the plugin and in the documentation area, but it is difficult to criticise the developers for this as English is not the first language of the developers and these small issues do not affect the functionality of the plugin or the quality of support.
$21 is a great price for a plugin with this level of functionality and I have no doubt that those of you who buy it will recoup their investment quickly by increasing conversions on their sales page.
If, however, you do not have a budget for the plugin, I encourage you to download and install the free version of ARPrice. It is a fantastic plugin in its own right and provides many of the great features you will find in the pro version.
Final Thoughts
ARPrice has been continually improved since its release at the start of last year. The version that was used in this review is 2.5, which just got released a few days ago. It added two new templates, lots of new styling options, and many improvements to existing settings.
It’s encouraging to see the developers improve the plugin with such frequently. I spoke with the developers and more features are being added over the next few weeks, such as additional samples to import.
With support for video and audio and native support for Google Maps, ARPrice can be used for more than simply pricing tables. The table I built for my own purposes was made in a short space of time. If I was to spend more time adding unique images and icons and change the colour scheme a little, I am sure the table would look more professional.
If you want to see firsthand what ARPrice can do, download the free version from WordPress.org. That will help you see what the premium version offers.
I also encourage you to check out the official demo page of ARPrice to see one hundred and fifty different examples of ARPrice tables. It is the perfect way of seeing what designs can be created and it will undoubtedly give you inspiration for your own pricing tables.
If you have any questions about ARPrice, please leave a comment below.
Thanks for reading.
Kevin