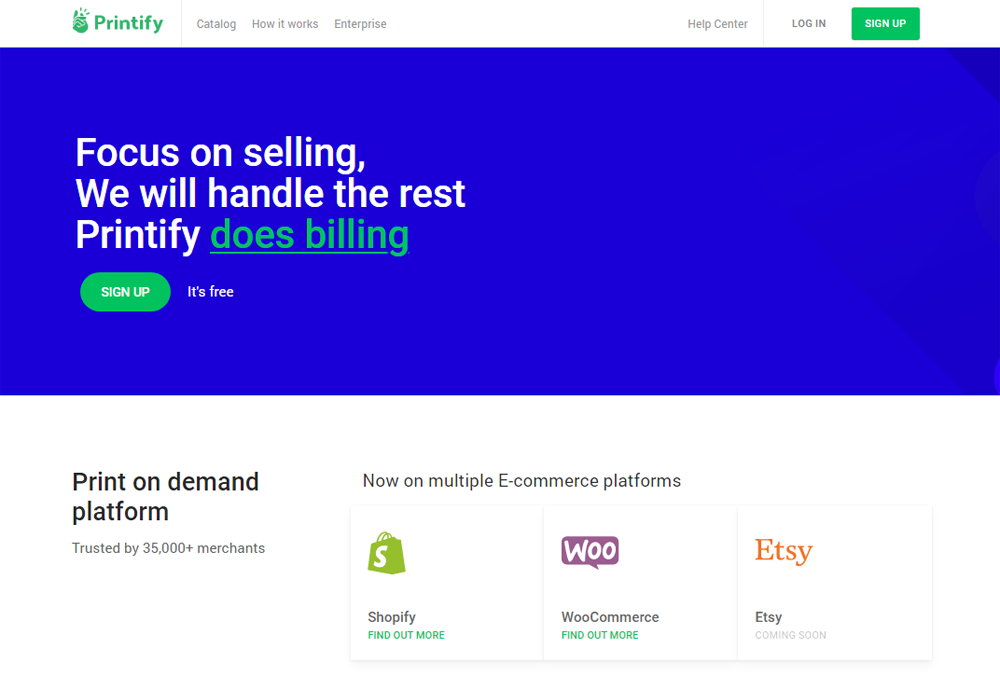
Printify is a Print on Demand dropshipping service that works with Shopify and WooCommerce. At the beginning of October it will also work with Etsy
A “Print on Demand Dropshipping Service” simply means that you set up a shop and create products and another company, in this case Printify, handles everything else. They take care of fulfillment, billing, and delivery.
Check out my video review below to see a walkthrough of how the service works.
Let’s take a closer look at how Printify works and how you can use it to make money online.
How Does Printify Work?
Printify has a very simple selling system.
The first thing you need to do is register with their service. Their service is completely free to use so you don’t have to worry about taking your credit card out.
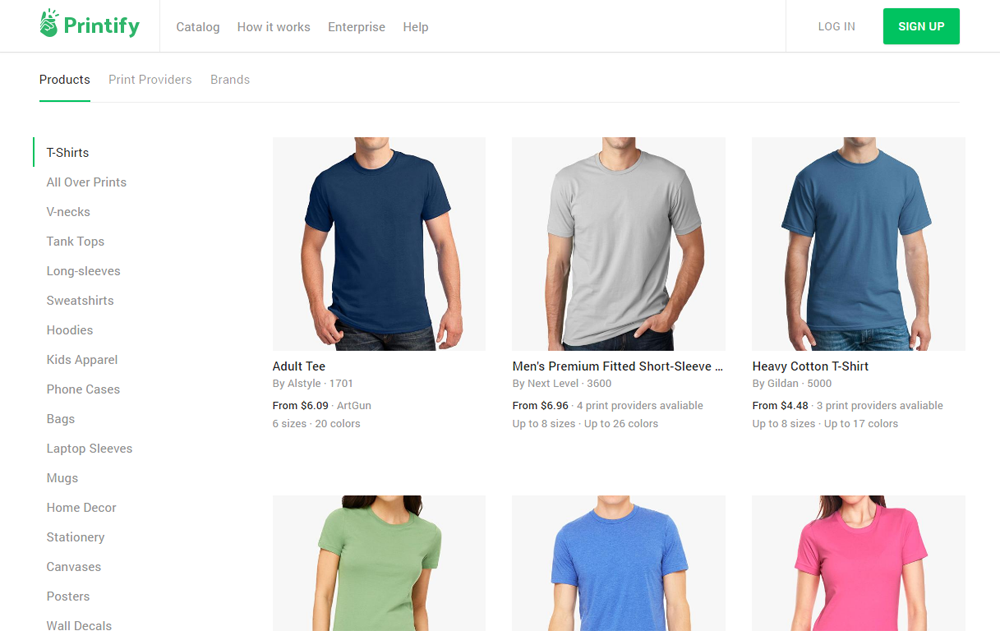
Next you need to browse their extensive product catalogue of clothing, bags, mugs, phone cases, stationery, and more. You can choose products from a host pf popular brands and print providers.
Once you have selected a product, you can customise it with designs, logos, photos, and more.
When you are happy with the product, send yourself a sample to see if the product is exactly how you want it to be.
If you are happy with how the product has came out, you can add them to your store and start selling them to the world.
Printify handles the fulfillment of the products to customers at competitive prices and offers domestic delivery of just two to three days.
If you don’t have experience building websites, you can use Printify with Shopify. If you do have experience building websites, you may want to integrate Printify with your WooCommerce powered store instead.
As you can see below, integrating Printify with WooCommerce is straight-forward. The whole process is easy and will allow you to make money online without needing to handle billing and stock and delivery yourself.
Setting Up Your Store
Once you have went through the speedy registration process you will be take back to Printify. The navigation area will show the product catalogue, your store, orders, and discounts.
At this point you should navigate the product catalogue and choose a product you would like to sell on your store. For each product you can change from a range of different styles and sizes and colours. You can also select the product provider and see the average fulfillment time.
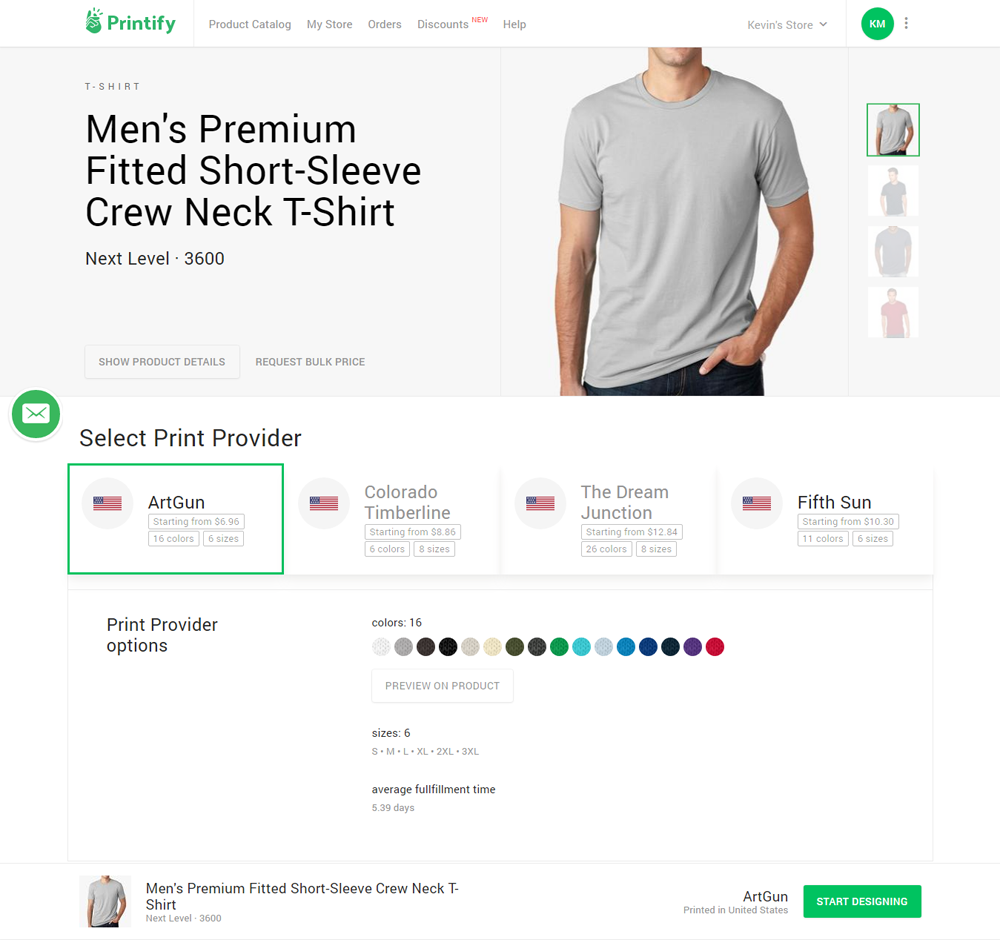
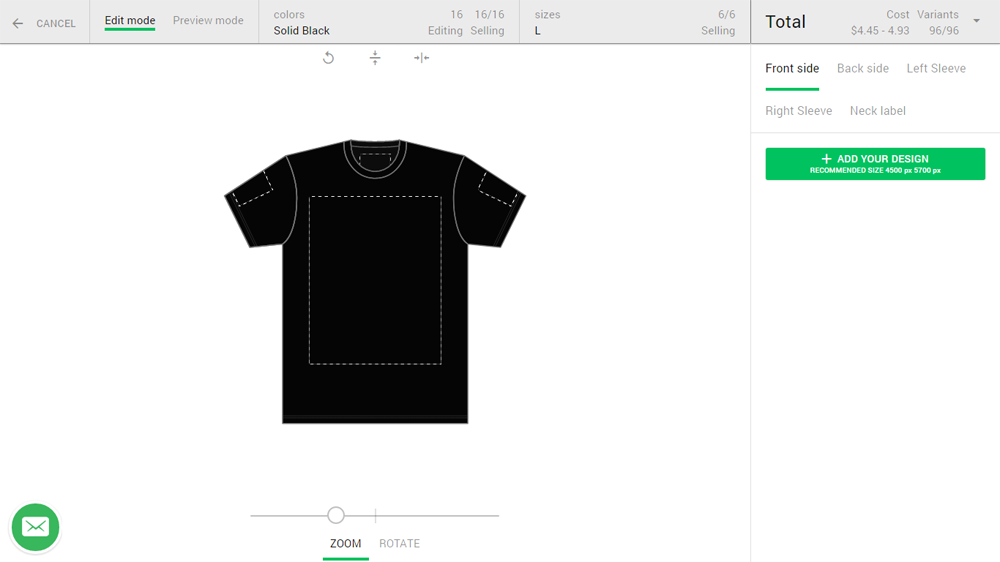
When you click on the start designing link you will be taken into the product edit area.
From here you can customise your product. A 50MB file can be uploaded directly or via Google Drive or Dropbox.
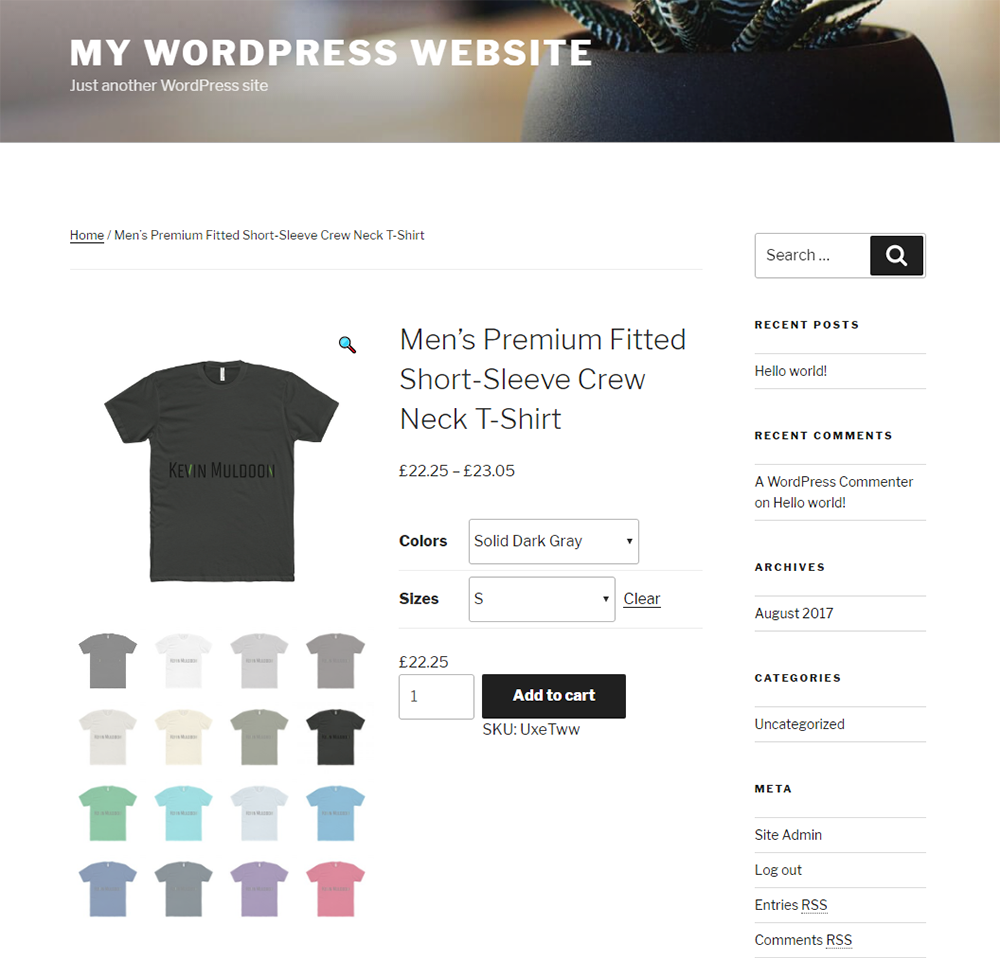
For t-shirts, you can add designs to the front, back, and sleeves. You can add a neck label too.
Designs can be uploaded via the “Add Your Design” button.
You will need to source your own images for this by either designing them yourself or buying them from a graphical resource website.
I do appreciate this policy as it means that users are forced to make sure their products are unique, though I think the service would be a lot more user-friendly if they provided users with a large selection of stock images and designs. Then store owners could source unique designs once their store gets up and going.
Printify could also use these stock images to create pre-made products that users could use as a template for their own unique products.
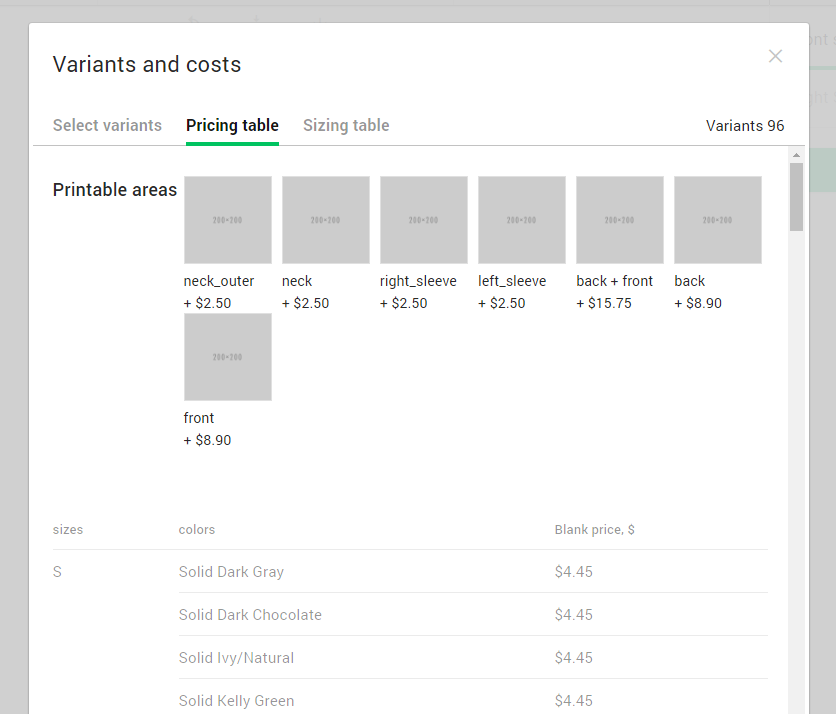
The cost of each product depends on a number of factors.
Size does not change price much. In the example below a small t-short costs $4.45 and a 3XL costs $4.93.
It will set you back $8.90 for the back or front, $15.75 for both, $2.50 for a sleeve, and $2.50 for the neck. Be sure to be mindful of the total cost of your product or your final product may be too expensive.
For each image you upload you can change the size and positioning and scale and rotate the design. Multiple layers can be uploaded for each part of your product.
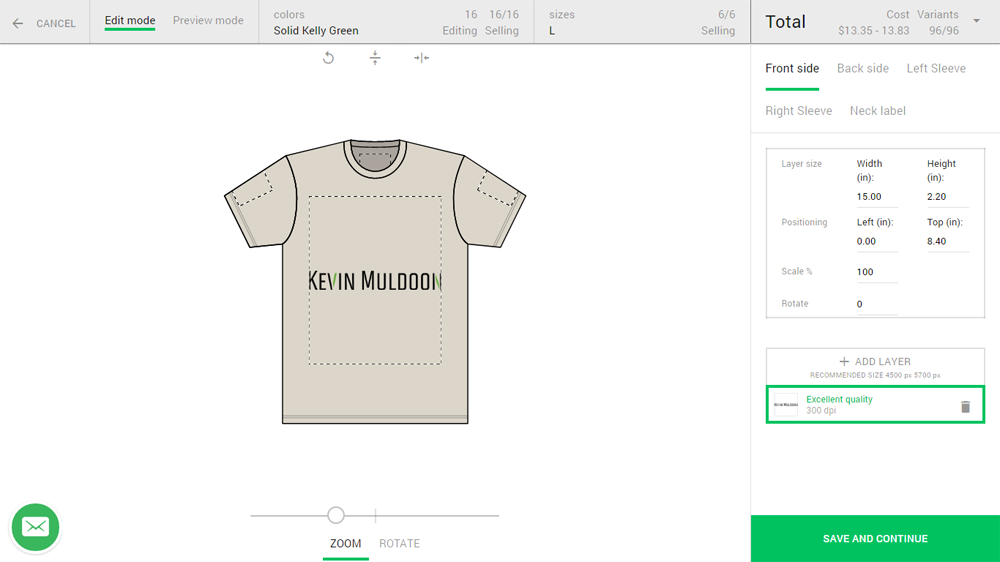
In the next area you can see mockups of your products in a range of colours.
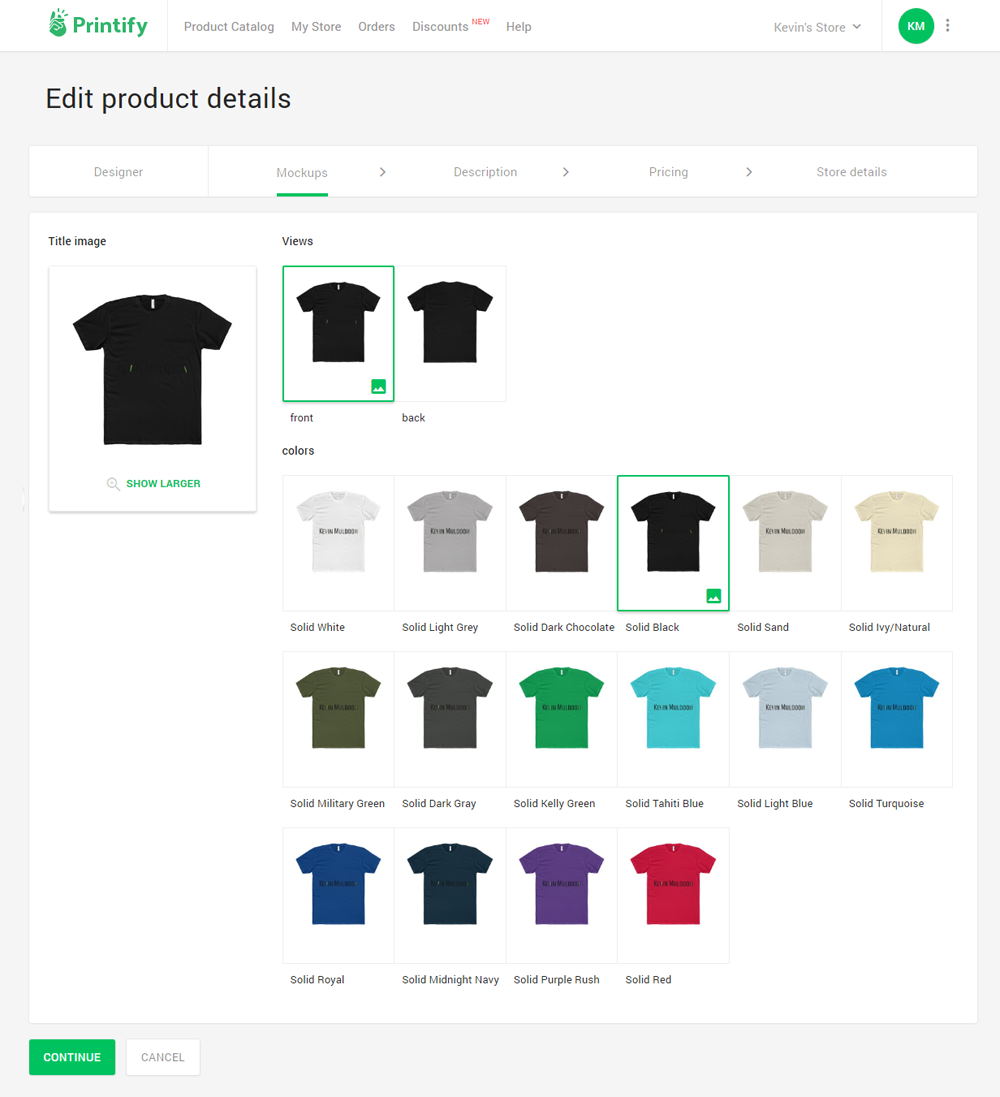
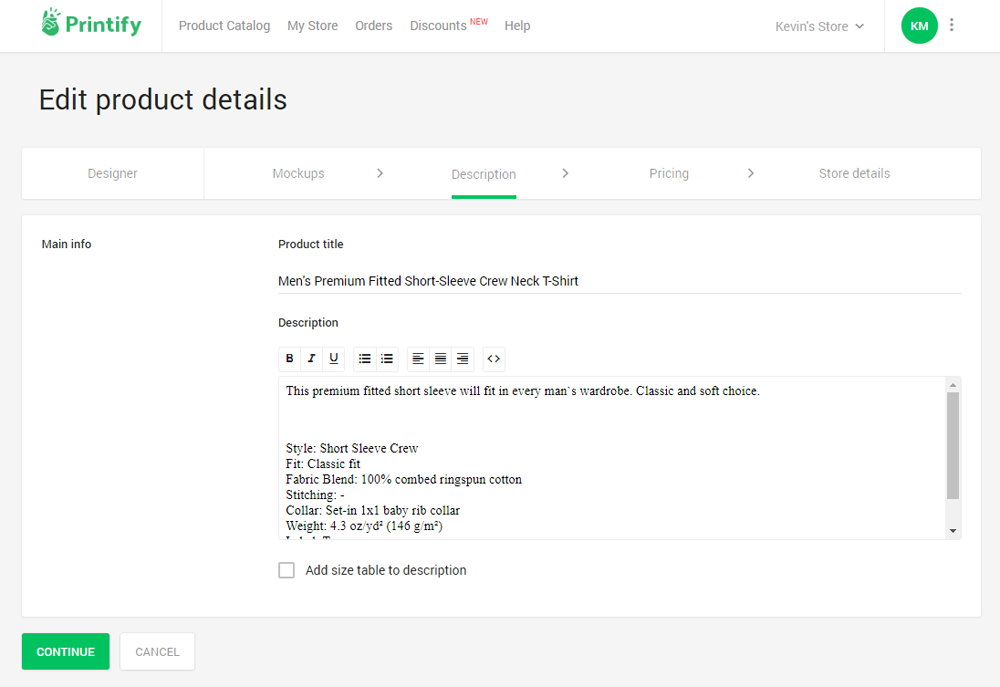
Next you can modify the product title and description.
Printify automatically adds information about your product to the description. This includes style, weight, fit, and more. There is an option to add a size table to the description too.
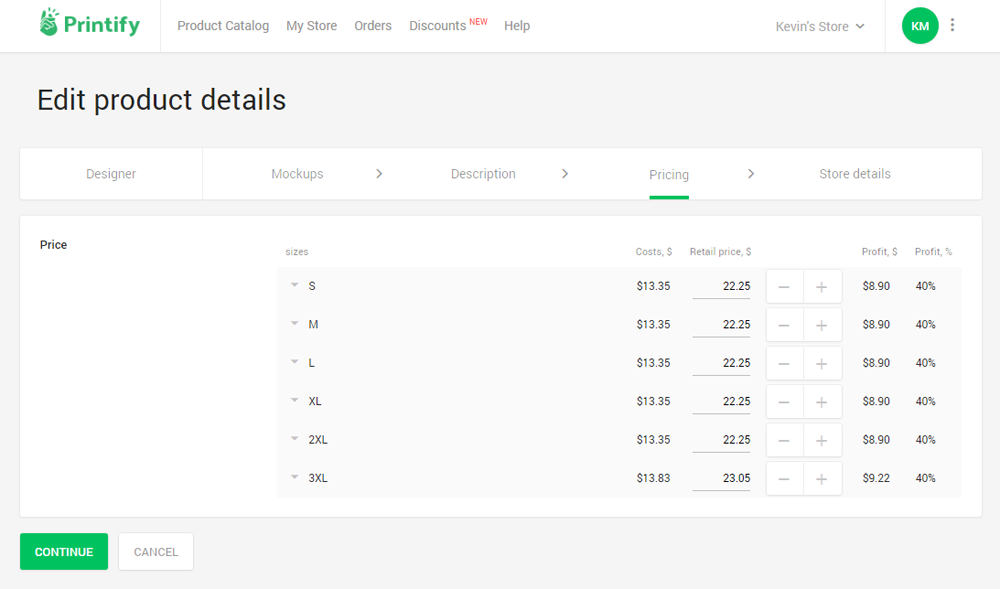
Pricing can be set in the next area.
Here you can see the cost of all your product variations and set the selling price for each one. Profit is shown in dollars and as a percenage of the total product price.
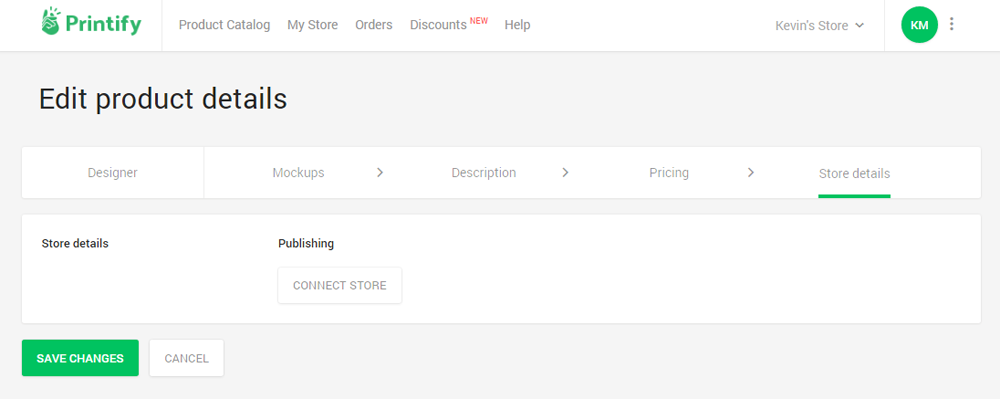
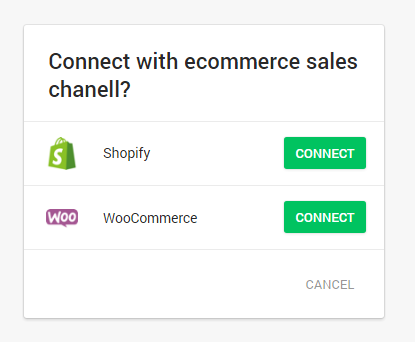
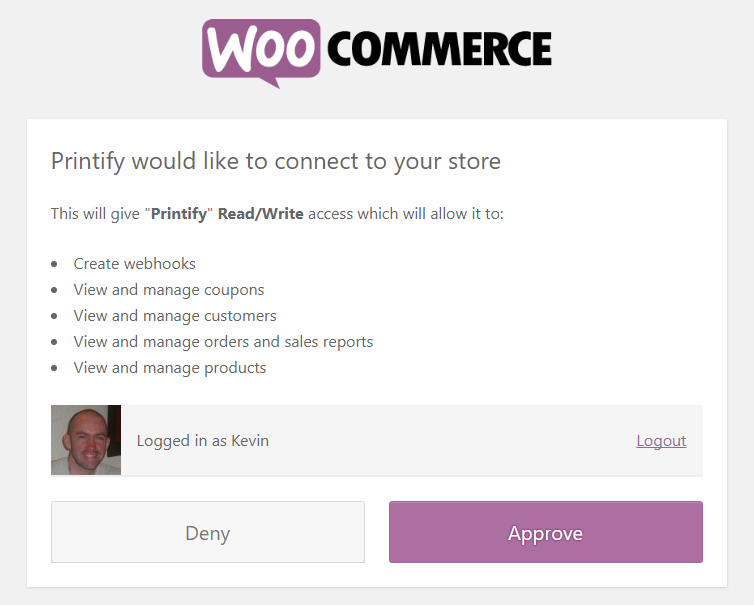
You will then be asked to connect your store.
I chose WooCommerce as my store and followed the WooCommerce integration steps to make sure everything was set up with the Printify for WooCommerce WordPress plugin.
Make sure you connect your store to Printify.
Printify will automatically calculate shipping in your store at checkout. Nothing needs to be manually adjusted as everything will be synced from Printify to your store.
Your products are synced to your store quickly. Very quickly. They get synced to your store in a matter of seconds.
Final Thoughts
I was impressed with what Printify could do. It is not a complete solution, though it looks like it can help shop owners make money.
To improve the service I believe Printify need to offer a large design library so that people can easily set up products without having to source them themselves. Alternative print on demand solutions offer this so this feature is a must.
Printify is free to use, though if you don’t currently own any websites you need to either choose Shopify, which costs $29 per month and up, or build a WordPress website, which requires at least a $5 or $10 hosting plan.
This is still a very low barrier for starting your own online store. Additionally, the beauty of Printify is that you do not need to use it on its own. Existing store owners can use Printify to add additional items to their existing store and increase profits. You could be leaving money on the table by not doing this.
Since Printify is free to use, I highly recommend signing up and trying their service out to see if it is a service you think you can make money with.
Good luck.
Kevin