
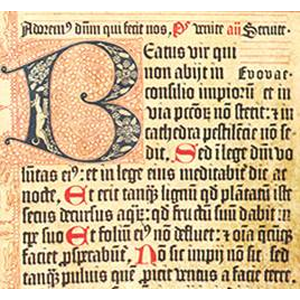
Online and offline magazines frequently style the first character of an article. It’s a simple yet effective way of making your content more attractive. The technique is sometimes referred to as “Drop Caps” or “Initial“.
Styling the first character of your content is very simple. You can do this manually within an article by using a span. For example, I could double the size of the first letter of an article by doing something like this:
<span style="font-size:200%;">W</span>elcome to my blog.
This would produce the following:
Welcome to my blog.
If I was styling the first character of articles frequently, it would make more sense to handle styling through the stylesheet. That is, I would use something like:
<span class="firstchar">W</span>elcome to my blog.
And then add this to my stylesheet:
.firstchar {font-size:200%;}
The above example is obviously very simplistic. You can improve the styling by using some basic CSS (i.e. changing the font, margins, colour etc.). Chris Coyier from the always amazing CSS Tricks wrote a great article a few years ago which shows you how you can style the first character.
By using the pseudo-elements first-child and first-letter, you can automatically mark up the first character of all your articles. Chris gave the following example:
p:first-child:first-letter { float: left; color: #903; font-size: 75px; line-height: 60px; padding-top: 4px; padding-right: 8px; padding-left: 3px; font-family: Georgia; }
This would produce the following:
Welcome to my blog. There are many like it, but this one is mine. My blog is my best friend. It is my life. I must master it as I must master my life. My blog, without me, is useless. Without my blog, I am useless.
Note that the above method will not work in older versions of Internet Explorer (that pesky browser always creates problems with CSS).
The WordPress Way
WordPress users will be pleased to know that there is a plugin available that helps you style the first character of content. Entitled Initial Letter, the plugin is perfect for those of you who are not comfortable editing templates directly.
The plugin gives you basic controls over how the first character is styled. You can choose from a range of different fonts, the size of the character, the vertical alignment, and the font colour. The styling can be applied to all paragraphs, though I think it is better to only apply styling to the first paragraph.
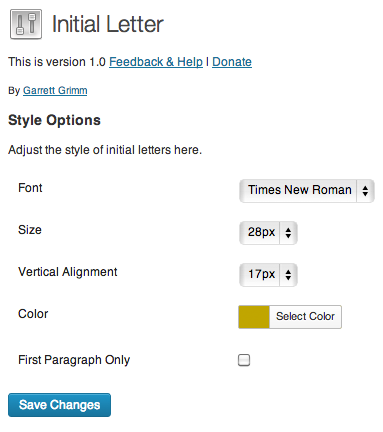
Whilst the plugin is great for making the first character stand out, you are better styling your content using CSS if you want complete control over how your content is styled. Though it’s a great solution for most people as simply changing the size, font and colour, is enough to make a paragraph stand out.
Good luck,
Kevin
It’s better to style that by using CSS, but you can do it in HTML using the hpsace amd vspace attributes if you like e.g. hpsace=”10″ vspace=”10″.
As you would expect, these stand for horizontal space and vertical space.
You have more control with CSS. All you have to do is add something like id=”authorbio” to your stylesheet.
Then you can style it in your stylesheet. e.g.
.#authorbio {
margin:0 5px 5px 0;
float:left;
}
The above will add a margin to the right and to the bottom, but not to the top and left. This is the best way to do it if you are aligning the image to the left hand side.
:)
Kevin
Kevin, trying with SimpleCode and pasting the code received but says “INVALID TOKEN”. Anyways below the HTML code
img src=”http://www.bloggingslogan.com/wp-content/uploads/2013/04/me.jpg” align=”left” width=”80px” height=”82px” margin=”3px”
Text alignment is shown at left BUT I need some space between PIC and TEXT
You need to strip the HTML code first so that it can be posted here. You can do that at SimpleCode.
img src = “” height = “” width =”” border=”3px” / >
CSS code :
Thanks Sagar.
Unfortunately, your CSS code did not post correctly. Can you try and post it again :)
I should be able to help you with this.
Kevin
Cool tips Kevin. Highlighting first on core niche like self development, health, blogging can be benefictial. Also I feel if you are writing an article as story based tone then having such highlight can make it more user friendly.
Image Border related Issue:
Kevin, I have some problem with img border which I’m not able to do it on my Blog linked with comment. If you check my ABOUT ME widget on footer4, I’m not able to set BORDER:3PX, my css code is
Am I doing any mistakes??? Please correct me