- Why WP Rocket?
- Website Optimisation Before Activating WP Rocket
- How My Website Performed Before Using WP Rocket
- Optimising Your Website with WP Rocket
- How Does WP Rocket Perform in 2017?
- Making Sense of My Performance Results
- Enhancing My Results with Autoptimize
- What's the Verdict on WP Rocket?
- Final Thoughts
WordPress caching plugins are an essential part of optimising a WordPress website.
For a long time I used W3 Total Cache. Packed with hundreds of options, W3 Total Cache could be quite overwhelming for WordPress beginners, but the reason I stopped using it is because it was causing some SEO related issues.
In 2014 I switched to the newly released WP Rocket. Whereas the majority of caching plugins are free to download from WordPress.org, WP Rocket was (and still is) a premium plugin, however it offered many optimisation features that could not be found in other solutions.
For a long time I believed that WP Rocket was by far the best optimisation plugin available for WordPress, but a lot can change over three years so I thought it would be good to look at WP Rocket with a fresh pair of eyes and review it again.
Check out my video review of WP Rocket below.

My written review can be seen below. In the review I delve deeper into WP Rocket and examine exactly how much the plugin improves the performance of your website.
* The version of WP Rocket I have tested for this review is 2.9.11.
Why WP Rocket?
Unfortunately, this review starts with a story of procastination.
You see, my license for WP Rocket expired a year ago. Rather than renew immediately, I continued to use the version I had (Version 2.6.5). When I later upgraded to PHP 7, this older version of WP Rocket no longer worked so this website was no longer optimised in the way it was before.
The universe was telling me it was time to optimise my website again. I looked upon this as an opportunity to do a case study and test lots of different caching solutions.
However, such a case study takes time to prepare. I did not want this blog to be slow whilst I spent a lot of time testing things out. I wanted to find a good solution right away.
There are a lot of good caching plugins available, including newer plugins I haven’t extensively tested such as Cache Enabler from KeyCDN, but it is hard to see past WP Rocket.
WP Rocket has always been very effective at reducing page loading times and it does everything at the click of a button. Additionally, I was lucky enough to meet most of the WP Rocket team in 2015 at WordCamp Europe and was impressed with how passionate they are about their product.
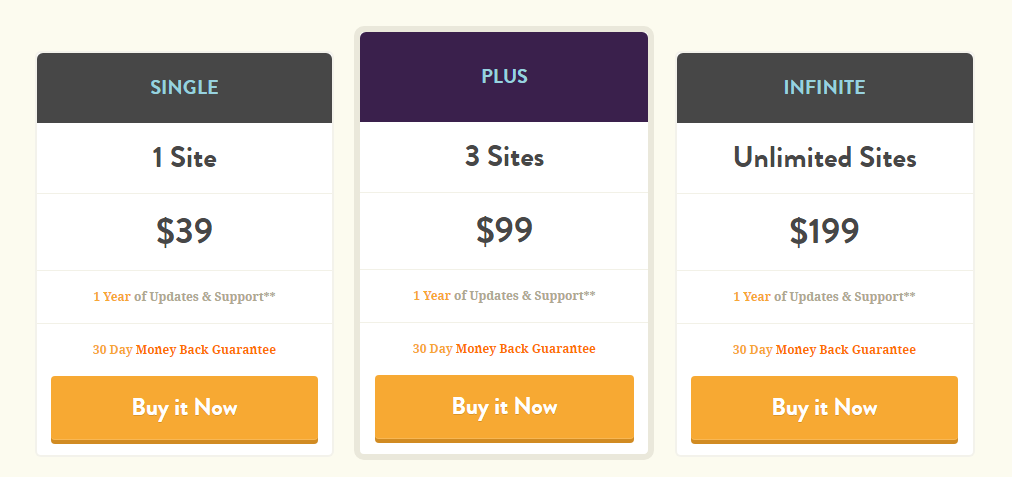
I opted for the personal license and used a 10% discount code that was advertised on the WP Rocket website to reduce the total cost.
Website Optimisation Before Activating WP Rocket
It may seem strange to optimise your website before activating WP Rocket, but it is the fairest way to see how WP Rocket is actually improving the speed of my website.
Truth be told, I did not do that first (Oops!). I initially activated WP Rocket and it highlighted the problem with a few problematic plugins, so I deactivated the plugin and then began the process of optimising this website.
Certain things, such as large images and WordPress plugins that make many external requests, are going to reduce website performance whether you are using a caching plugin or not. It is therefore best to address problems like that before comparing performance tests of using WP Rocket and not using it.
To point me in the right direction, I entered my website address on website speed testing services such as Pingdom, GTmetrix, and Google PageSpeed Insights.
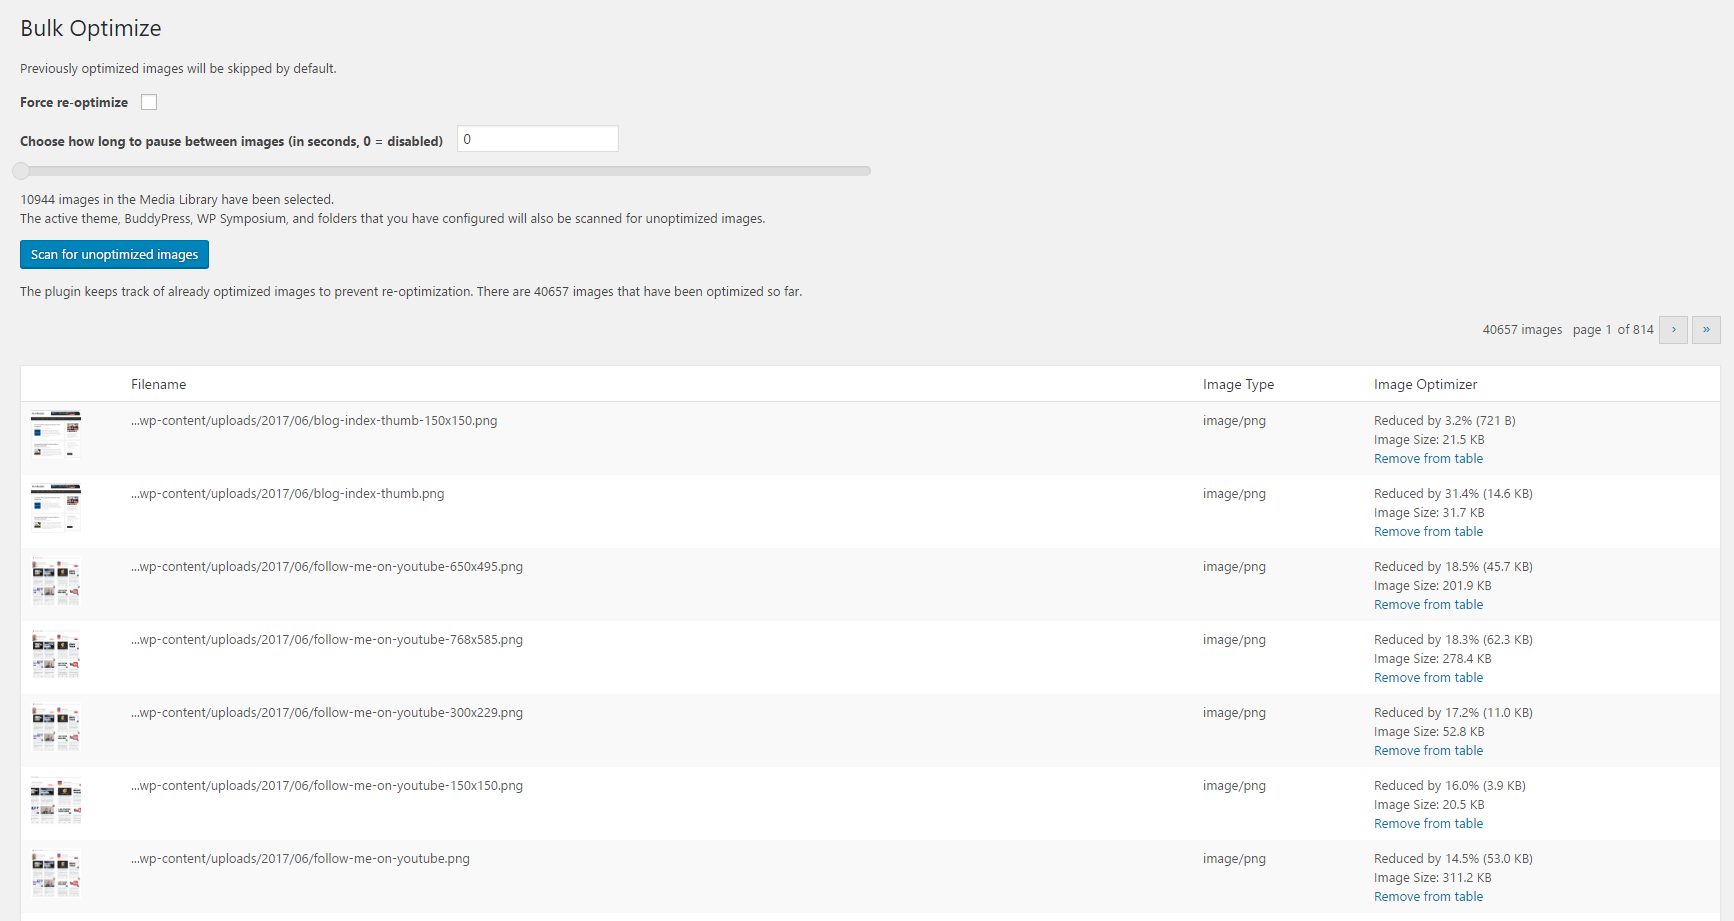
The first thing I did was optimise the images on my website.
There are a lot of plugins available that help you do this, but I opted for EWWW Image Optimizer since it is free to use. The plugin reduced the size of a whopping 40,563 images on this website.
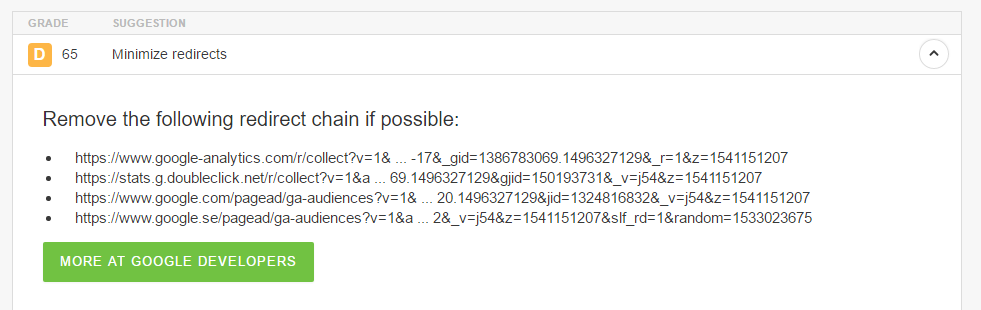
Next I reduced the round trip that Google Analytics needs to do address the “Mininize Redirects” issue. To address this issue I disabled demographics and advertising reporting in Google Analytics.
It did not resolve the issue completely. I looked into the issue more and saw that the best way to stop redirects from Google Analytics is to store the Javascript file locally.
My friend Brian Jackson from Woorkup published a fantastic tutorial on how to do this manually.
A simpler solution is to use the free WordPress plugin Complete Analytics Optimization Suite. Make sure to disable features functionality in the plugin settings area to completely stop redirects.
To help improve the speed of my blog posts and pages, I stopped displaying the counter for social media shares. I am, however, continuing to use the plugin Easy Social Share Buttons to display profile buttons and sharing buttons.
For a long time I have displayed my latest YouTube videos on my home page and footer using the Yottie YouTube WordPress Plugin. It’s a fantastic plugin, but it really slows down the pages it is on due to external requests and thumbnails that are hosted externally, so I have relegated my latest YouTube videos to a dedicated page about my YouTube channels.
I was pleased to see a huge improvement in my page loading times and performance as soon as Yottie was removed from most pages.

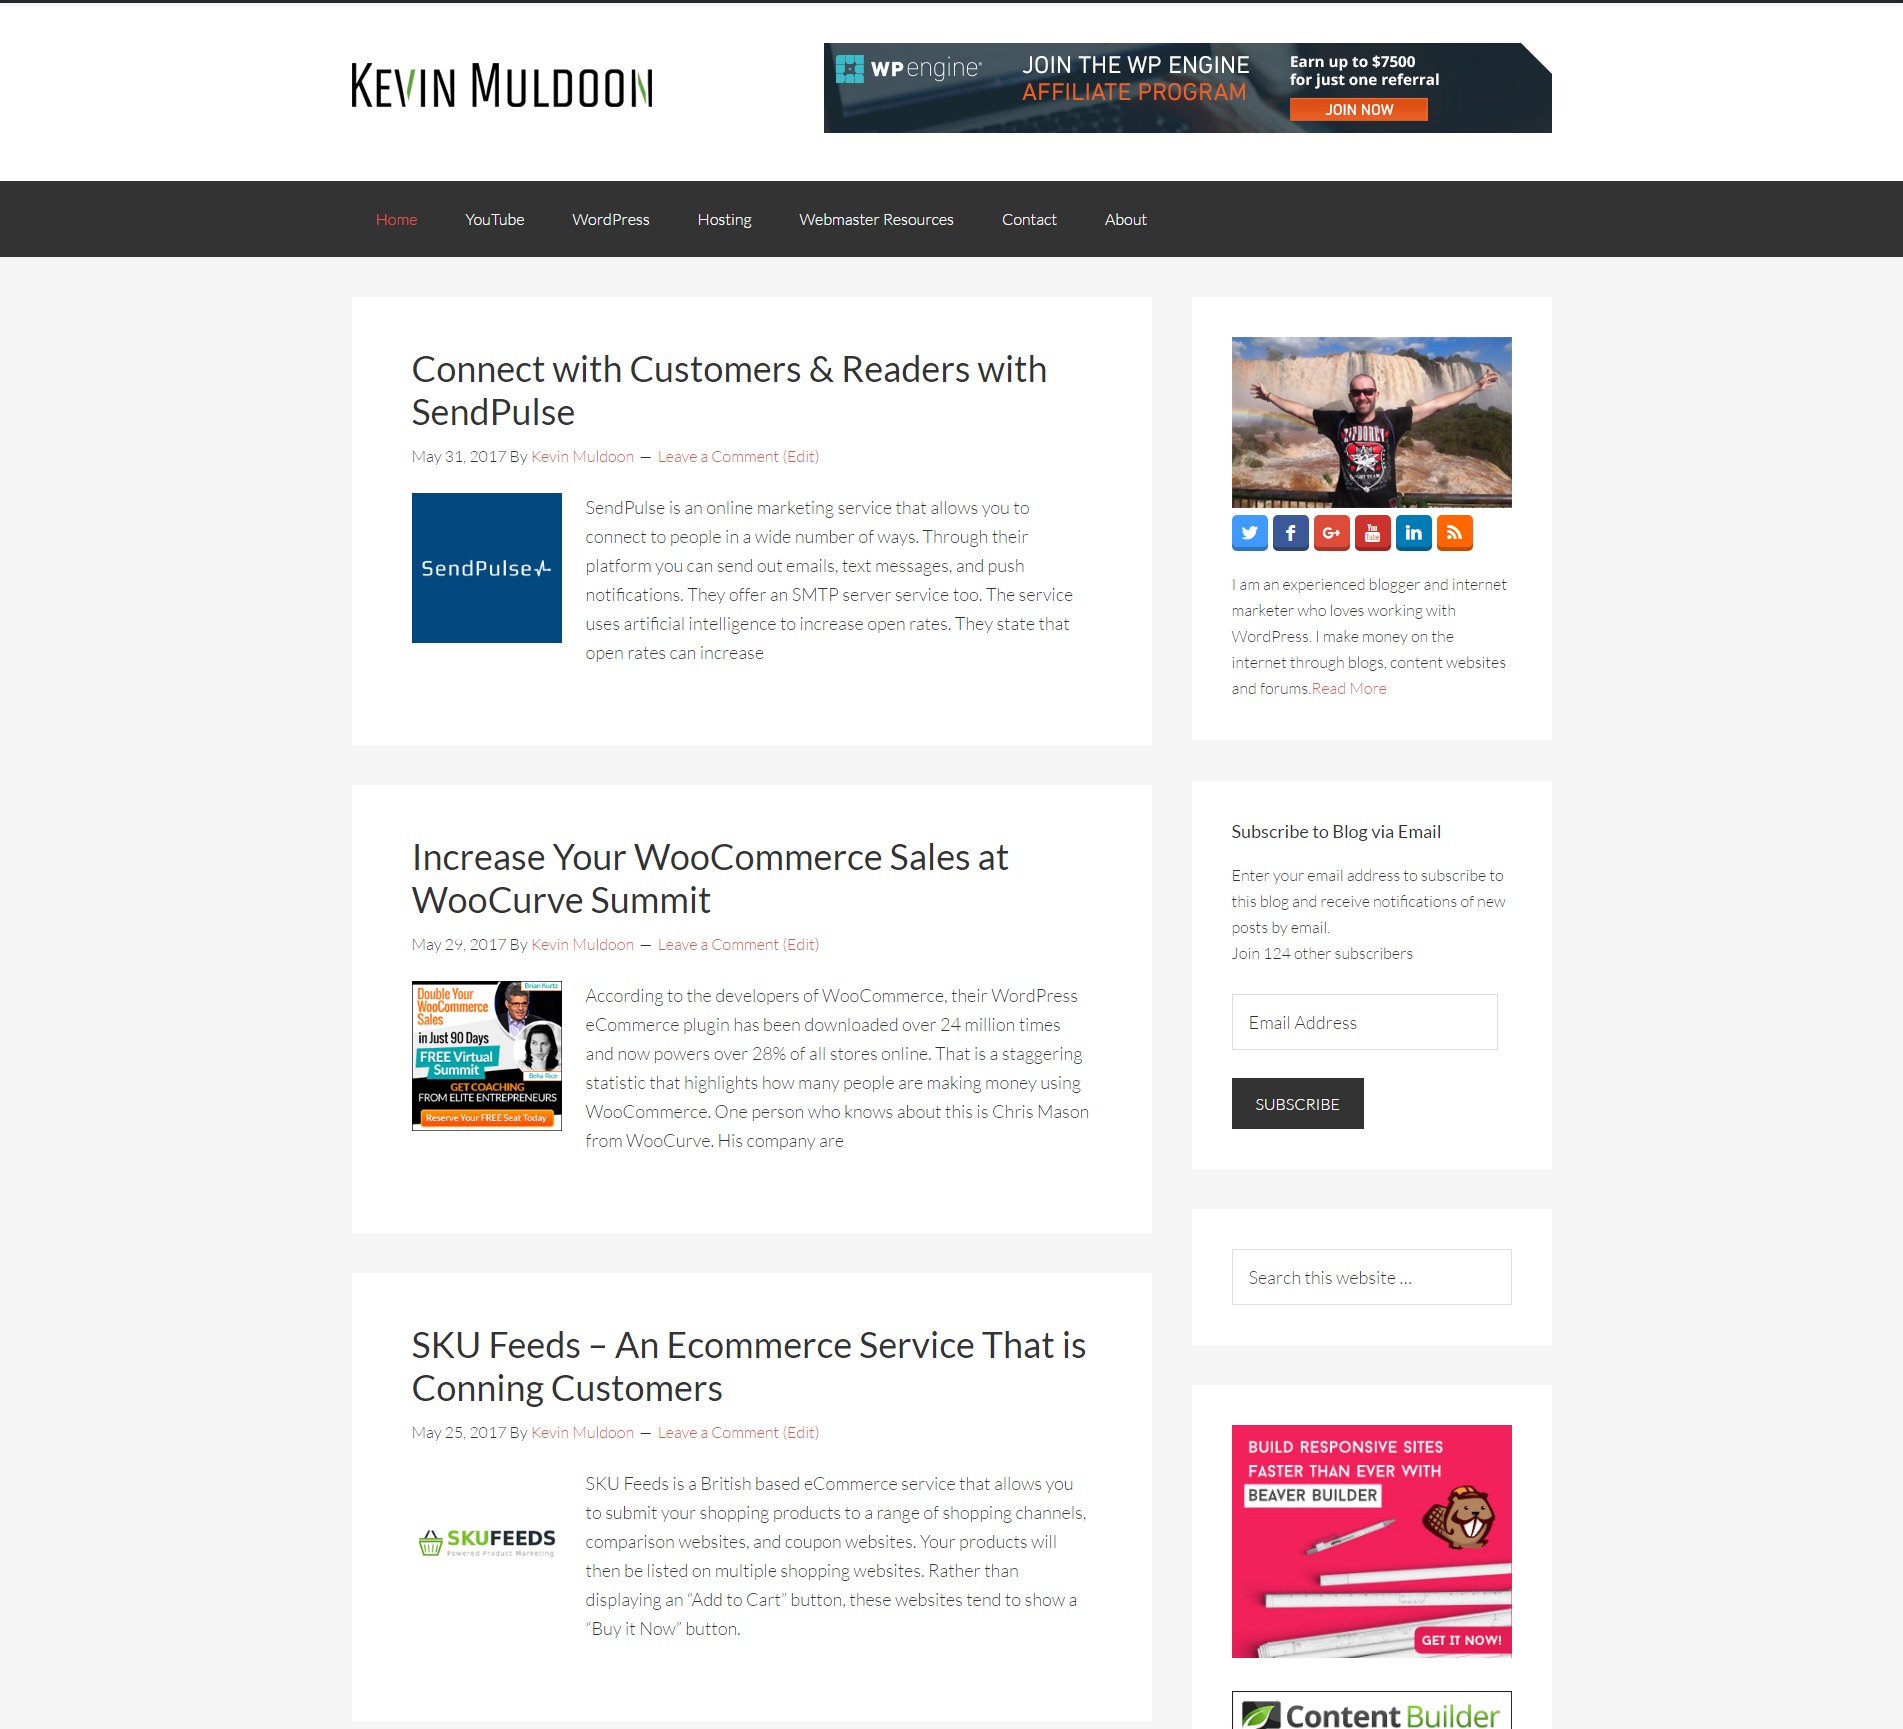
Next thing I did was move my blog index from www.kevinmuldoon.com/blog/ to www.kevinmuldoon. This was an easy decision to make once I removed videos from my home page and it means that more focus is on my articles.
Despite telling all website owners to optimise their websites, Google can be quite problematic when it comes to performance. I had used Google Adsense on here for a long time and found that displaying advertising ads from their network caused redirection issues, external request issues, and more.
I therefore made the decision to remove Google Adsense from this website and display banner ads for WordPress related products and services instead.
Google fonts are a pain too. If I was using them directly I could maybe host them locally, but since they are being called through my drag and drop page builder Visual Composer, I have yet to find a way to cache them locally (hopefully I can find a solution later). My WordPress theme uses Google Fonts too so that is something I should be able to change in the future.
Another warning I saw on Pingdom was “Serve static content from a cookieless domain”.
This error refers to the fact that the images on this website are uploaded to the main domain and that domain uses cookies. In order to stop this error, I need to host my images on a sub-domain of my website (e.g. images.kevinmuldoon.com) or use a content delivery network to host the images.
I plan on giving KeyCDN a try soon and doing a review for all of you guys. Their service should eliminate most cookieless domain errors, however I may not be able to fully stop this from happening since since I use Cloudflare and they add a security cookie to my main domain.
The above modifications did not turn this blog into the fastest website on the internet, but I did improve performance significantly and remove many problems that I should have addressed a long time ago.
How My Website Performed Before Using WP Rocket
A slow website frustrates visitors and makes them click the back button on their browser. We all know that it affects search engine rankings too.
The question is: How slow was my blog before using WP Rocket?
That was something I obviously wanted to test.
The tests I am about to show you illustrate how this website was performing after performing the changes mentioned above, but before activating WP Rocket. No caching plugin was installed at the time so bad results are to be expected, though I was taking advantage of Cloudflare’s free content delivery network.
There are many benchmarking services that can be used, but it becomes a little redundant to show scores from many different services. Still, I wanted to test a few different services so that I got a complete picture of where my website stood so I decided to show scores from three services.
I chose Pingdom because it is a favourite of many developers and I chose GTmetrix because I had used this service three years ago in my previous review of WP Rocket and wanted some consistency with that.
I also tested my website with Google PageSpeed Insights because many website owners strive for that perfect score of 100/100 (ultimately, a perfect score is meaningless, but many people do aim for it).
The two pages I am checking are my home page and a recent review I published of Beaver Themer.
Let’s start with my home page.
Before using WP Rocket, Pingdom gave my website a performance grade of E (56%), load time of 1.54 seconds, a page size of 771.5KB, and a total of 55 requests.

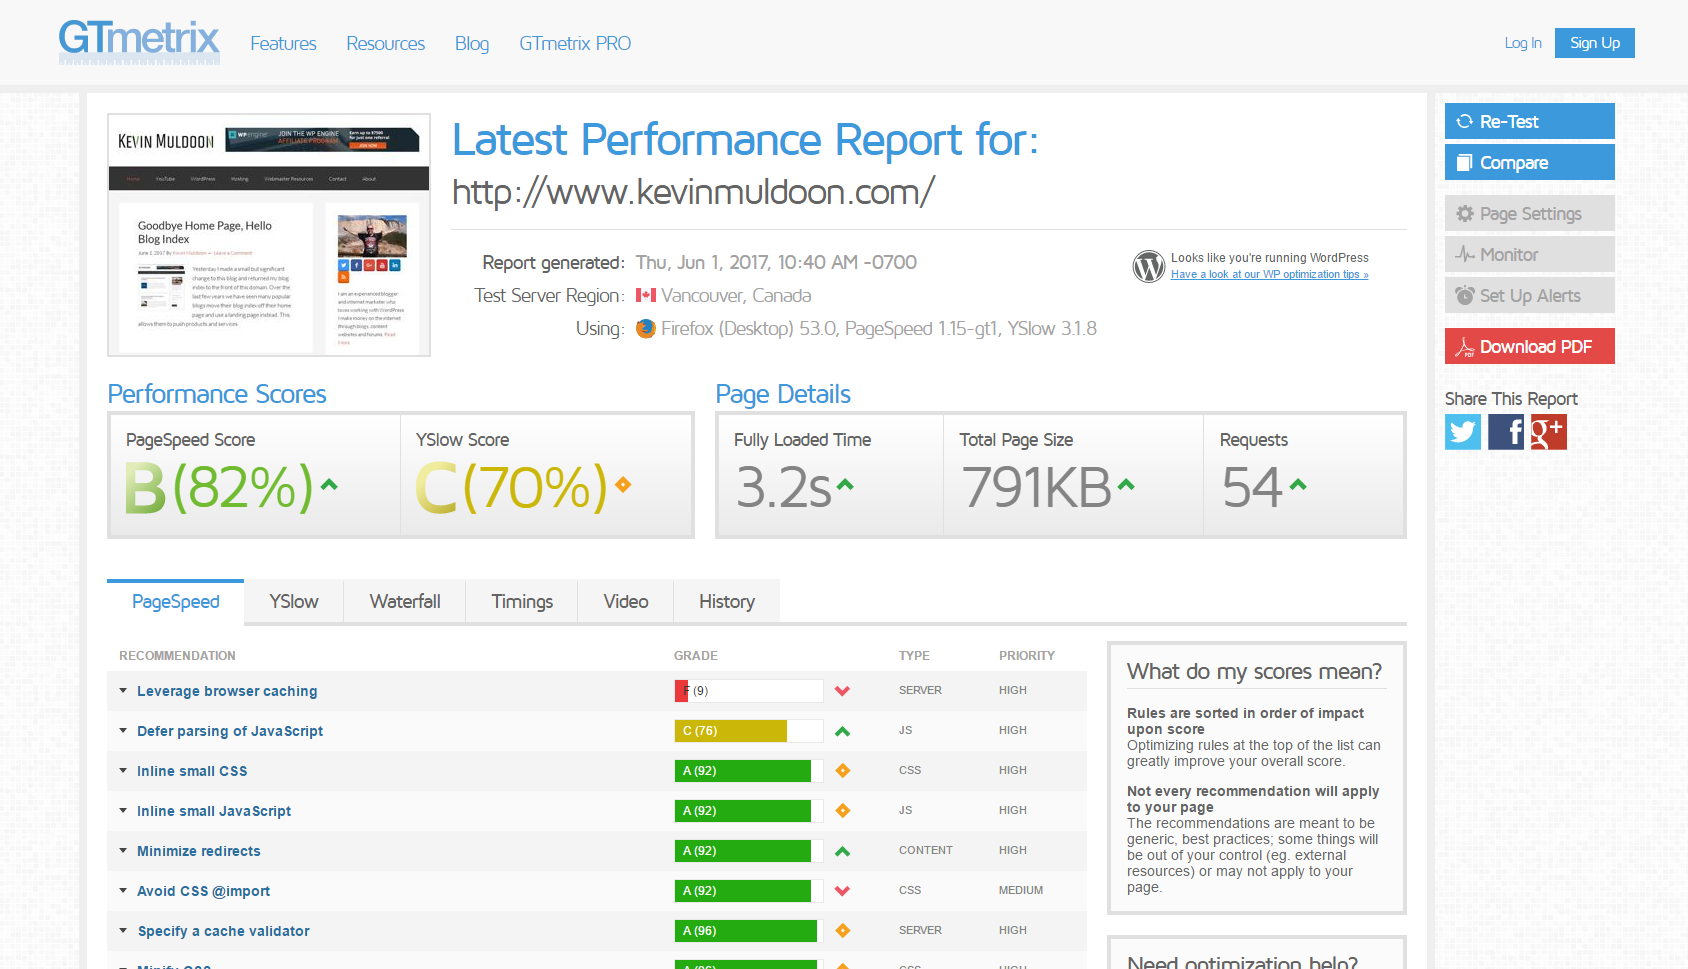
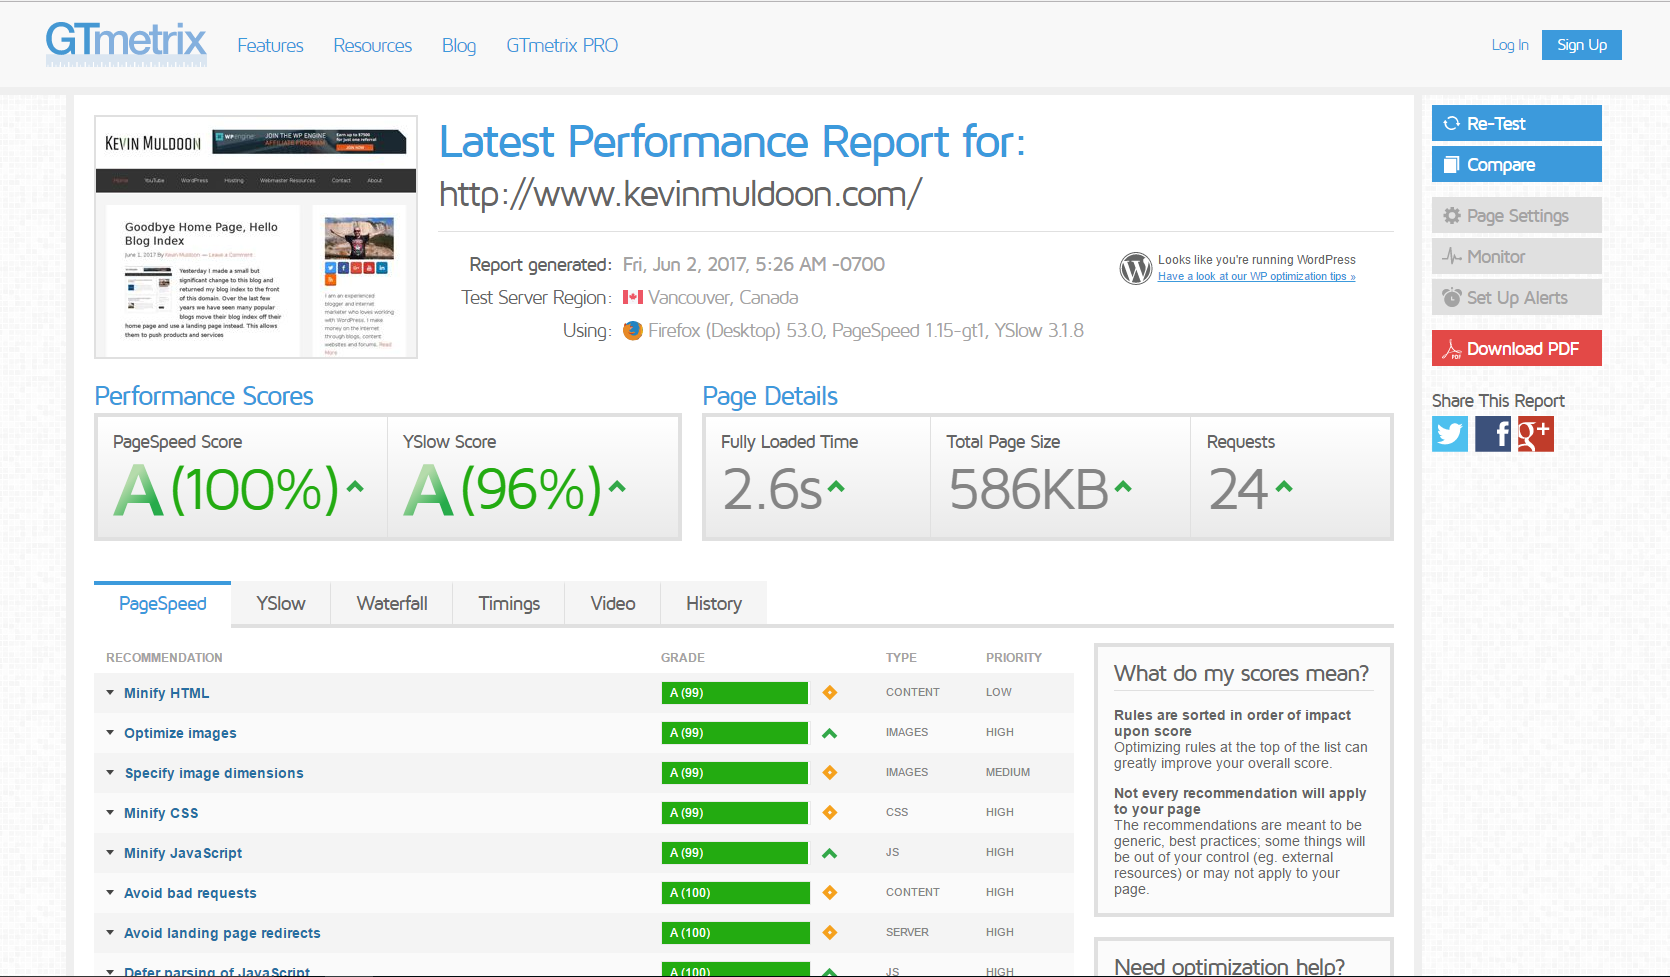
GTmetrix showed a PageSpeed score of B (82%) and a YSlow score of C (70%). Load time was 3.2 seconds, page size was 791KB, and a total of 54 requests.
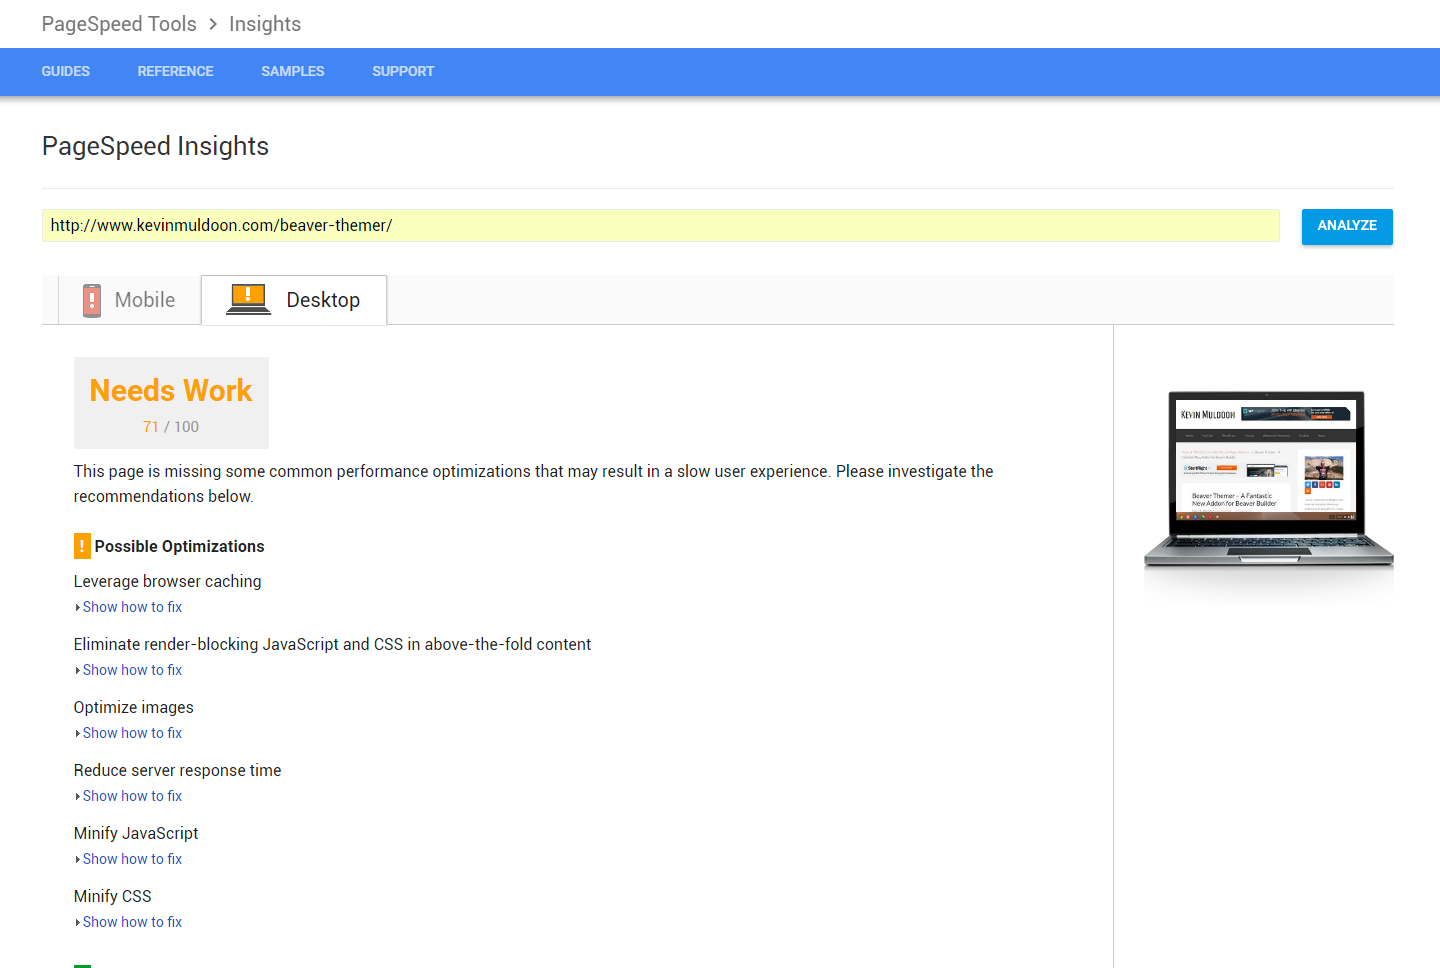
Google PageSpeed Insights showed a score of 61 for mobiles and 76 for desktops.

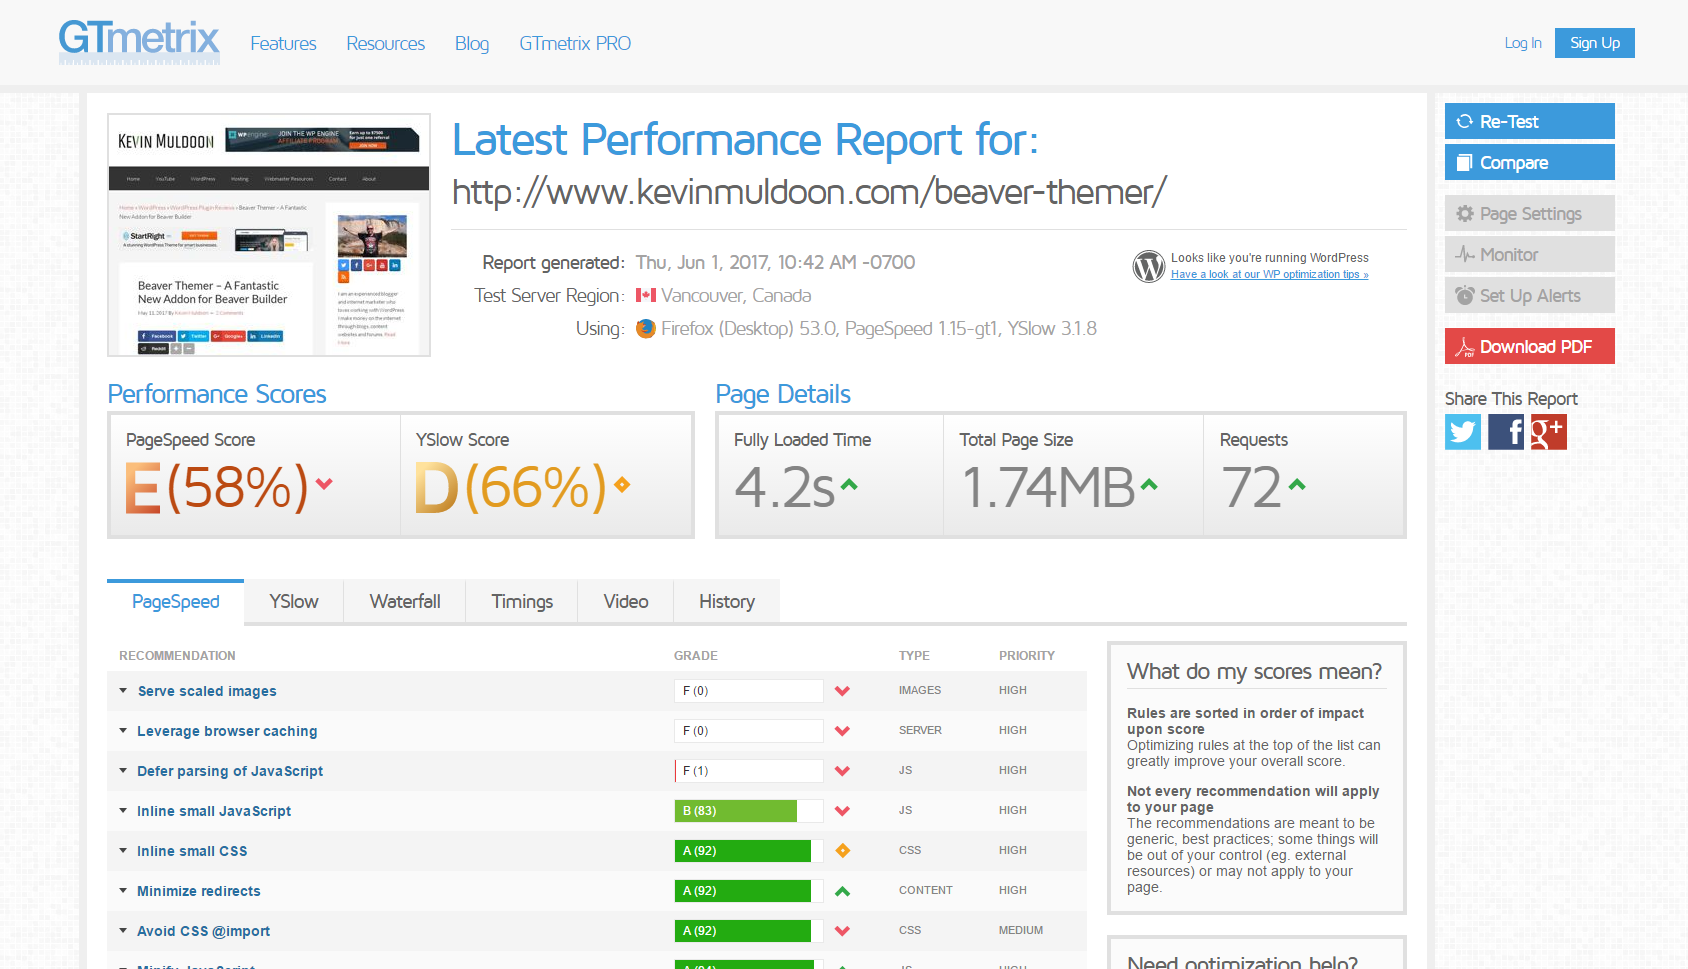
Next I tested my review of Beaver Themer. This is as good as an example as any other blog post or page on my blog as it displays the blog sidebar.
Pingdom gave my blog post a performance grade of E (58%), a load time of 2.38 seconds, a page size of 1.7MB, and a total of 80 requests.

On GTmetrix I got a PageSpeed score of E (58%) and a YSlow score of D (66%). The page took 4.2 seconds to load the 1.74MB page size and 72 requests.
Google PageSpeed Insights showed a score of 58 for mobiles and 71 for desktop.
It is worth noting that benchmarking services typically report slightly different values to each other. Additionally, every time you test a page the overall loading time may be different due to server response times and other factors.
Still, there is no denying that without utilising a WordPress caching plugin, my website performance is not very good.
What really surprised me is how little different Cloudflare’s content delivery network was to the performance of my website.
Optimising Your Website with WP Rocket
WP Rocket boasts a huge number of features that will help reduce the poor performance of my slow website.
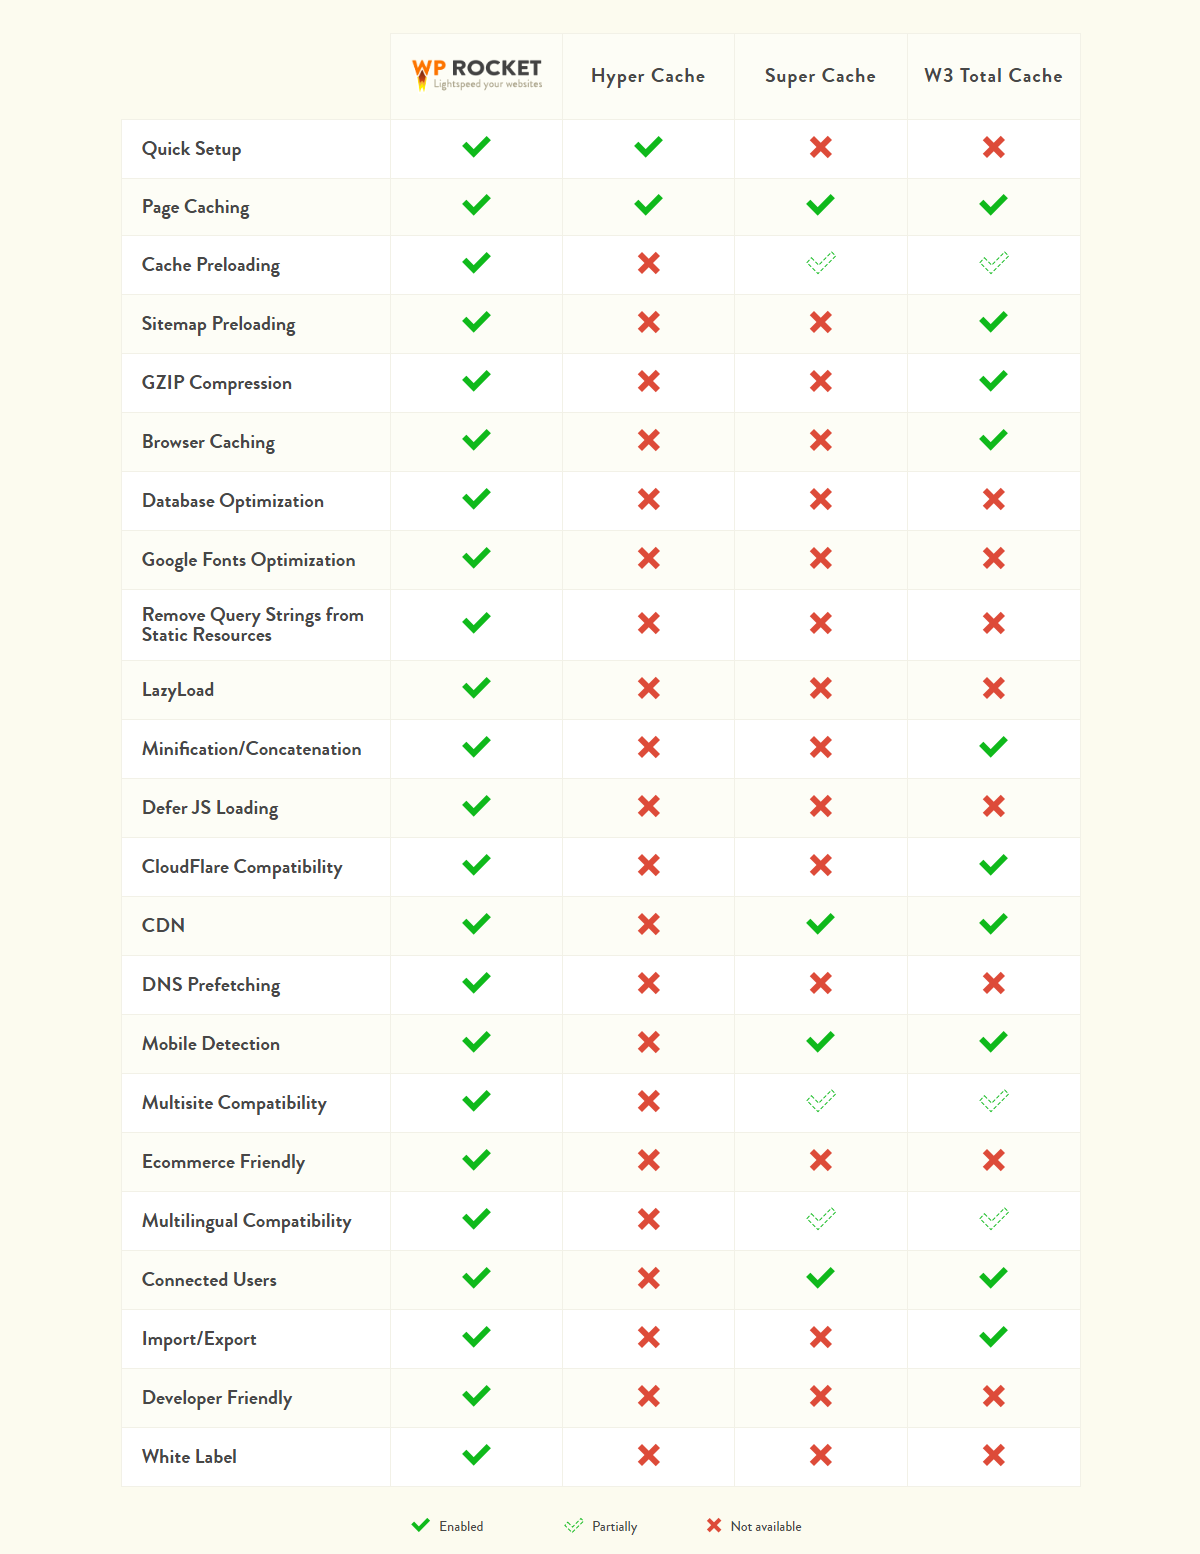
You can see what WP Rocket can do in their features page. Since WP Rocket launched, their features grid has compared WP Rocket to Hyper Cache, WP Super Cache, and W3 Total Cache.
This grid has been there since the launch of WP Rocket in 2014, but looks out of date now as many features that these other caching plugins did not have at the time have since been added. For example, today Hyper Cache does have support for content delivery networks and W3 Total Cache has support for Cloudflare.
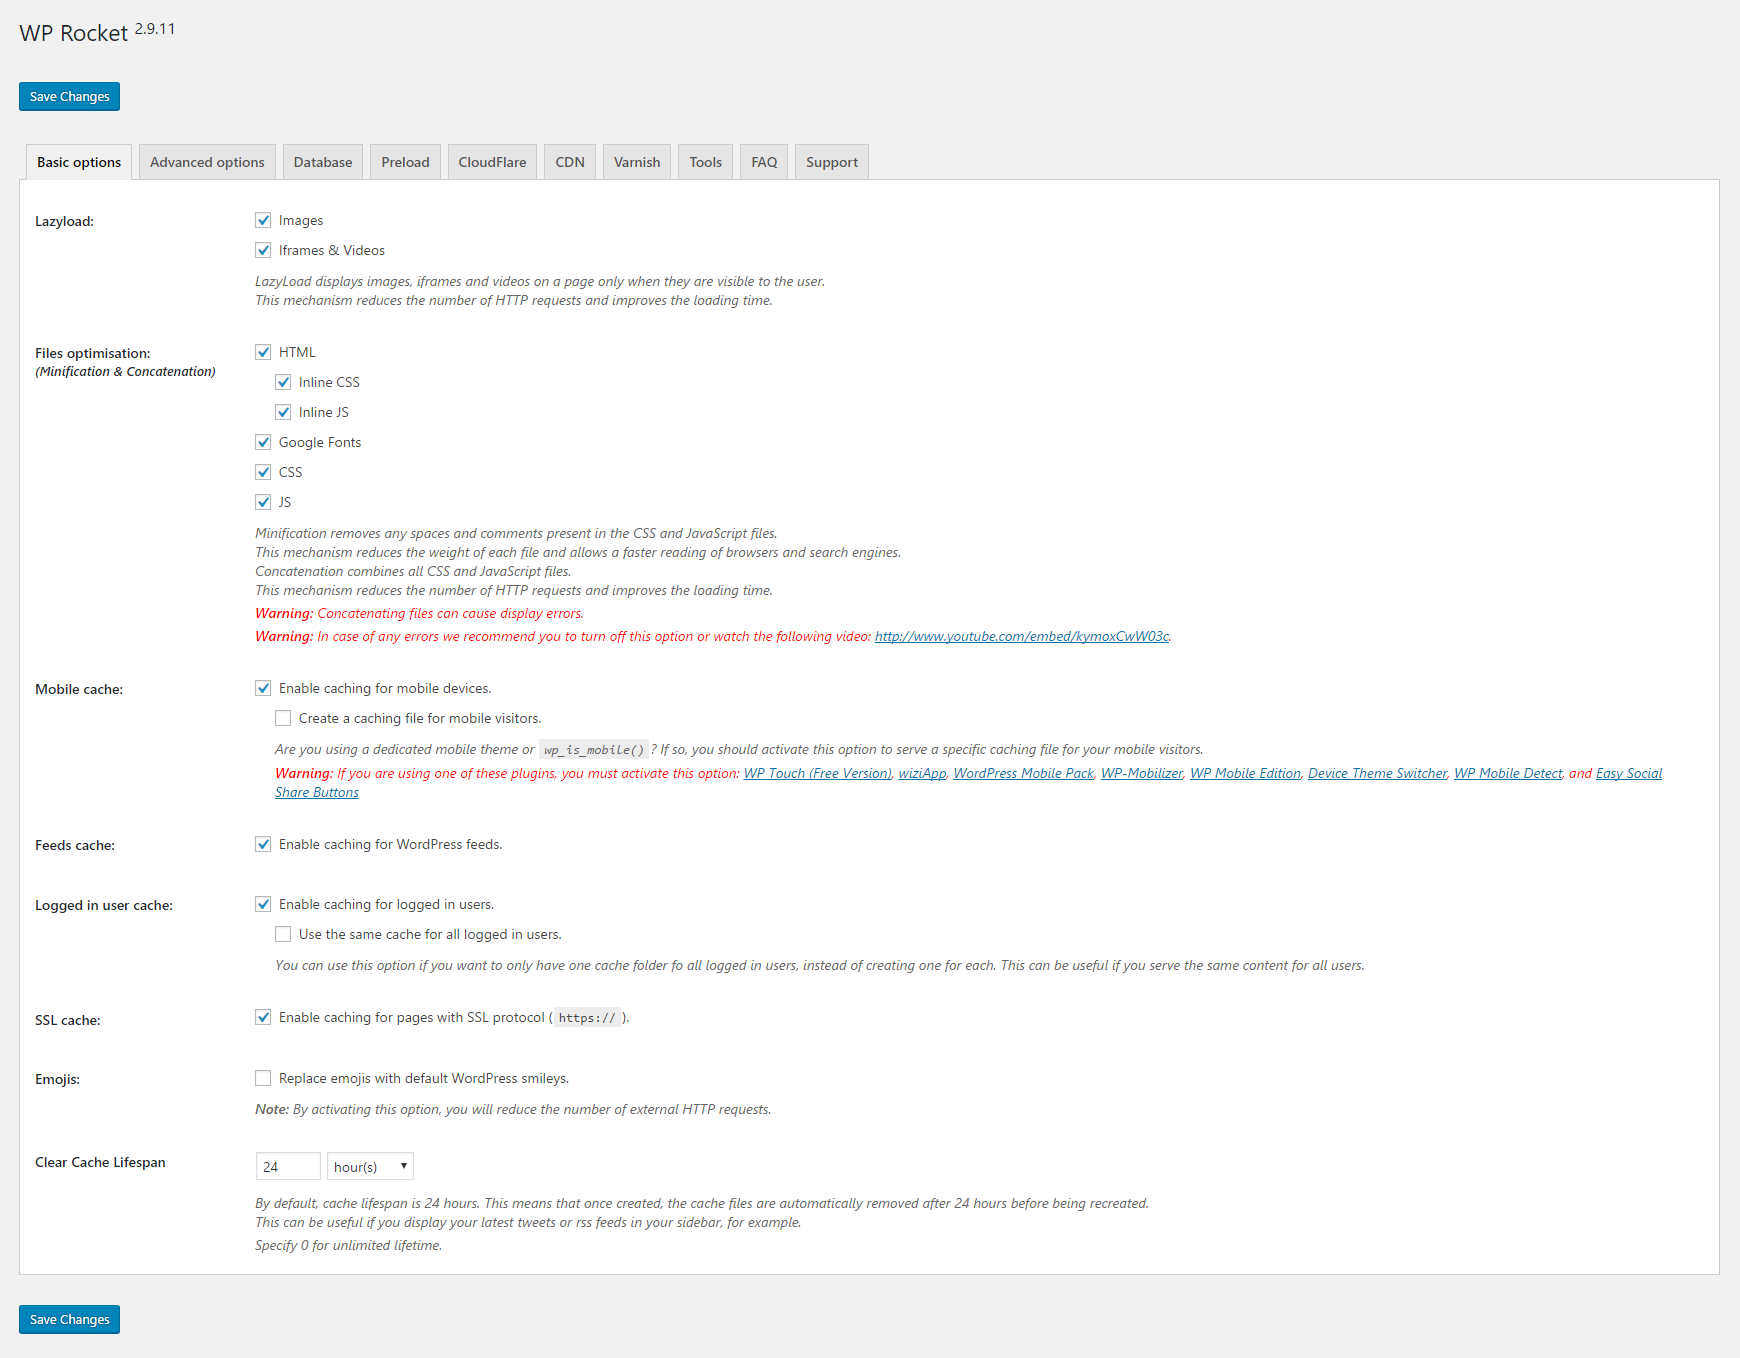
A lot of new options have been added to WP Rocket since I first reviewed it three years ago.
The basic options page has options for lazy loading, minification, concatenation, and caching.
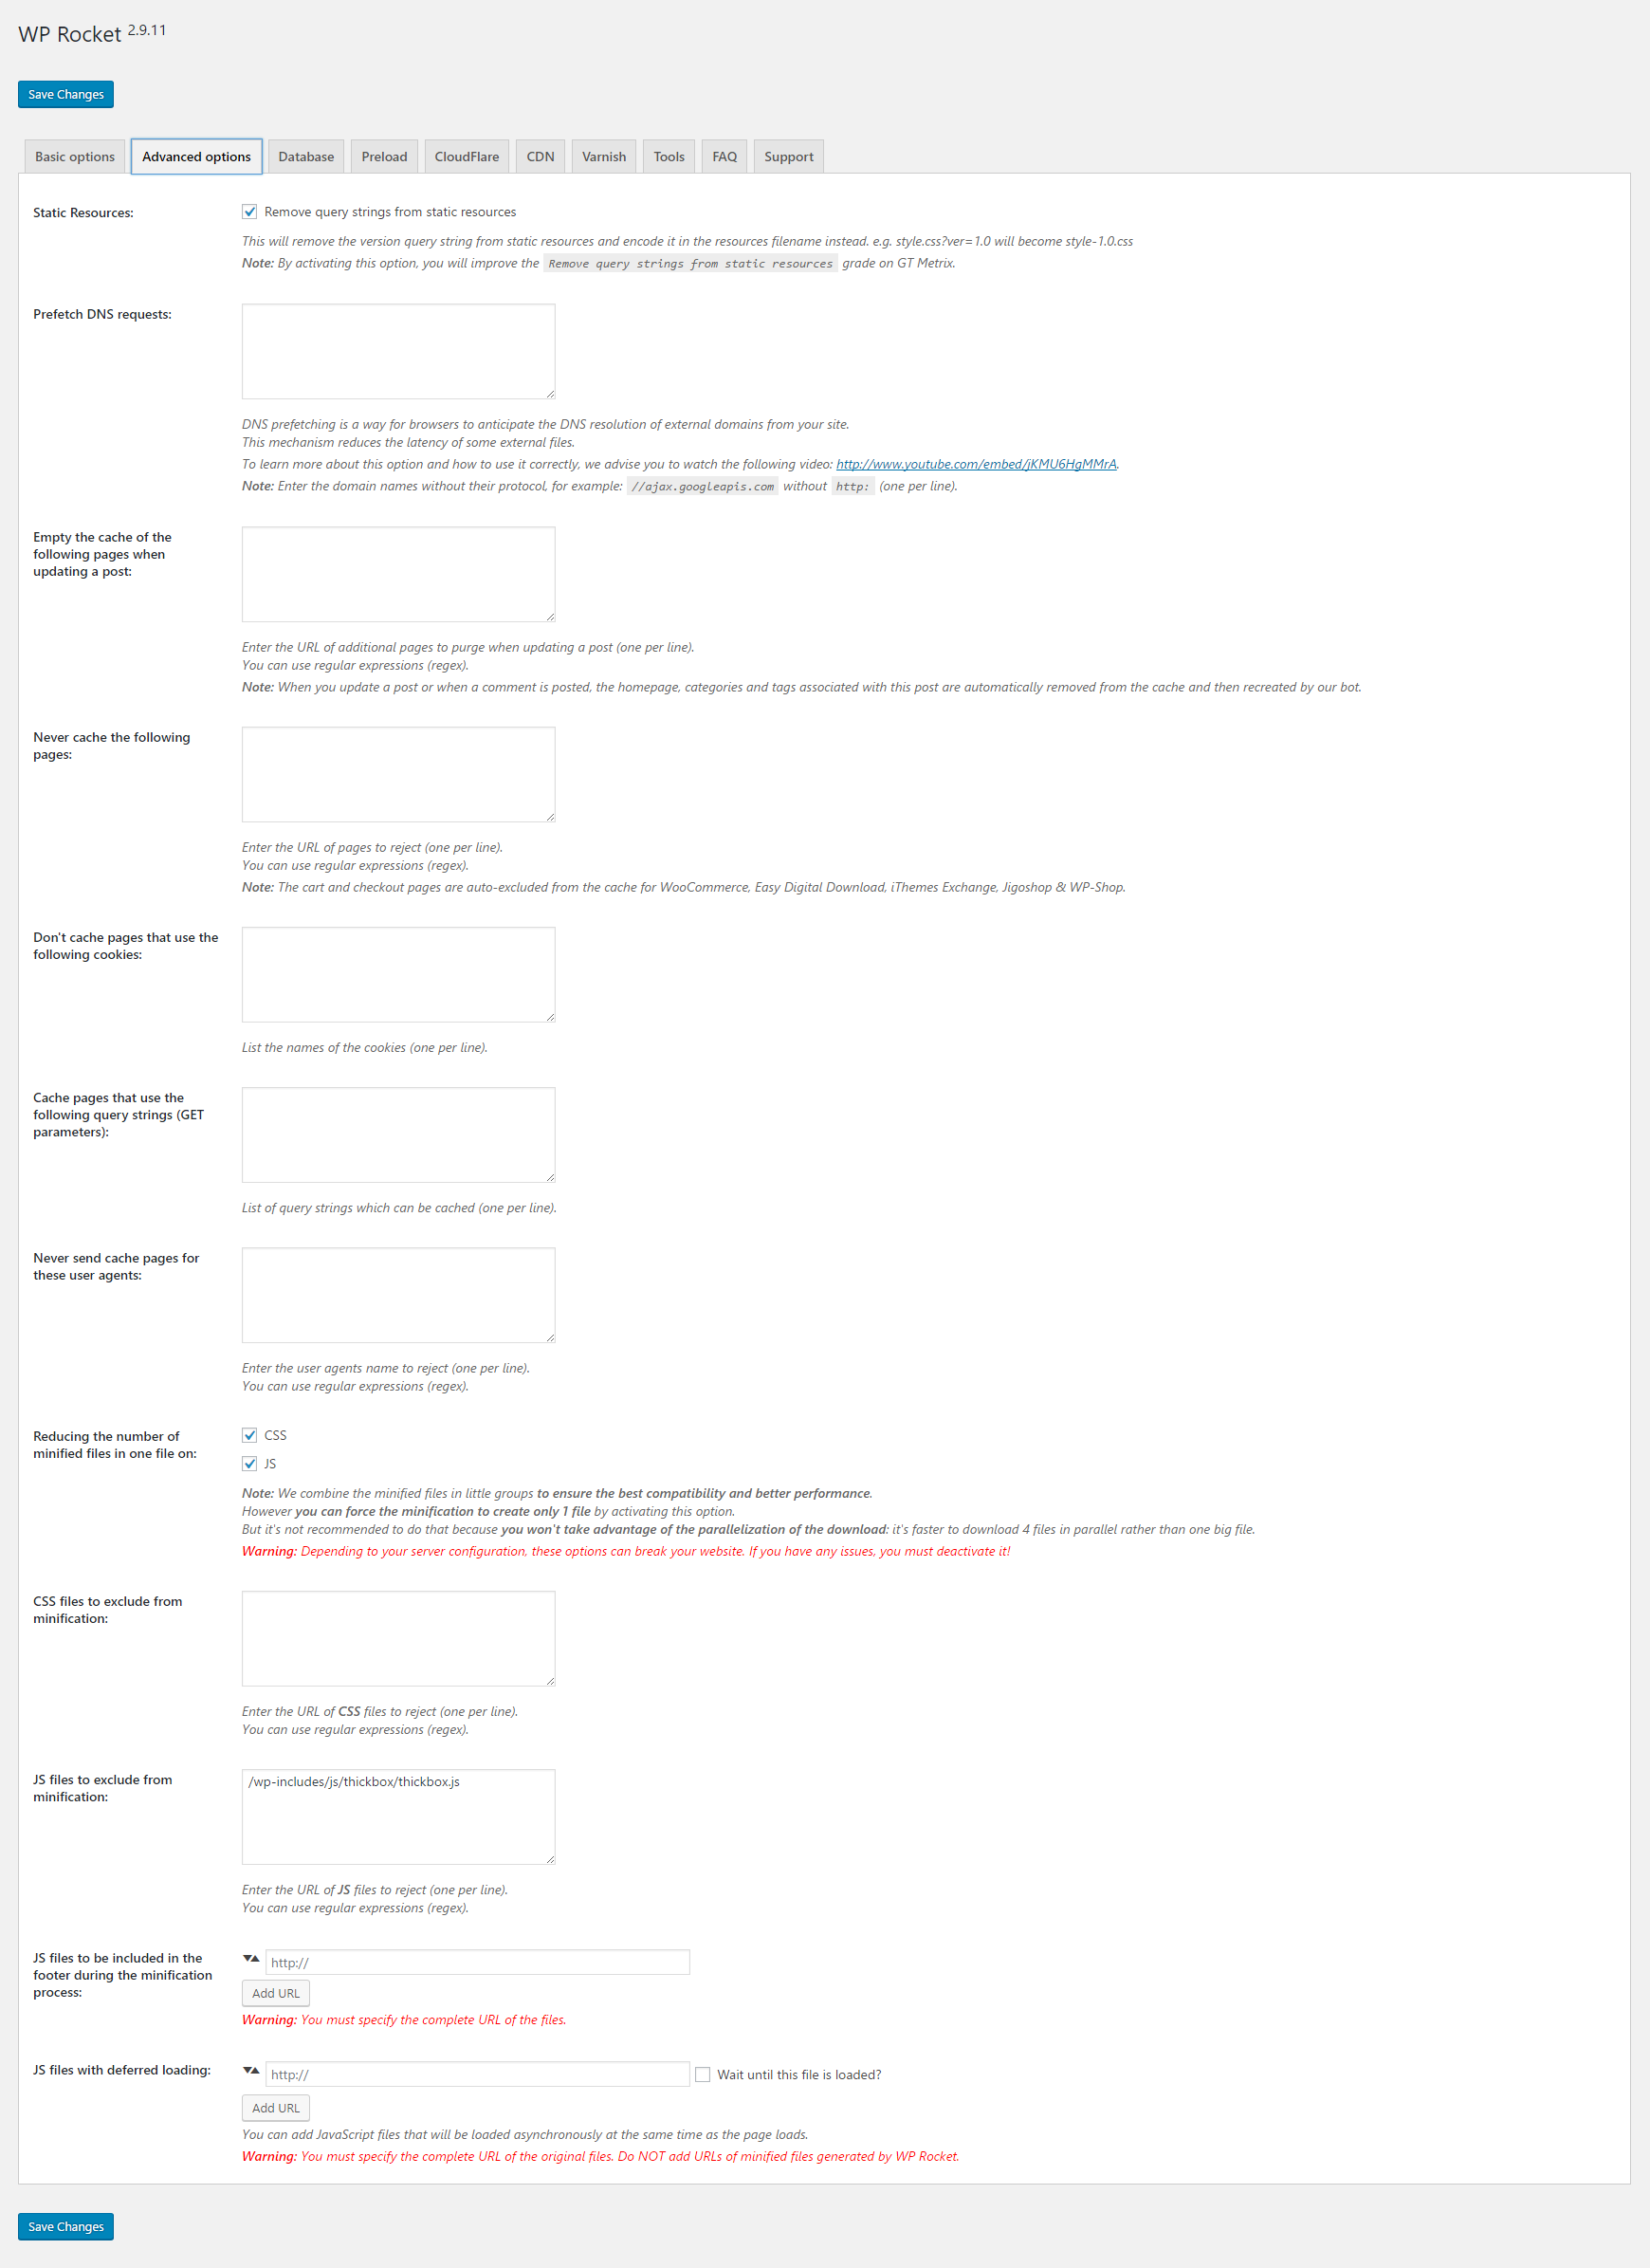
In the advanced options page you can exclude many pages and files from being cached.
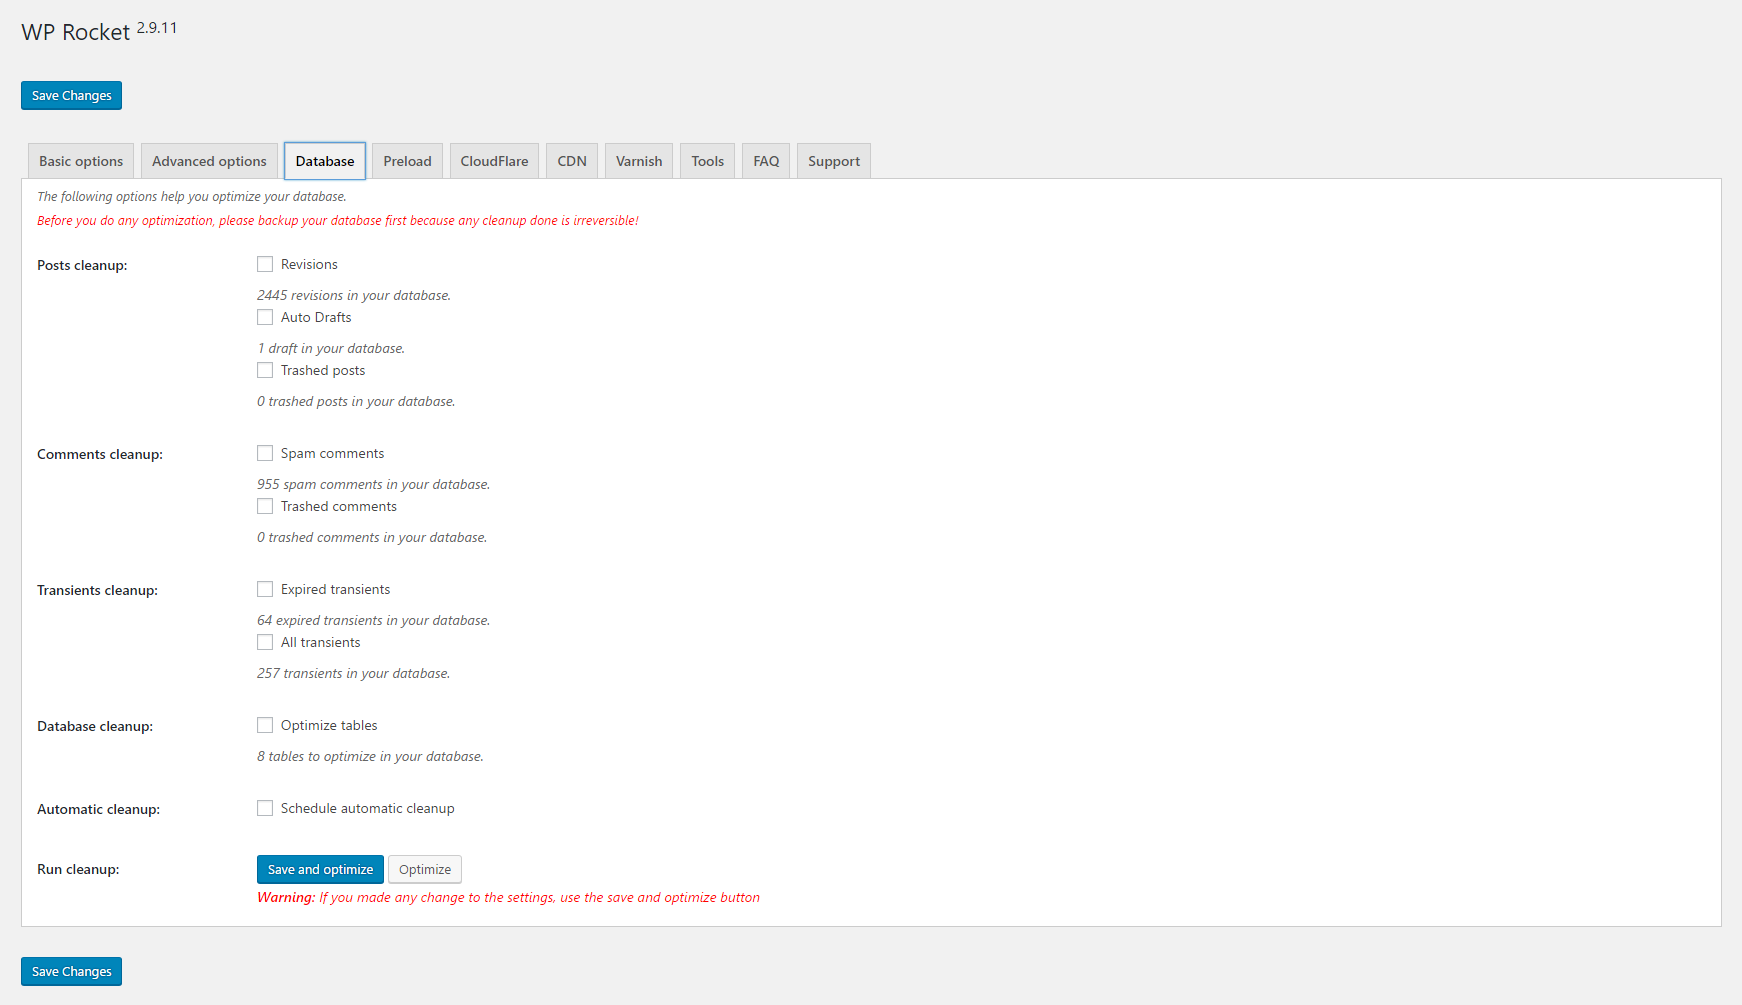
There are useful WordPress plugins such as WP-Optimize that can help you optimise your website database, but it’s pleasing to see WP Rocket offer a host of optimisation options for your database. You can delete revisions, spam comments, and transients. Database tables can be optimised and there is an automatic cleanup option too.
Unfortunately, there is no functionality to keep a set number of revisions so be careful with the delete revisions option. Additionally, there is no information about the size of your database. It would be good to see these options added in the future.
In the preload options page you can define whether cached files are manually or automatically preloaded. You can preload your sitemap too.

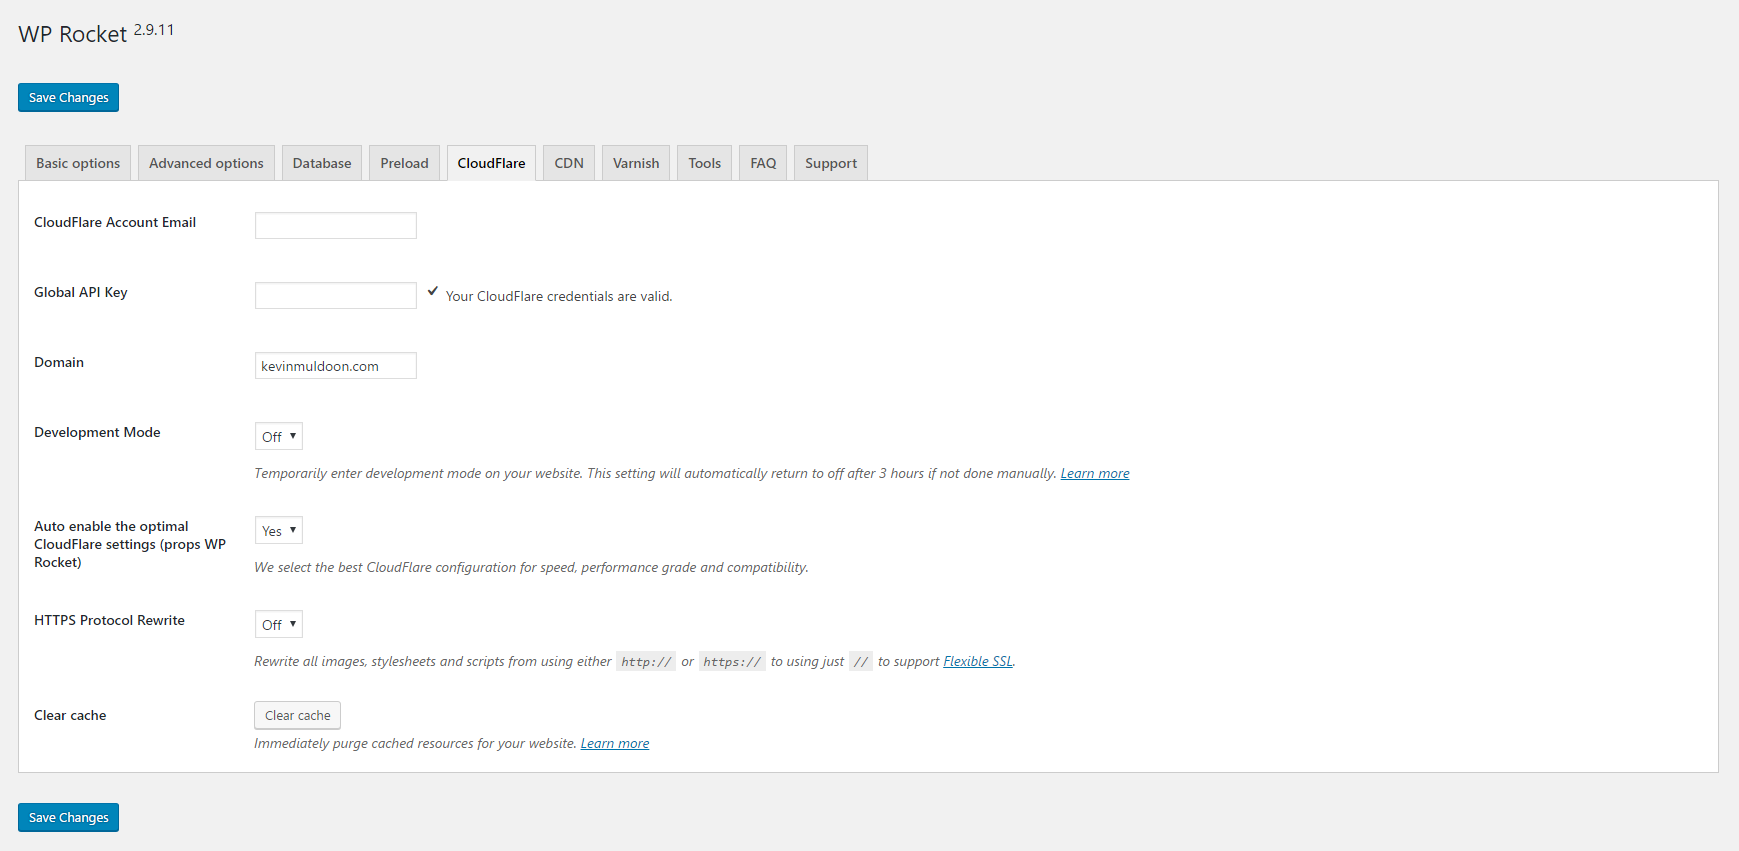
A Cloudflare settings page is displayed if you enable it through the CDN settings page.
All you have to do is enter the API key that Cloudflare provides to you and then enter your website domain. Optimal settings for Cloudflare can be enabled automatically and you can clear the cache too.
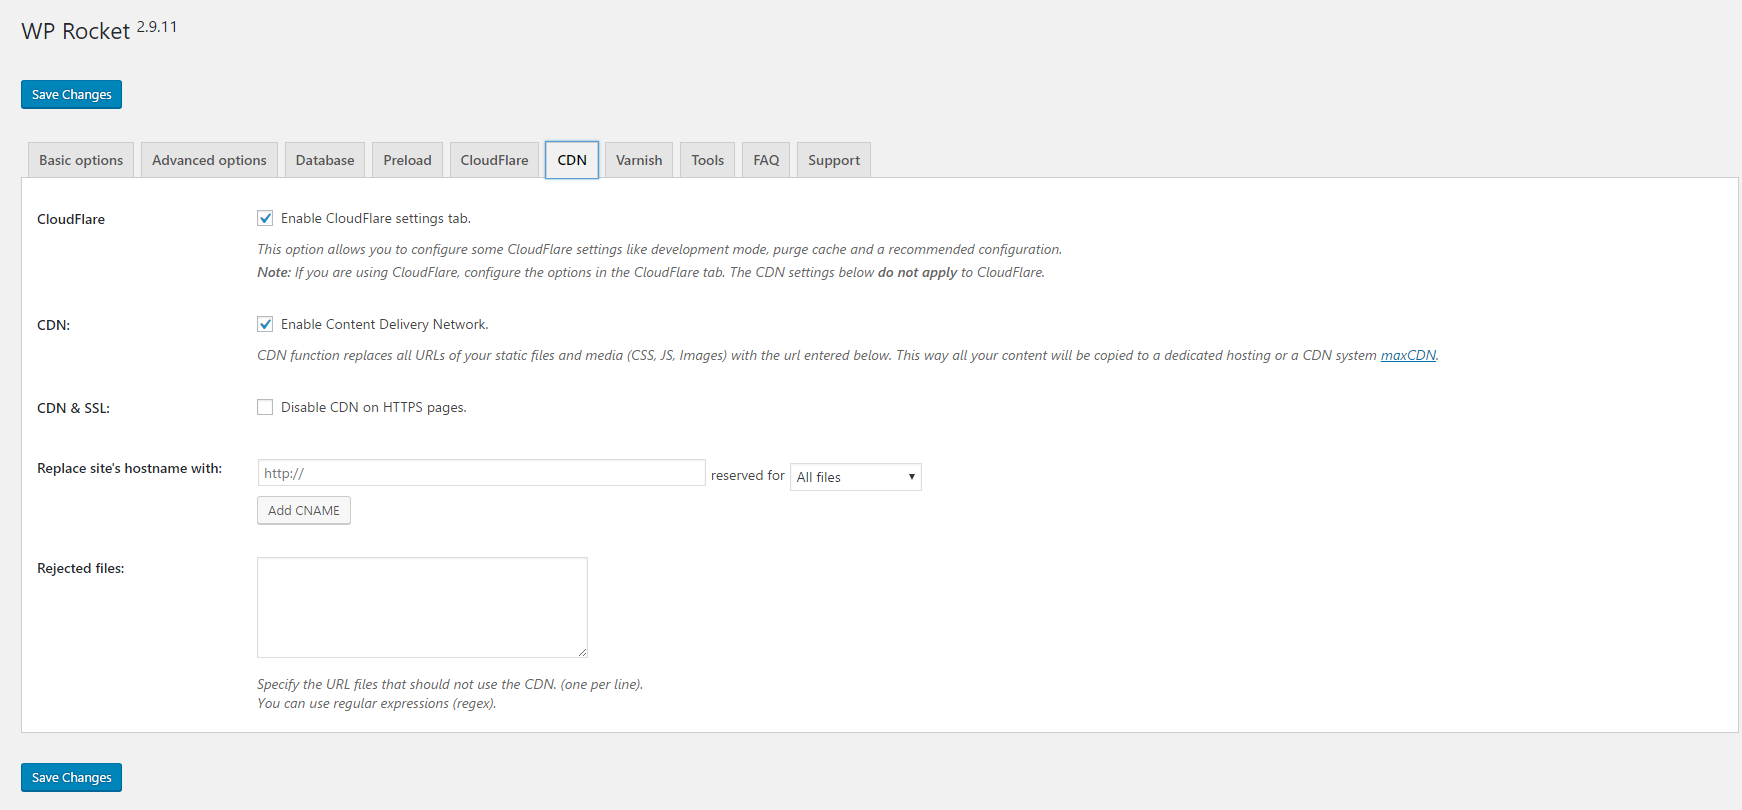
WP Rocket works with other content delivery networks too. There is also an option to disable your CDN on HTTPS urls.
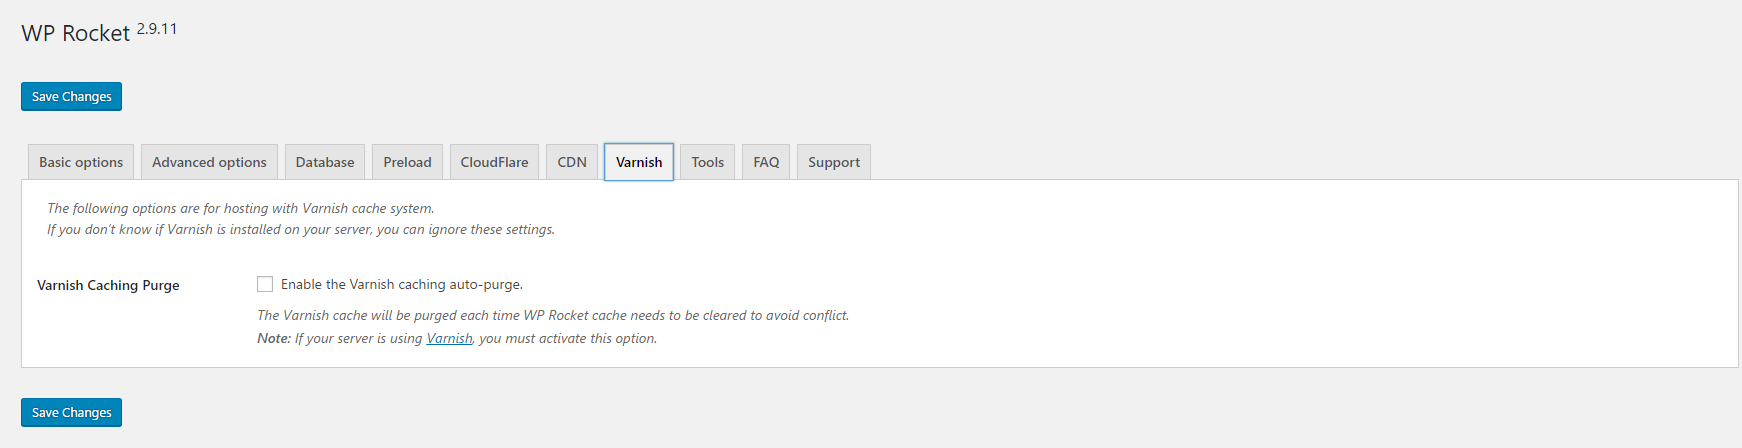
WP Rocket also has support for Varnish Cache. Be sure to enable Varnish in the settings area if you are using it on your server.
On the tools page you can clear cache, preload cache, export and import settings, and rollback WP Rocket to a previous version.

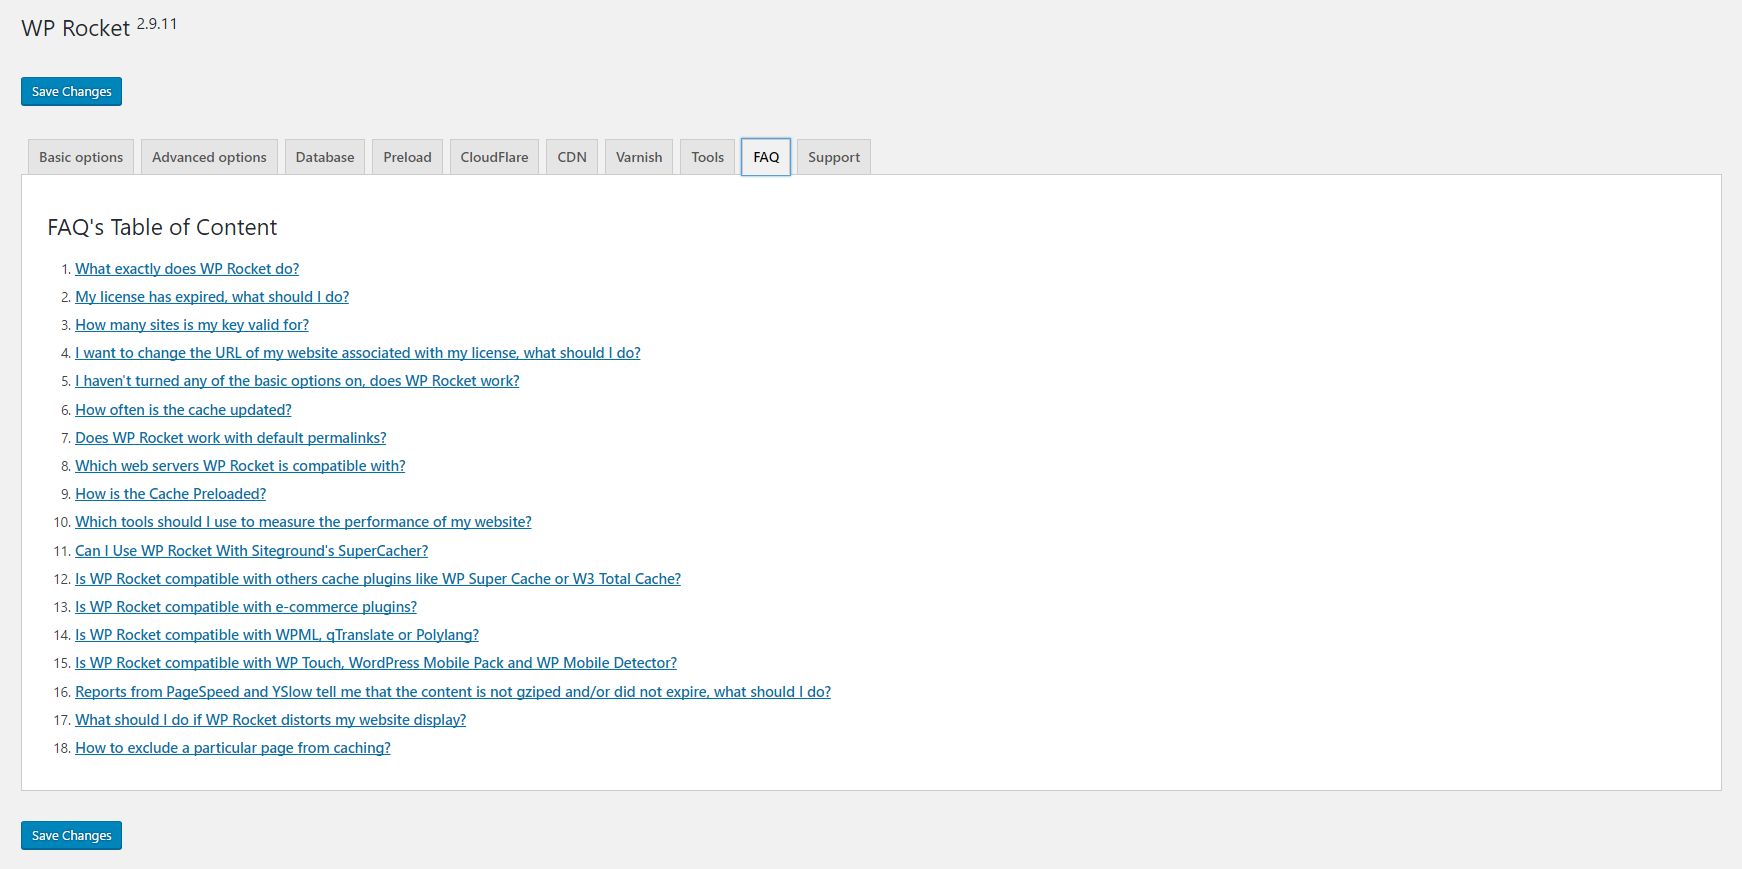
The frequently asked questions page provides answers to many common questions.
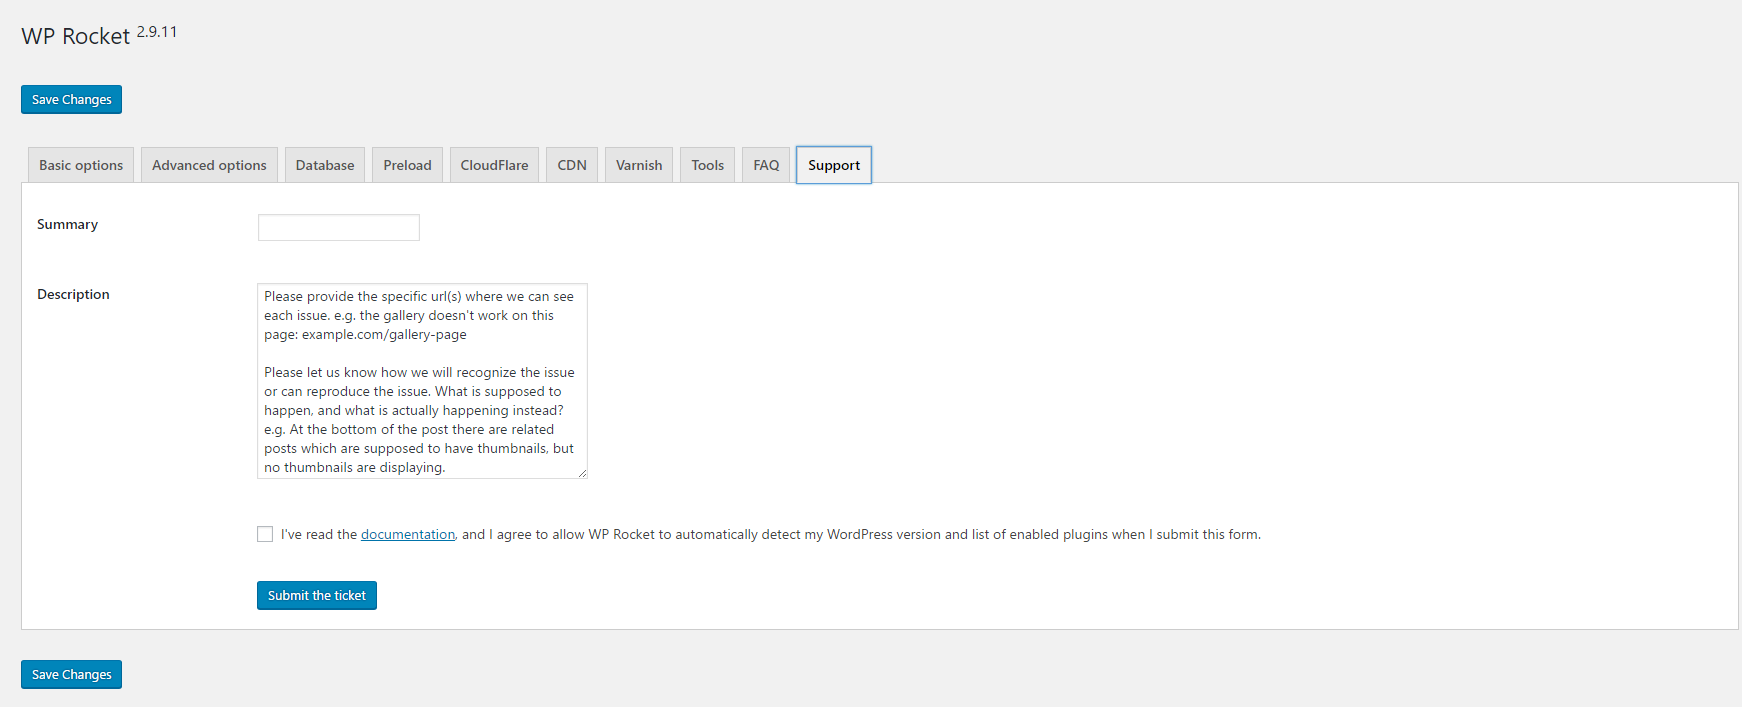
Support tickets can be created and sent directlty through the plugin settings area. This makes the process of getting support straight forward.
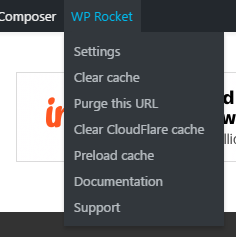
WP Rocket also adds a handy menu to the WordPress admin menu that allows you to access settings, clear cache, clear Cloudflare cache, preload cache, and more.
There is no simplified installation process for beginners, but the default settings for WP Rocket will be fine for most users and most options are self-explanatory. Many options have warnings too to ensure that you are aware that problems can arise in certain situations.
Put simply, WP Rocket is easy to use.
How Does WP Rocket Perform in 2017?
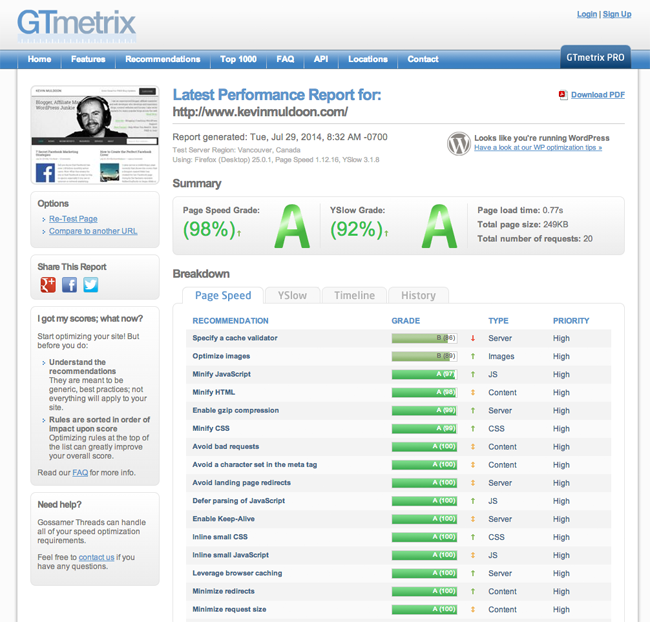
The thing that I always loved about WP Rocket was that you simply activated it and it handled all of the necessary optimisation. In my review three years ago I was able to get an double A rating on GTmetrix at the click of a button.
Sure, there were other things I did later did to improve my score a little, but at the click of a button WP Rocket was able to reduce my page loading time to 0.77 seconds, my page size to 249KB, and my total number of page requests to 20.
Three years later and this website is still using the Genesis framework for its design; however many of the WordPress plugins that are activated on this website are different.
Let’s see how much WP Rocket improved the performance of my website.
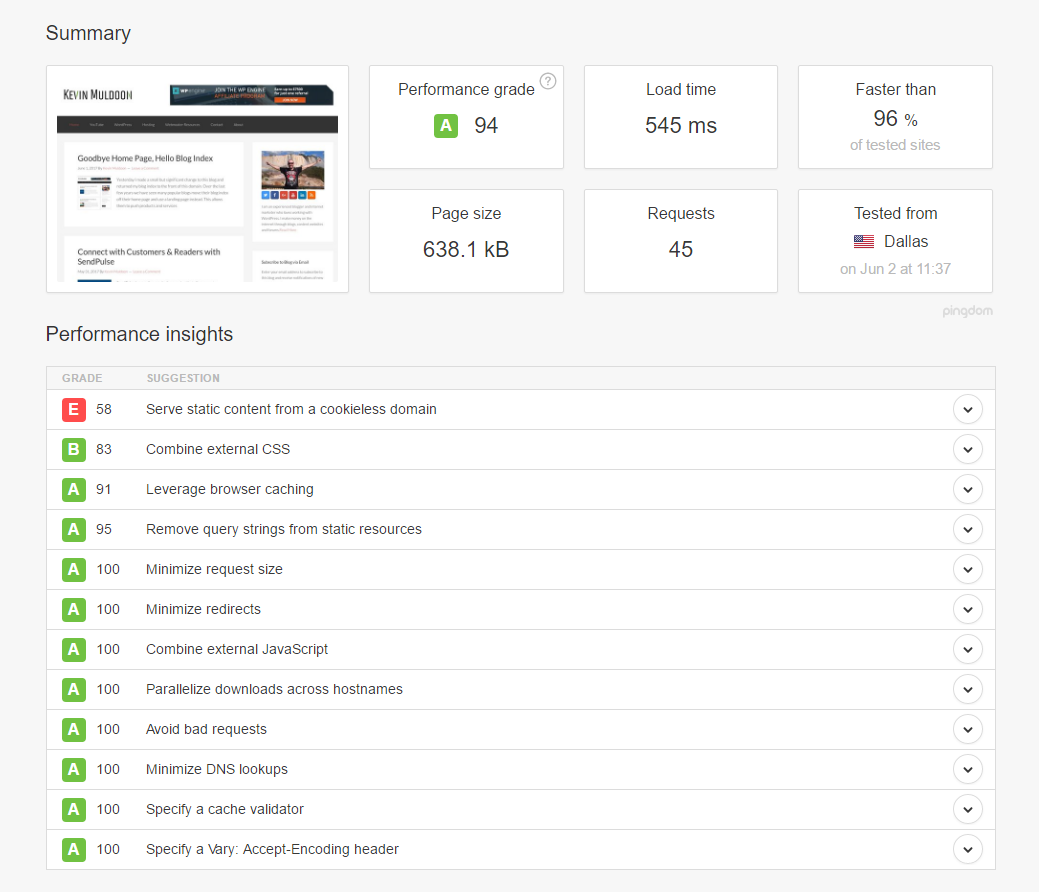
On my home page WP Rocket helped improve my Pingdom performance grade from E (56%) to A (94%). Loading time dropped from 1.54 seconds to 545 milliseconds and the page size dropped from 771.5KB to 638.1KB. Total requests also dropped from 55 to 45.
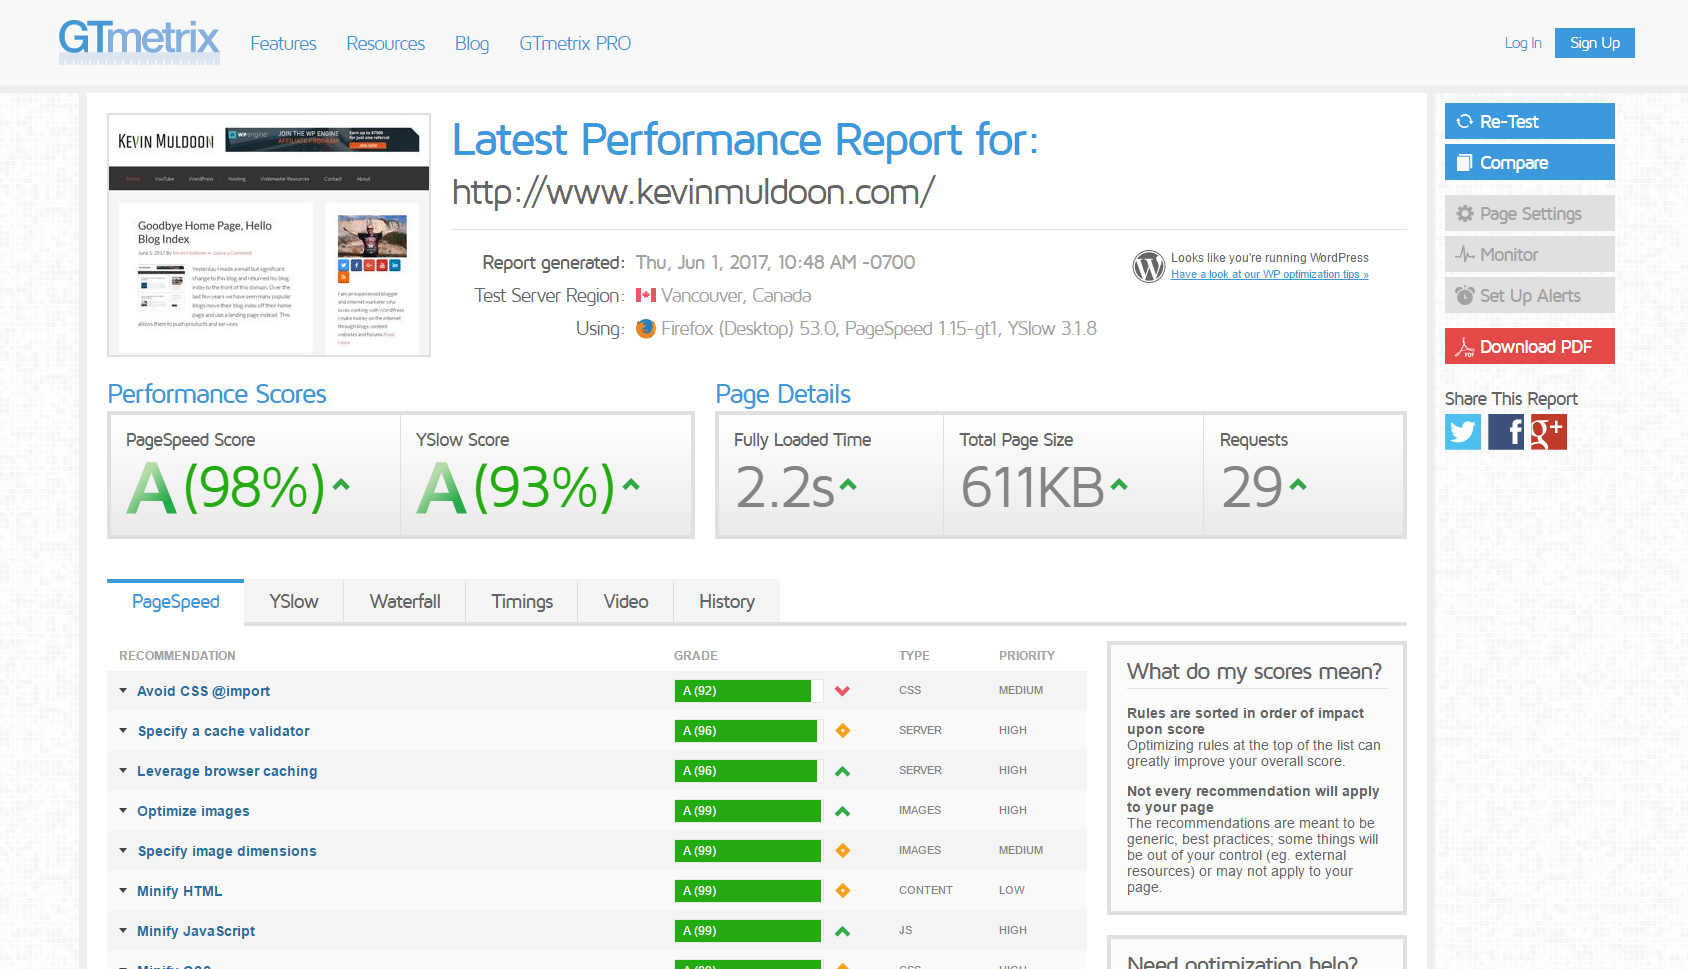
On GTmetrix my PageSpeed score improved from B (82%) to A (98%) and my YSlow score increased from C (70%) to A (93%). Loading time dropped from 3.2 seconds to 2.2 seconds and page size dropped from 791KB to 611KB. Requests also dropped from 54 to 29.
On Google PageSpeed Insights the mobile score increased from 61 to 62 to and the desktop score increased from 76 to 84.

Now let’s look at how the performance of my blog post improved.
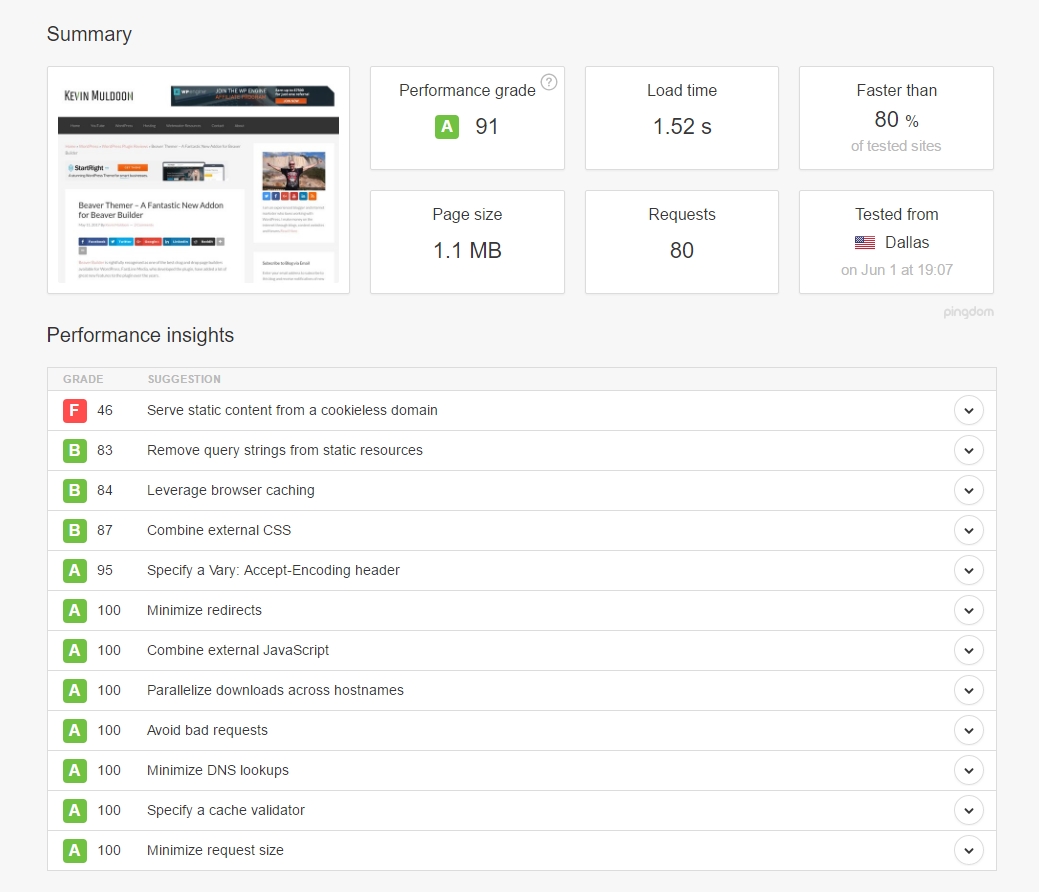
On Pingdom the performance grade increased from E (58%) to A (91%). Load time dropped from 2.38 seconds to 1.52 seconds and page size dropped from 1.7MB to 1.1MB.
The total number of requests bizarrely remained the same at 80.
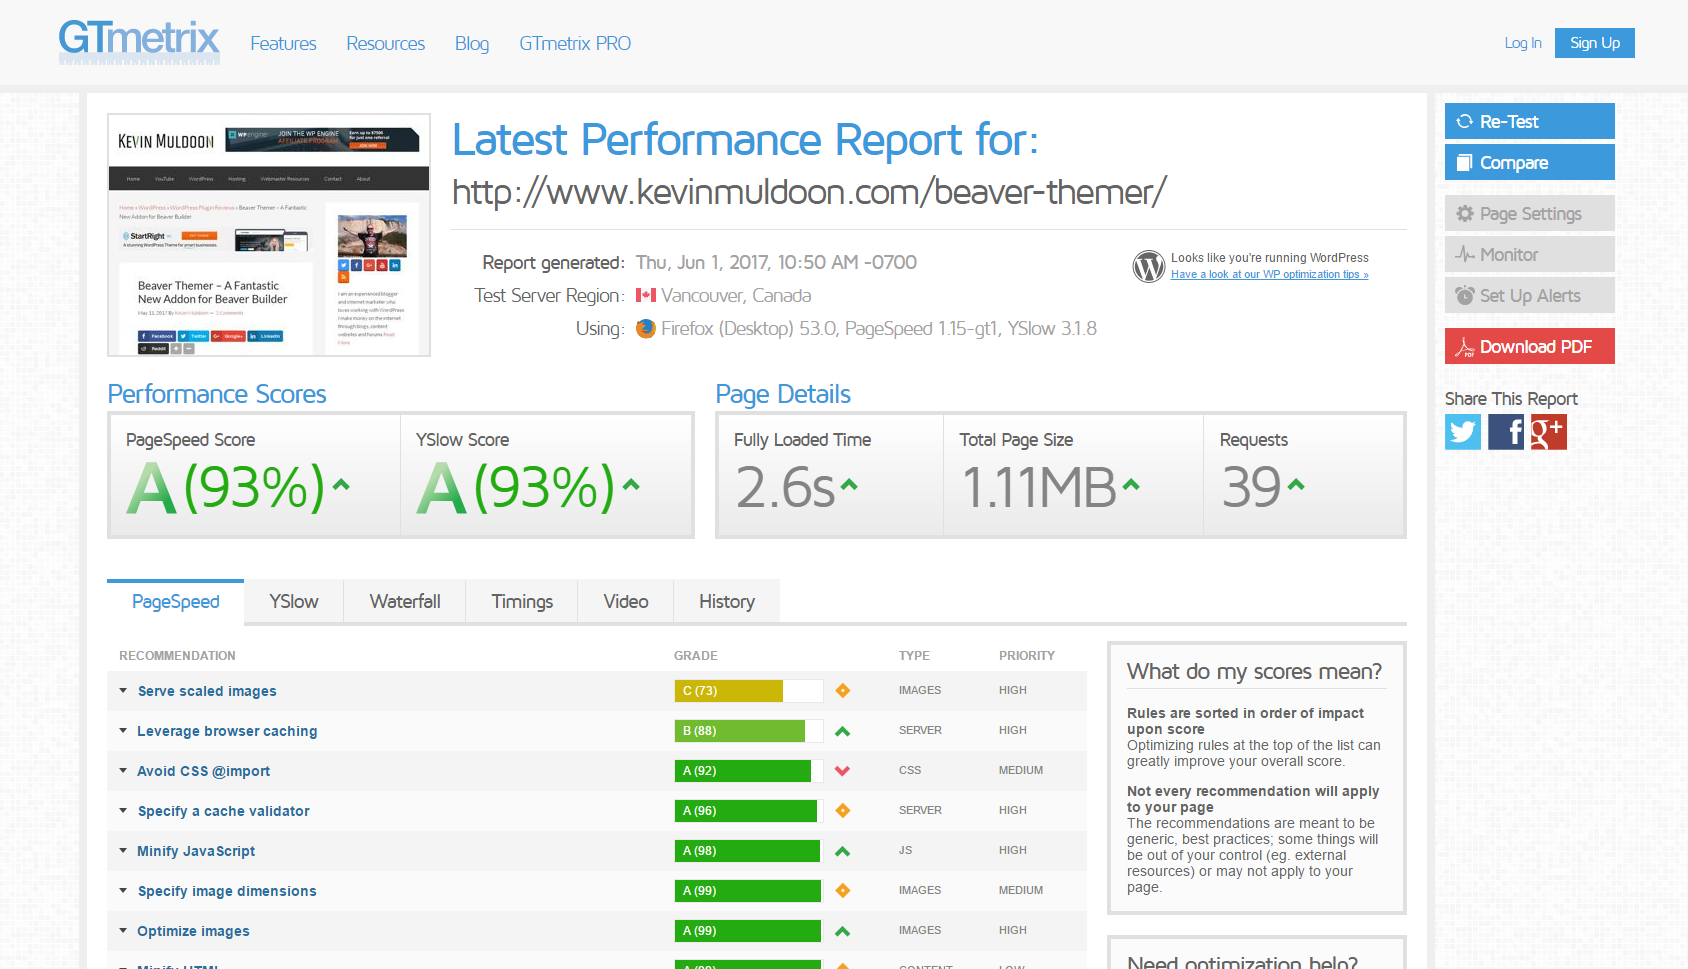
On GTmetrix I saw my PageSpeed score of E (58%) and my my YSlow score of D (66%) both jump to A (93%). Loading time dropped from 4.2 seconds to 2.6 seconds and page size dropped from 1.74MB to 1.11MB. Requests dropped from 72 to 39.
On Google PageSpeed Insights the mobile score jumped from 58 to 68 and the desktop score increased from 71 to 83.
All in all, I was very pleased with how WP Rocket improved the performance of my website, however there are still some things I can improve upon.
Making Sense of My Performance Results
There are a few things that you may have noticed from the above performance results.
One thing that surprised me was the total number of requests on my blog post. GTmetrix showed requests dropping from 72 to 39, but Pingdom showed the total number of requests staying at 80. I am sure these website speed services count the total number of requests in a different way, but it is strange that Pingdom did not show any decrease.
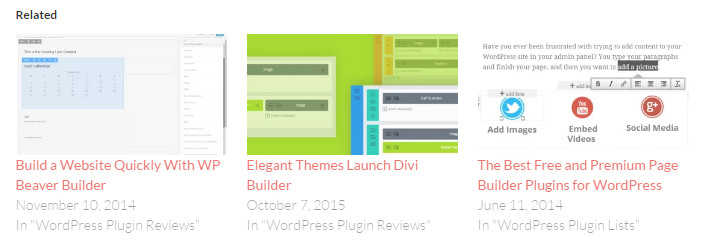
You may also have noticed from the screenshot that I got a C score on GTmetrix for scaled images for my blog post.
I did not get an A for scaled images because I use the Jetpack Related Posts addon. This addon does not scale images properly.
There is an option to remove images from related posts. Doing that would automatically remove the scaled images error, but not displaying an image with related posts would greatly reduce the number of people who clicked to read related posts.
Therefore, at this time I am inclined to keep using the addon until I find a better solution or until Jetpack decide to scale images.
As I noted earlier, I will not be able to resolve the issue of cookieless domains until I implement a content delivery network; so it is not something I am concerned about.
With WP Rocket giving me A grades on Pingdom and GTmetrix, you may be wondering why I am scoring so badly on Google PageSpeed insights.
That is something I looked into a little further.
Enhancing My Results with Autoptimize
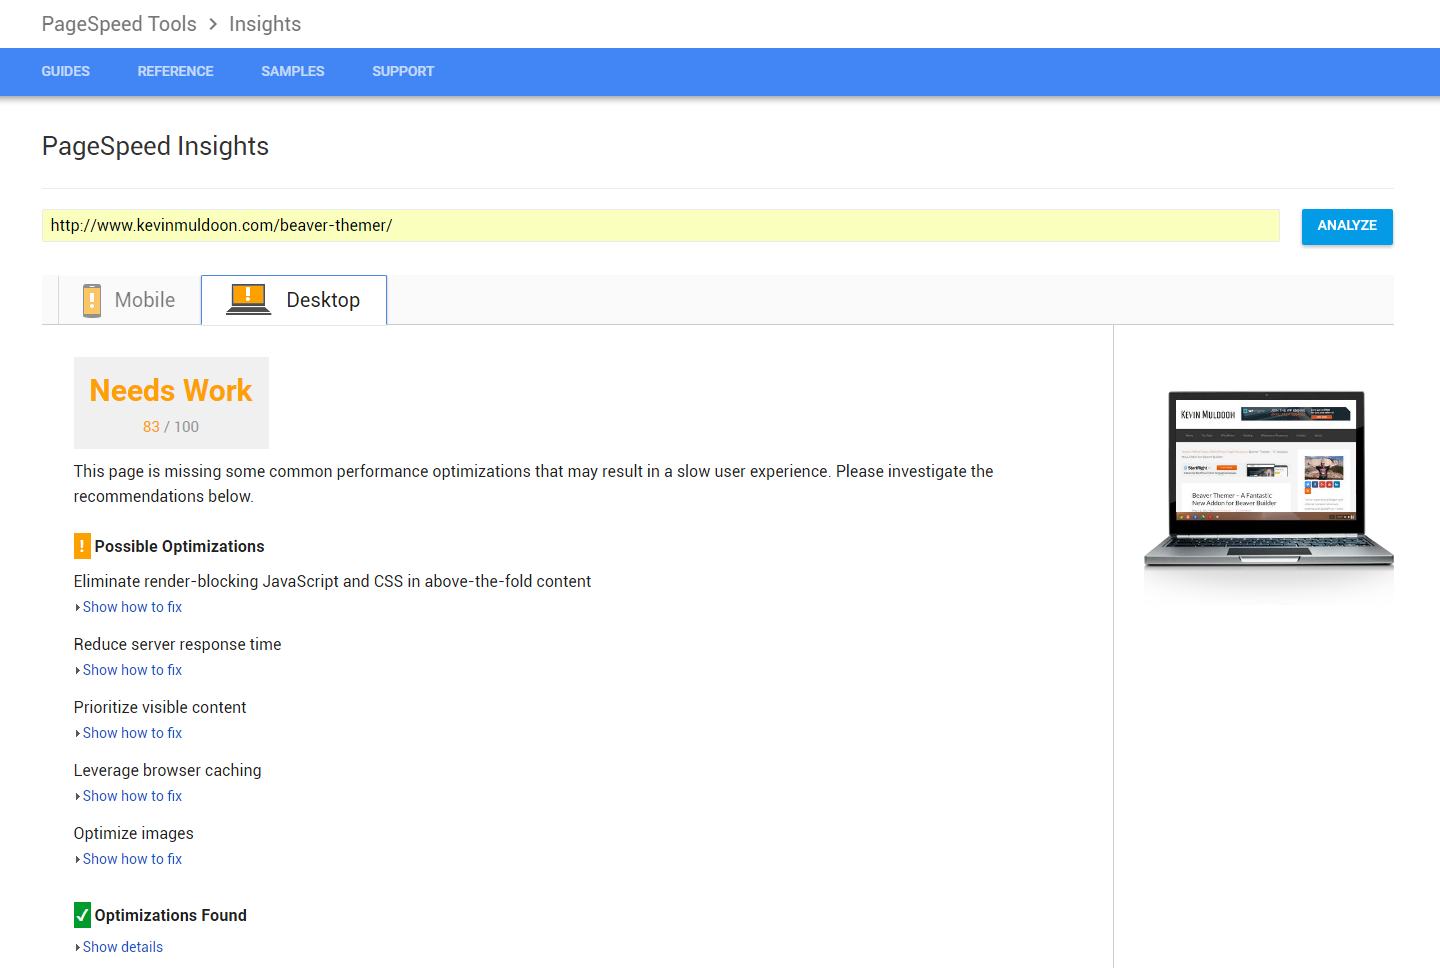
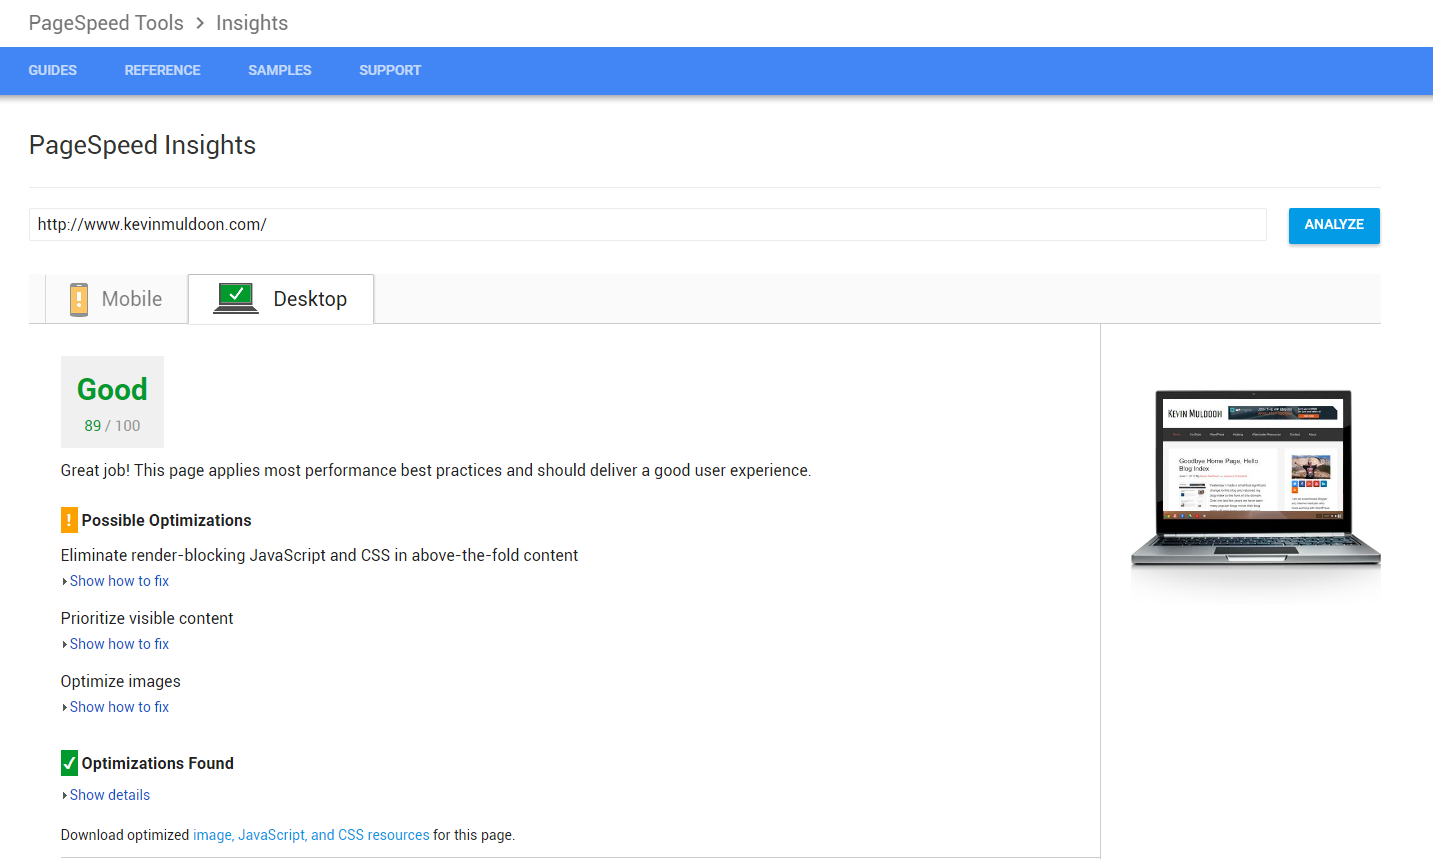
For my home page, Google PageSpeed insights gave me a rating of 61 (Poor) for mobiles and 84 (Needs Work) for desktops.
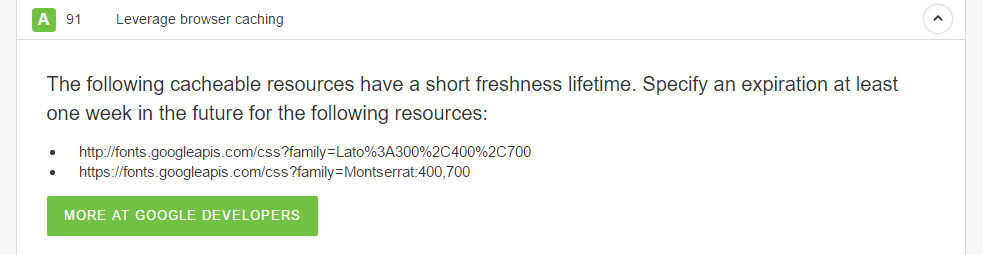
The two main issues that Google says I need to address are:
- Eliminate render-blocking JavaScript and CSS in above-the-fold content
- Prioritize visible content
For the first issue, Google states that I have three blocking script resources and three blocking CSS resources that are causing a delay in rendering my home page.
For the second issue, Google states that my page requires additional network round trips to render the above-the-fold content.
Looking into the issue of blocking script resources led me to a fantastic free WordPress plugin from Frank Goossens called Autoptimize. The plugin works in conjunction with caching plugins such as WP Rocket and helps optimise your website a little more.
The developer explains the purpose of Autoptimize on WordPress.org:
Autoptimize makes optimizing your site really easy. It concatenates all scripts and styles, minifies and compresses them, adds expires headers, caches them, and moves styles to the page head and can move scripts to the footer. It also minifies the HTML code itself, making your page really lightweight. There are advanced options and an extensive API available to enable you to tailor Autoptimize to each and every site’s specific needs.
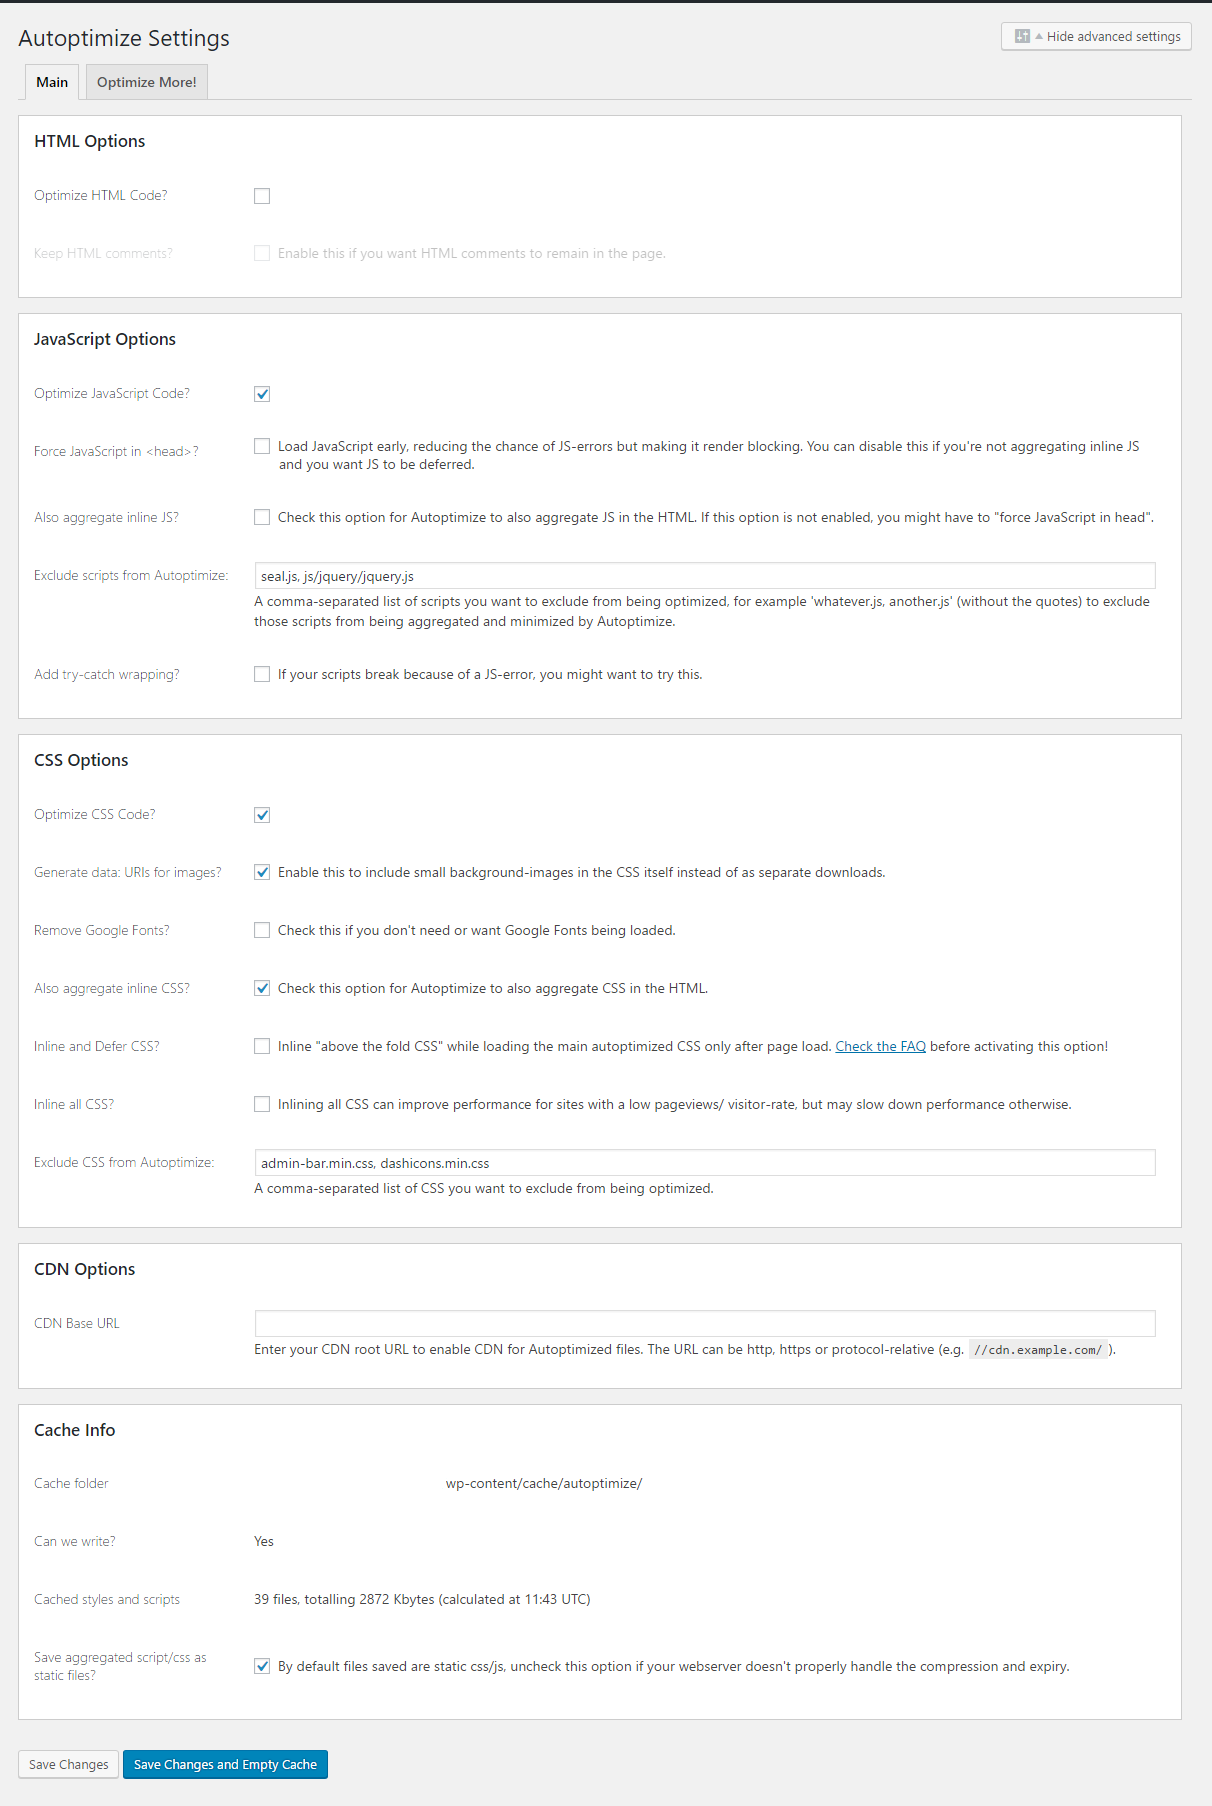
The Autoptimize settings page is divided into four categories: HTML, Javascript, CSS, and CDN.
In the simple settings mode you simply enable or disable what you want to optimise.
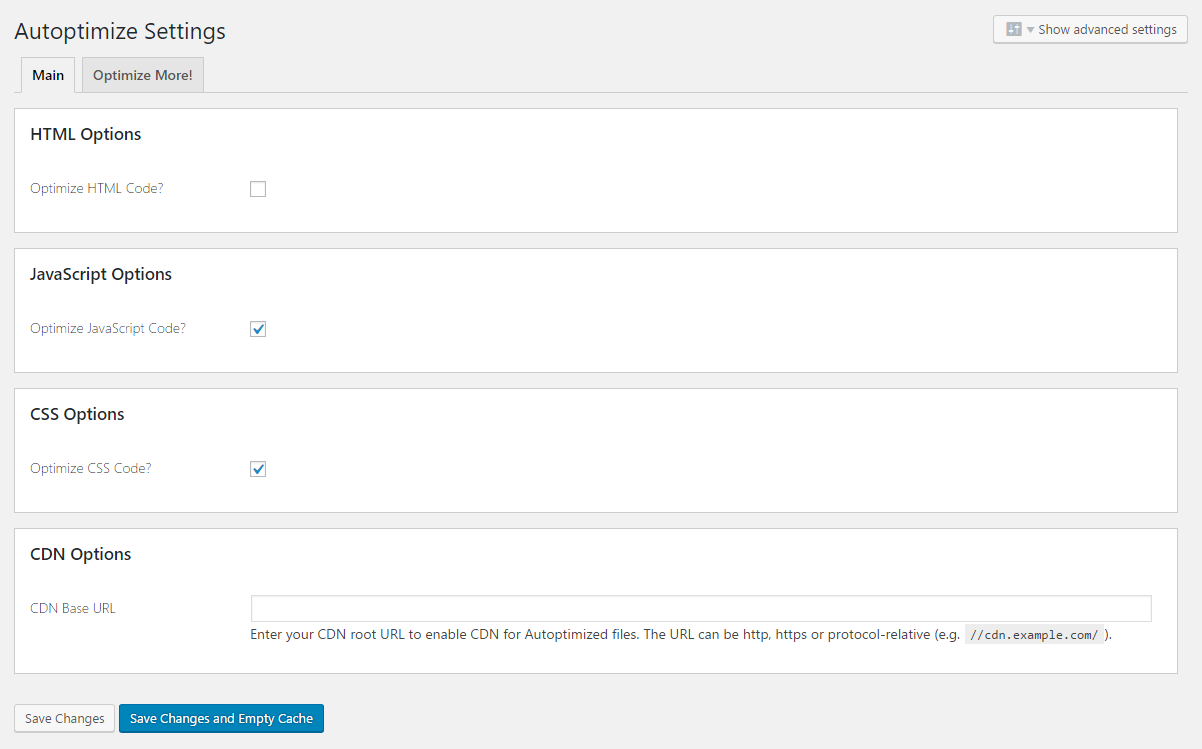
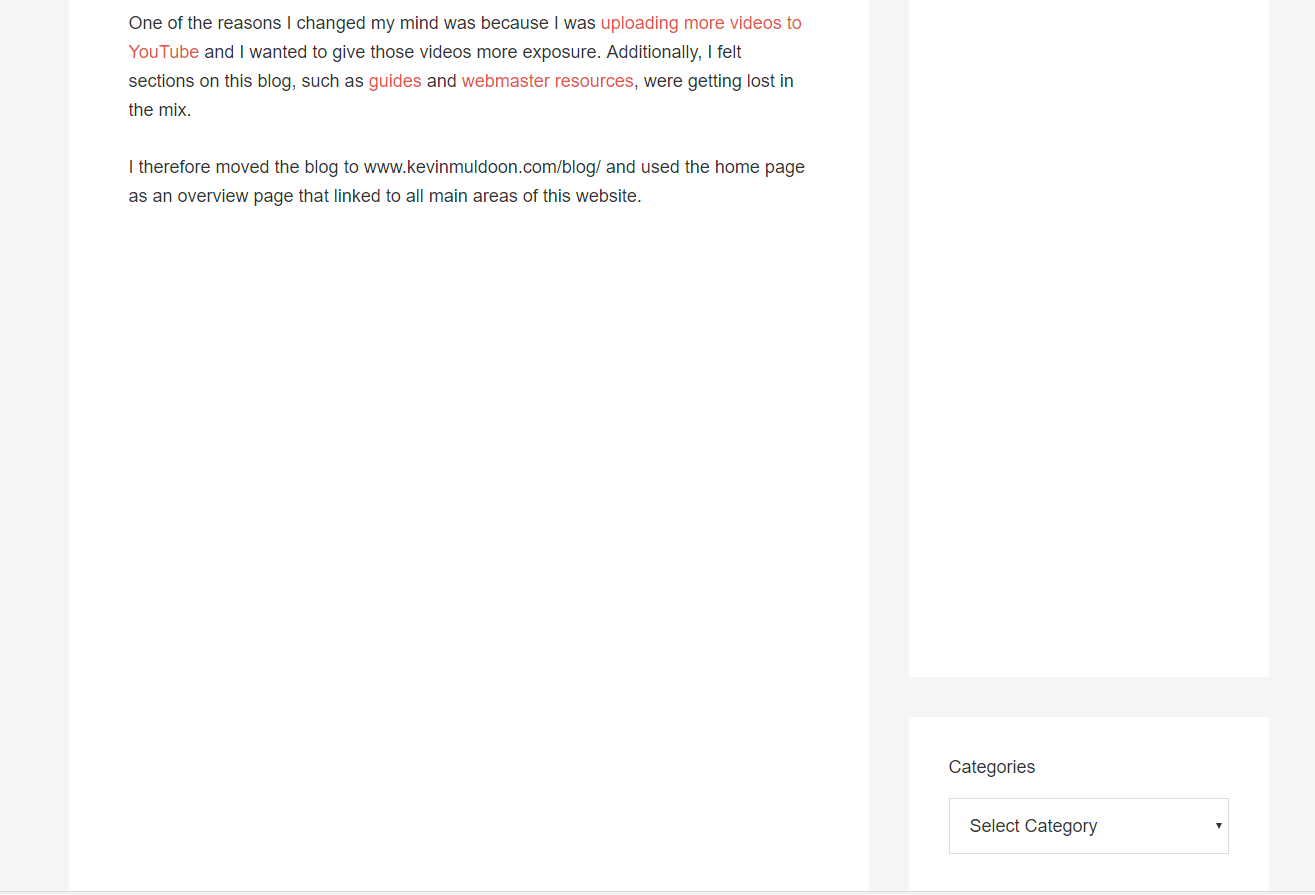
You may have noticed that I have not enabled HTML optimisation in the above screenshot. This is because when I check that option, my website breaks and looks like this.
What I did with Autoptimize was change a setting, save and clear cache, check my website was still working the way I wanted it to, and then checked the performance of my website on Pingdom, GTmetrix and Google PageSpeed Insights.
Through trial and error I seemed to get everything optimised a little more than using WP Rocket alone.
I cannot stress enough the importance of checking your website after changing any setting in Autoptimize.
When I enabled “Aggregate inline JS”, for example, most images disappeared from my website.
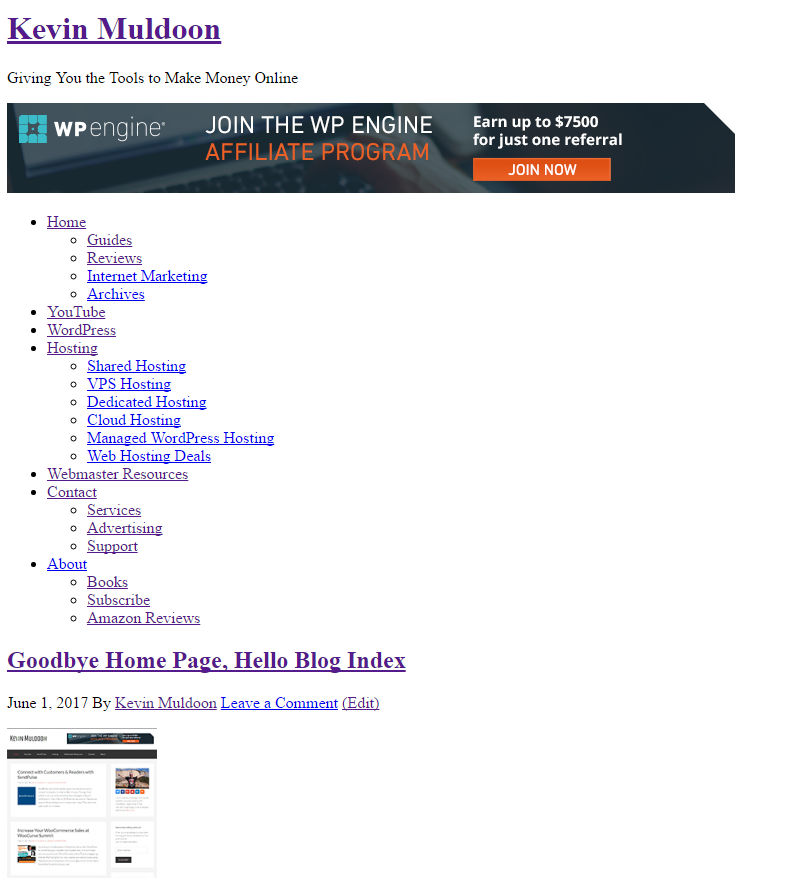
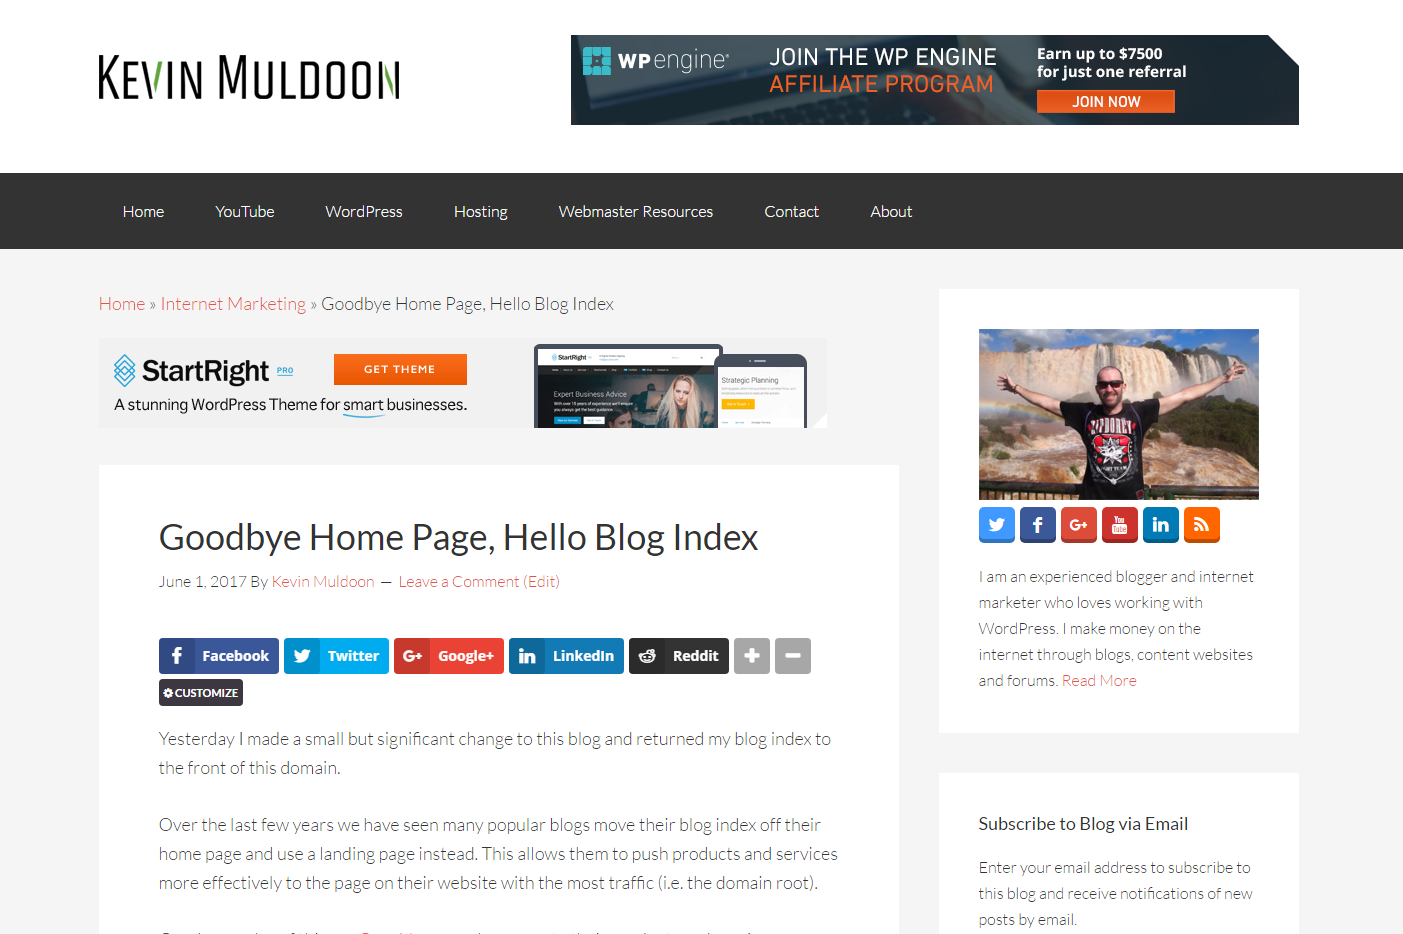
Selecting “Remove Google Fonts” made the biggest difference to performance, but it also made the typography on this website look worse.
This is how my website looks with Google Fonts enabled.
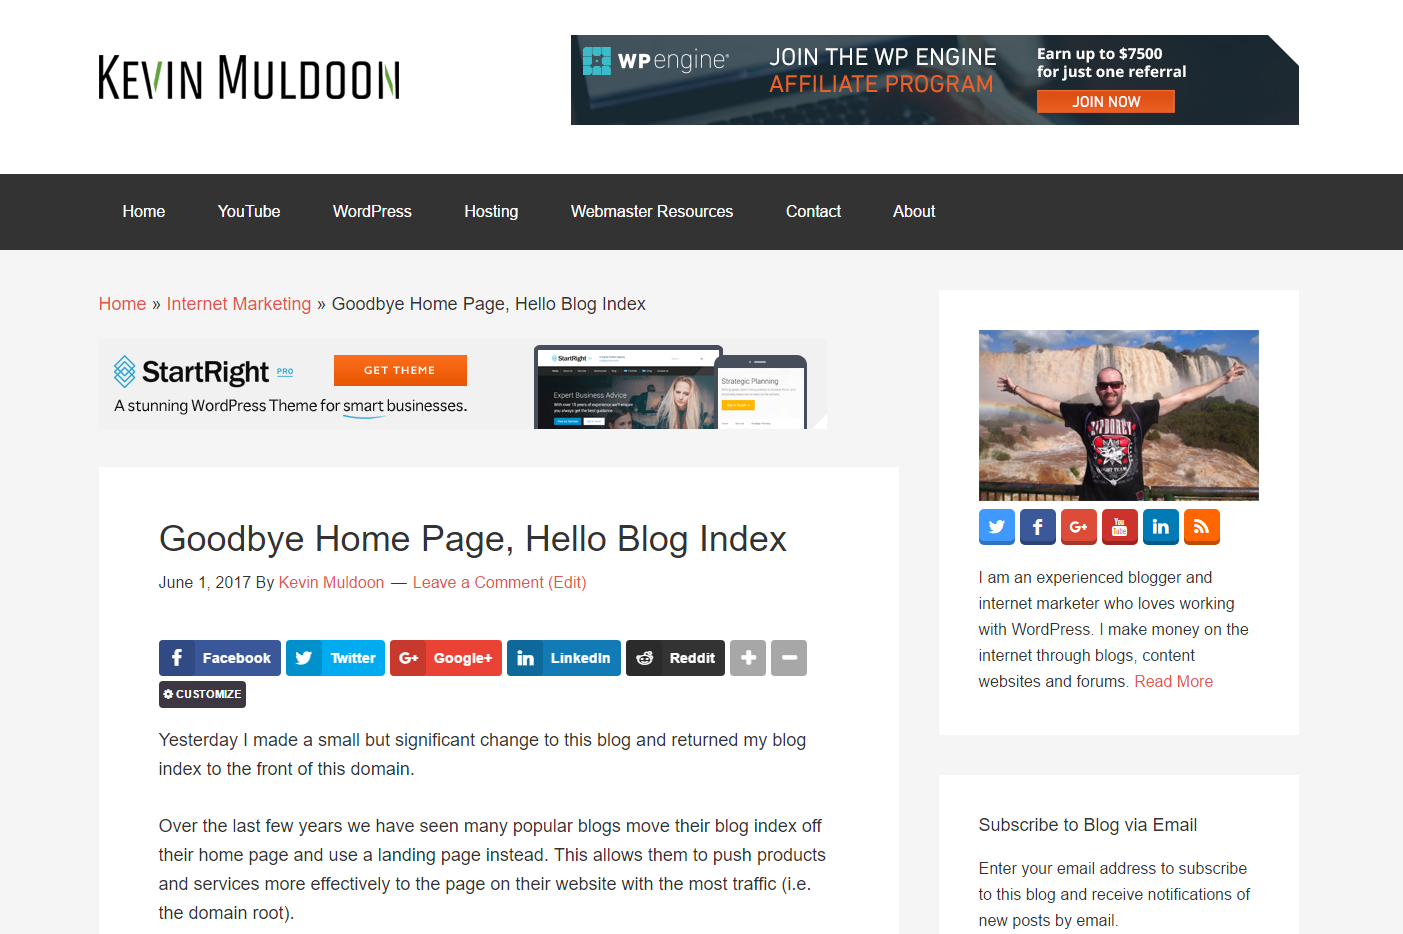
This is how my website looks when Autoptimize has disabled Google Fonts.
With Google Fonts enabled, I got the following performance scores for my home page:
- Pingdom – Performance Grade: A (94%), Load Time: 691 milliseconds, Page Size: 663KB, Requests: 44
- GTmetrix – PageSpeed Score: A (97%), YSlow Score: A (92%), Load Time: 2.4 seconds, Page Size: 636KB, Requests: 28
- Google PageSpeed Insights: Mobile: 68, Desktop: 86
For my blog post I got the following:
- Pingdom – Performance Grade: A (91%), Load Time: 1.33 seconds, Page Size: 1.1MB, Requests: 79
- GTmetrix – PageSpeed Score: A (93%), YSlow Score: A (92%), Load Time: 3.1 seconds, Page Size: 1.14MB, Requests: 38
- Google PageSpeed Insights: Mobile: 67, Desktop: 86
Removing Google Fonts using Autoptimize might make my website less appealing visually, but it does improve performance significantly (at least in the eyes of website speed testing services).
For my home page I scored:
- Pingdom – Performance Grade: A (96%), Load Time: 723 milliseconds, Page Size: 603.7KB, Requests: 40
- GTmetrix – PageSpeed Score: A (100%), YSlow Score: A (96%), Load Time: 2.9 seconds, Page Size: 586KB, Requests: 24
- Google PageSpeed Insights: Mobile: 79, Desktop: 89
Improving my PageSpeed score on GTmetrix to 100% is pretty impressive.
For my blog post, disabling Google Fonts helped improve scores further.
- Pingdom – Performance Grade: A (92%), Load Time: 1.41 seconds, Page Size: 1MB, Requests: 59
- GTmetrix – PageSpeed Score: A (95%), YSlow Score: A (96%), Load Time: 3.5 seconds, Page Size: 1.07MB, Requests: 33
- Google PageSpeed Insights: Mobile: 79, Desktop: 89
At this point it should be clear that that Autoptimize compliments WP Rocket very well by doing a few things that WP Rocket does not. I have no doubt that I would also improve results of other caching solutions by using Autoptimize.
What’s the Verdict on WP Rocket?
Let’s make sense all of these results.
For my home page, WP Rocket improved my Pingdom performance grade from E (56%) to A (94%). Using Autoptimize and disabling Google Fonts I could jump up to A (96%).
On GTmetrix I saw my home page go from a PageSpeed score of B (82%) and a YSlow score of C (70%) to A (98%) and A (93%). These A grades could be improved further to A (100%) and A (96%) by disabling Google Fonts with Autoptimize.
On Google PageSpeed Insights, I initially had a score of 61 for mobiles and 76 for desktops. WP Rocket increased these scores to 62 for mobiles and 84 for desktops.
Autoptimize can help improve the scores further to 67 for mobiles and 86 for desktops, but by removing Google fonts these scores jump even further up to 79 for mobiles and 89 for desktops.
As you saw from my results, I saw similar jumps in performance for my blog posts as I did for my home page.
So at this point in the article you are probably bored of looking at performance statistics so I will summarise all of the reports and say this.
- WP Rocket will make a vast improvement to the performance of your website
- Using Autoptimize with WP Rocket will improve your performance a little bit more
- Removing Google Fonts with Autoptimize will improve performance further
- Using a Content Delivery Network (CDN) should help improve results even more
Please also remember that no WordPress plugin or service provides a guarantee that your website will be optimised. As a website owner, you have a responsibility to remove plugins that are hurting performance and take steps wherever possible to optimise your website design.
Final Thoughts
I hope you enjoyed this review and case study of WP Rocket.
I have always been impressed with how effective WP Rocket is at optimising a WordPress website, but I made a point of not letting my past view on WP Rocket influence how it performs in 2017 and stuck to facts and figures.
Without a doubt, WP Rocket remains a great caching solution. You will see a huge jump in website performance by installing the plugin on your website and you can tweak things further by using Autoptimize too.
Whilst it is good to improve your score to an A grade or 100/100 score, I do feel that there comes a point where optimisation becomes less important. From an SEO point of view at least, I don’t think that Google will care whether you score an A with 92% or an A with 95%. Sure, it is good to reduce page loading times and requests etc, but at a certain point you are talking about a few milliseconds and not multiple seconds.
At the end of the day, the key thing about optimisation is to deliver a fast enjoyable experience to users whilst. As a website owner, you will need to make decisions on website features that hurt performance and decide how essential they are to your website and user experience.
So how does WP Rocket perform against other WordPress caching plugins? That is an important question and something which I would like to test in the future.
The next step for me is to implement a content delivery network on this website. I plan on testing KeyCDN soon and seeing whether it improves better performance than the content delivery network provided by CloudFlare. After that, I hope to test other caching plugins and see how WP Rocket compares against them.
I would love to hear your thoughts on WP Rocket so I encourage you all to leave a comment below :)
Thanks for reading.
Kevin
This was super helpful and helped get my numbers on Google Pagespeed for mobile from yellow to green for Ramshackle Pantry. I cannot stress how important it is to have backups with this and to do it incrementally. I have seen other people find problems when using WP-Rocket and Autoptimize in tandem. I did not have any of these problems, but you never know.
You’re welcome.
This post is the final confirmation that we should migrate our existing w3tc plugin to WP-Rocket! Thanks for such a long and thorough comparison.
You’re welcome Marks. Glad you found it useful.
You cleared my doubts about the WP Rocket cache plugin. Thoroughly explained, awesome work. It became easy for me to put WP rocket on my site after reading this review. Thanks for the awesome post.
You can get great results just using Async JavaScript, Autoptimize and Cache Enabler.
Also do not forget about DNS prefetching.
Nice comparison Joe. That’s pretty amazing how well Comet Cache did. I will need to try that one too.
I did actually do a comparison for aThemes last year and WP Rocket came out on top:
https://infogr.am/19556b9b-15d0-48ff-a94d-d29921ff0271
Thanks Ankur.
Doesn’t CloudFlare allow you to use their service with another CDN? I still plan on using their service but wanted to try another content delivery network.
Ok I meant purely from the “CDN” point of view and not other features of Cloudflare. I have seen several bloggers comparing MaxCDN (or KeyCDN) and Cloudflare CDN performance in the same breath.
The thing is Cloudflare CDN works on reverse proxy and your entire traffic pass through them while CDNs like MaxCDN would only host the static part of a webpage which may include images, js, css files.
Great review by the way. It was very comprehensive.
Thanks for the comment Ankur. Yeah Cloudflare does a lot of different things, but I wanted to see how it compared from a benchmarking point of view,
That’s good you are seeing similar results with WP Super Cache. I will need to do a comparison in the future to see how they all perform.
I have a 3 site license. Last I checked , the combo of WP Super cache and Autoptimize gave similar performance to WP Rocket.
Would definitely check it again on a high traffic site.
Also just a note, KeyCDN and Clouflare CDN , while both have CDN, they work in an entirely different manner. You cant really make a 1-1 comparison.
Yeah it is pretty impressive. It will be interesting to see how it performs against other caching plugins.
Impressive results! I’ve tested a few caching plugins for other blogs and WP Rocket comes out on top.
It doesn’t increase requests. You can see from my reports that WP Rocket decreases requests. All caching plugins decrease the total number of requests.
I love WP rocket and using $199 plan for unlimited sites they are good. But personally feel it increases requests you check on Pingdom tool. This review will be more even better by providing wp rocket settings to download. So they can import your setting and use it on their websites.
Thank You
Peace \/
W3 Total Cache remains a great caching solution.
With regards to WP Rocket offering a free version, I do agree that offering a free version helps the WordPress community more. The plugin is only $39 to buy and frequently sells for less due to coupons etc, and it’s only $20 the second year to renew.
The money helps support the team that develops regular updates. This ensures the plugin grows and security issues are addressed quickly. It also means you get help when you need it.
Hyper Cache appears to have been updated a two days ago, but when I checked it the other day it haddened been updated for a year.
Personally, for a solution that improves performance, I am more than happy to pay for a secure solution that is well maintained.
Thanks for taking to the to write and share this massive post. Its really helpful. I personally have no problem in the complex setup of W3TC, but the way WP Rocket is growing its astonishing. I wish they had a free version, so they could help the community even more.