Filmora is a set of video editing products from software company Wondershare. The products allow you to edit videos in a variety of situations.
Their product suite consists of:
- Filmora video editor – A versatile available for Mac and Windows that lets you add filters, overlays, test, transitions, music and more. It’s free to download, though you have to pay a one-off fee of $59.99 if you want to remove the watermark and get support.
- Filmora Scrn – A feature rich screen recording script that is available for only $29.99. It allows you to record up to a whopping 120 frames per second and has a host of editing tools.
- Filmora Go – A mobile video editor for Android and iOS that is free to download. It allows you to trim, crop, and modify your video and audio. A host of video themes, transitions, and tools, are available through the app.
A premium effects store is also available for their main video editor.
The product I would like to focus on in this article is their screen recording software Filmora Scrn. I hope you enjoy the review :)
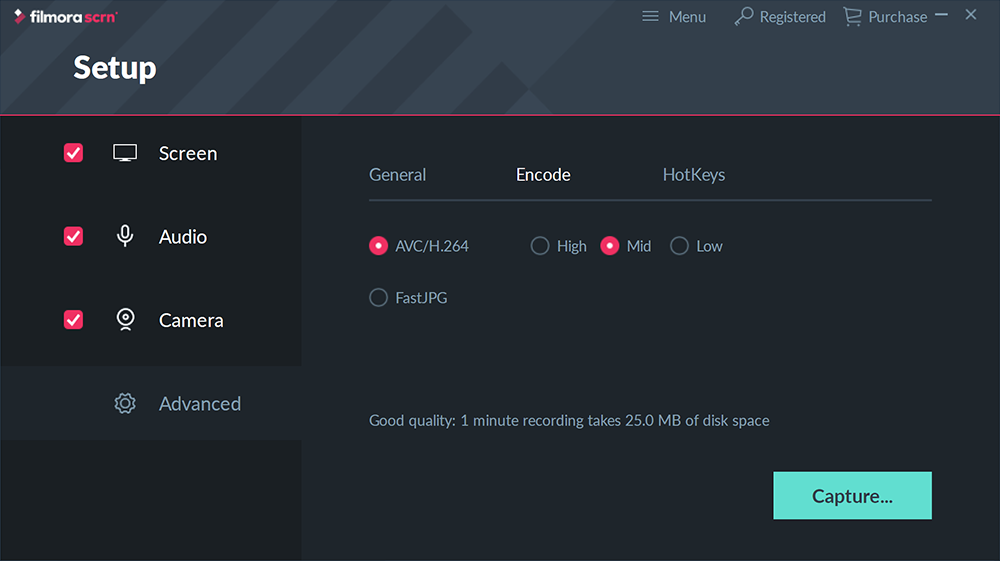
What Does Filmora Scrn Offer?
Screen recording software can be used to record gaming videos, video walkthroughs, video tutorials, gameplay videos, and much more.
The screen recording market is quite competitive, but without doubt Filmora Scrn is one of the most versatile solutions out there as it has great recording features and great editing features. Many alternative solutions are good at recording, though they offer very little editing features.
The software works with Windows 7, Windows 8, Windows 10, and Mac OS X 10.11 and above. It can be downloaded free of charge, though a watermark is applied if you do not upgrade to the premium version (which, thankfully, is very affordable). I’m a big fan of this business model as it allows users to test the software themselves so they can make an informed decision on whether they should purchase the product.
If you are looking to record gaming videos, Filmora Scrn has you covered. It allows you to record at up to 120 frames per second in Windows computers and 60 frames per seconds on Macs. As you would expect, you can display your webcam whilst recording too.
Filmora Scrn has a ton of editing tools too so after you have finished recording you can trim, crop, add text, change audio, and more. Over 50 types of media can be imported. This means you can import audio, videos, photos, into your videos.
Using Filmora Scrn
* Please note, for the purpose of this review I installed Filmora Scrn on a laptop that uses Windows 10. I have not tested the Mac version :)
It takes less than a minute for Filmora Scrn to install on your computer. Once it has been installed you can either select “Get Started”, “Quick Capture”, or “Video Editor”.
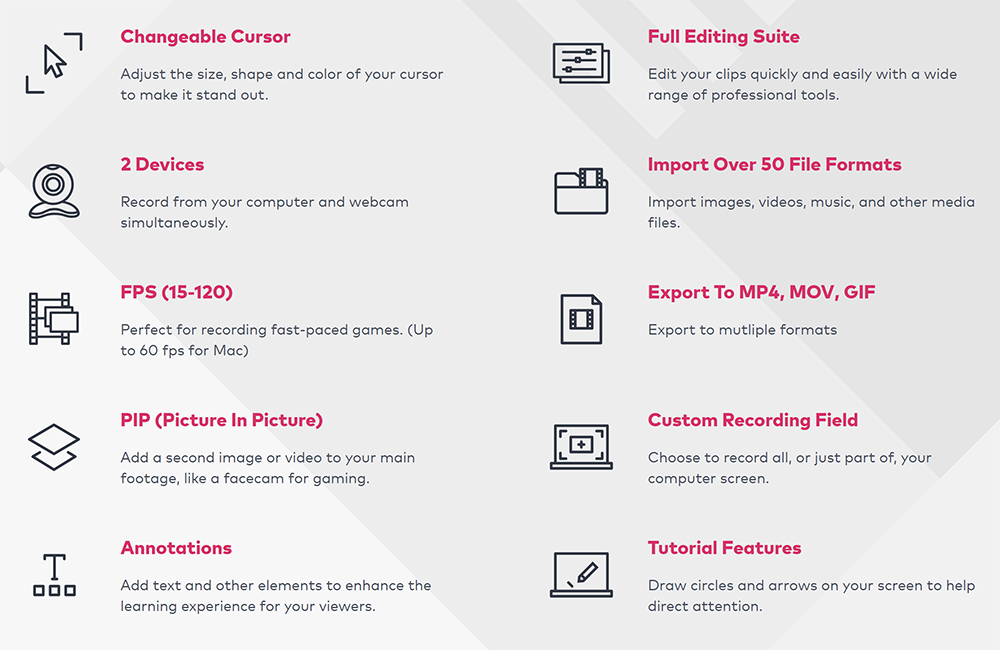
When you click to get started you are taken to a settings area where you can adjust settings for your screen, audio, and webcam. All you have to do is select or deselect what you want to record. For example, if you did not want to record audio, simply deselect it.
In the screen area you can select whether you want to capture your full screen, a custom window size, or a target window. The recording frame rate can be defined here too. If you select the game option you can choose the game or window you want to record from.
In the audio settings area you can select the microphone you want to record with and whether you want to record computer audio too. In the camera section you can select your webcam together with the resolution and frame rate of the camera.
In the advanced settings area you can change where recordings are saved to, enable GPU acceleration, and enable an auto-hide version that hides the recording controls whilst you’re recording.
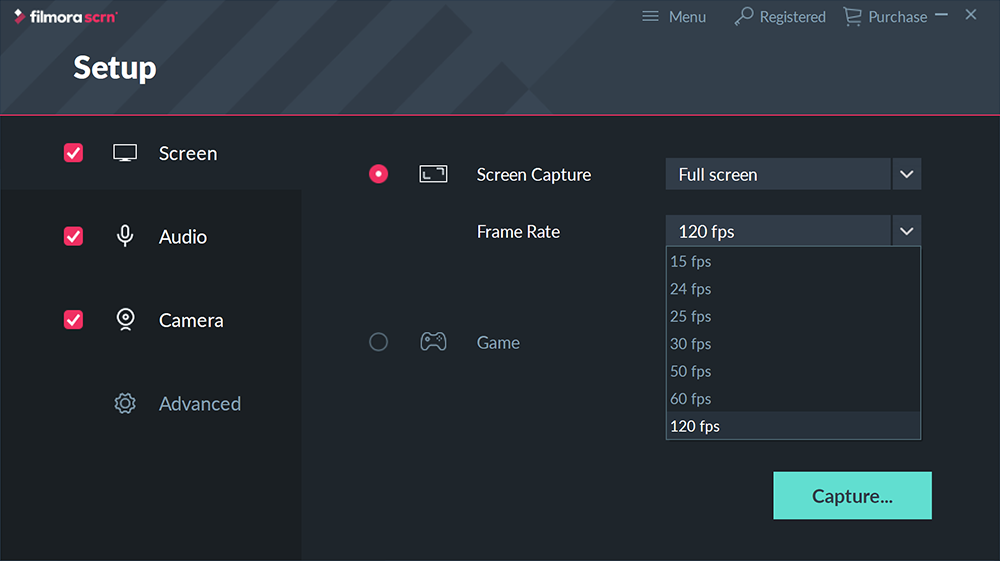
Encoding settings can be adjusted here too. You can select from AVC(H.264) or FastJPG.
In AVC the high setting offers the best quality but uses 50mb of disk space for each minute of recording. The mid setting uses 25mb of disk space every minute and the low setting uses 10mb every minute.
FastJPG uses up a lot more space. It uses 650mb a minute in the high setting, 350mb in mid, and 150mb in low setting.
You will also find a hotkeys section in the advanced settings area that lets you set shortcuts for starting and stopping, pausing and resuming, full screen recording, and adding markers.
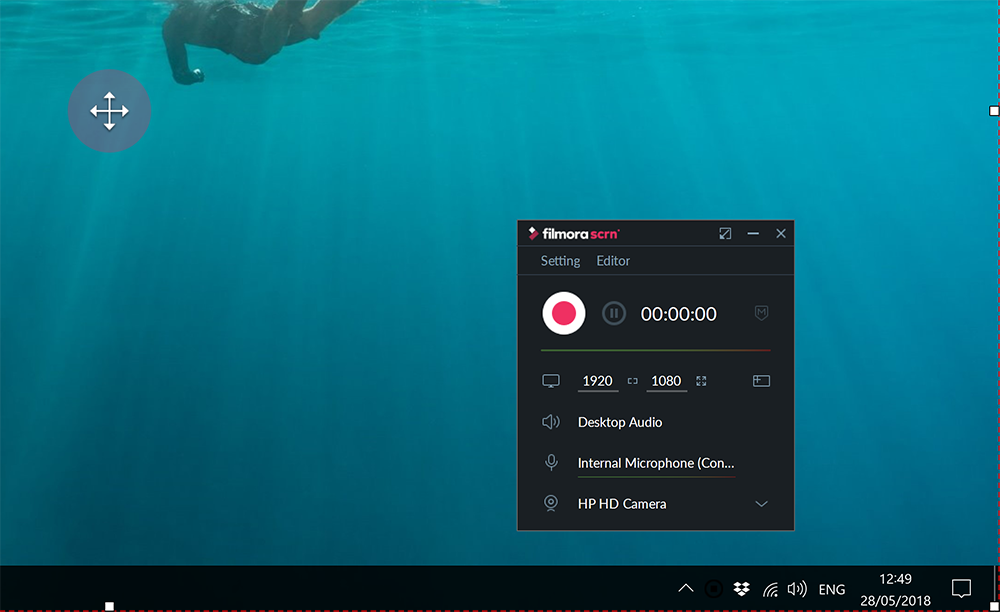
Clicking on the capture button will bring up the capture controls. This small control area can be dragged around to any area of your screen.
At the top of the controls are links to the settings area and to the editor. A large red button dominates the section underneath with a pause button and timecode.
Underneath you can change your recording resolution from the one you defined in the settings area. There is an option to select a target window for recording too. This option does work, but you do need to be careful. A few times when I selected it I was unable to revert back to the recording area easily and spent a lot of time trying to come out of it. Like I said, it does work, but it isn’t as fluid and user-friendly as the rest of the software.
In the next options you can select whether desktop audio is recorded and select which microphone and camera you want to include in your recordings. You can of course disable disable audio or video you don’t want to capture.
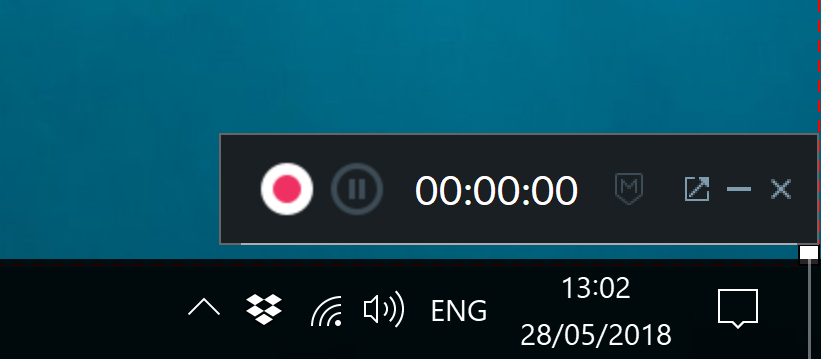
The recording panel is by no means large, but once you have confirmed the settings and are ready to record you may want to minimise it. The controls can also be auto-hidden and placed in your tray.
Recording is easy. Simply click record and then stop when you are finished.
Unfortunately, there is no option to test your microphone’s volume and webcam in the settings area to ensure that everything is set up correctly. I therefore recommend doing a test recording of your setup before you do your main recording.
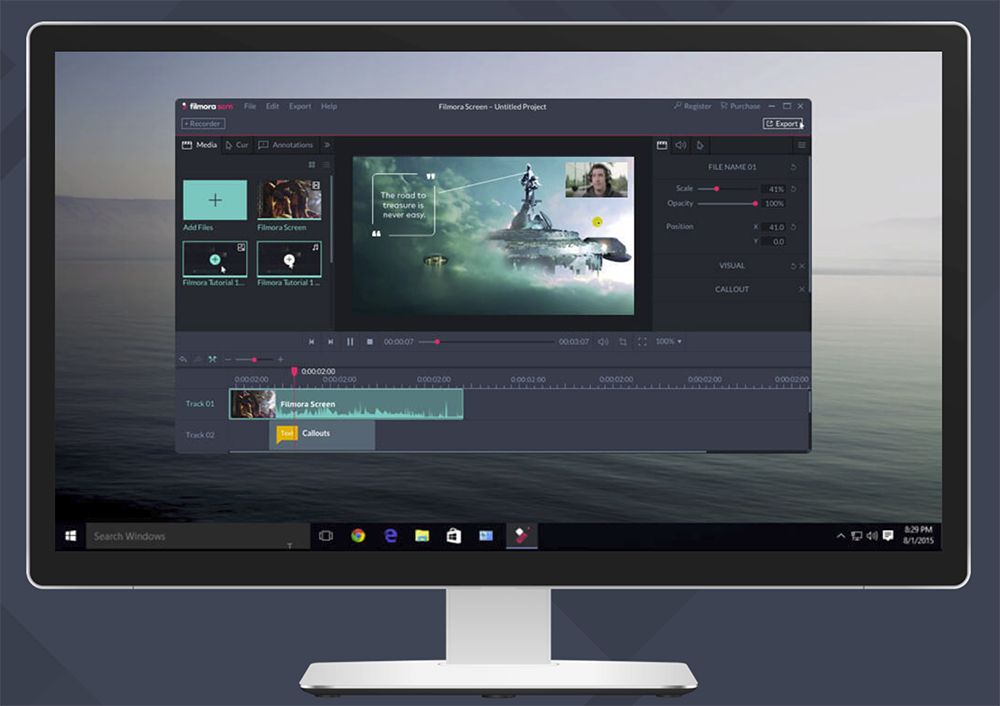
Once you have finished your recording, the main video editor will open.
The great thing about Filmora Scrn is that it displays your screen, webcam, microphone, and audio, in separate tracks. This really helps with editing. For example, you can re-position your webcam, increase or reduce its size, make it transparent, add a border, and change its speed.
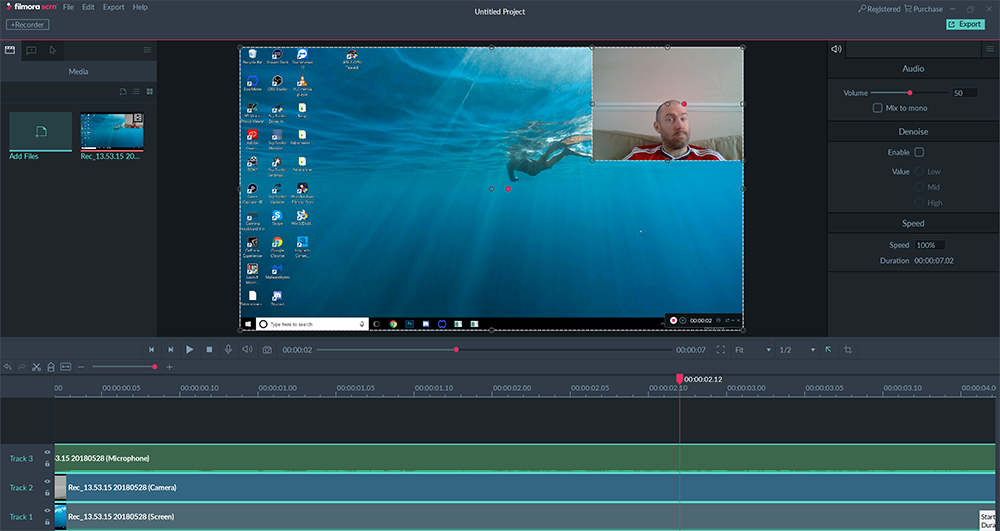
If you have ever used video editing software before, you will feel at home with Filmora Scrn. You can easily import media, add voice overs, cut, crop, and more. The ability to add text and pre-made arrows, banners, and overlays, is also welcomed.
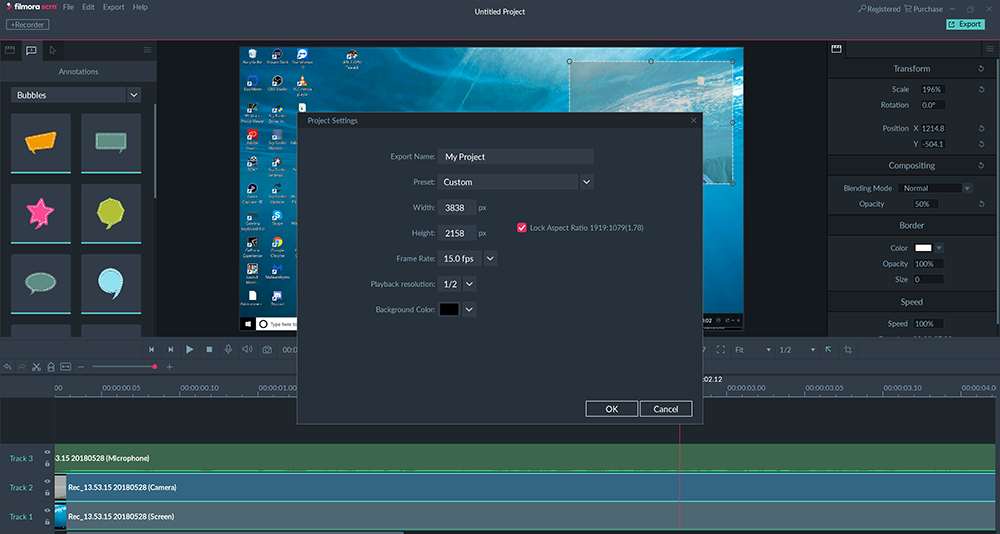
If you compare Filmora Scrn to an advanced video editing solution such as Adobe Premiere Pro, then Filmora Scrn editing interface is limited, but it has everything you need for making screen recordings and applying a few changes.
In contrast, many alternative screen recording solutions have very few editing tools and a user-interface that is easy to navigate.
Filmora Scrn Pricing
Filmora Scrn works on Macs and Windows computers and can be downloaded 100% free of charge. However, the free version applies a watermark and does not come with technical support.
If you are just recording your screen to send videos to friends and associates, the watermark may not be a big issue, though if you are planning on uploading your videos to a videos service such as YouTube, you should consider the free version a great opportunity to see for yourself what the software can do.
Filmora Scrn is available for only $19.99 per year, though the lifetime license at $29.99 offers more value in the long term. I suspect this is the version most customers opt for.
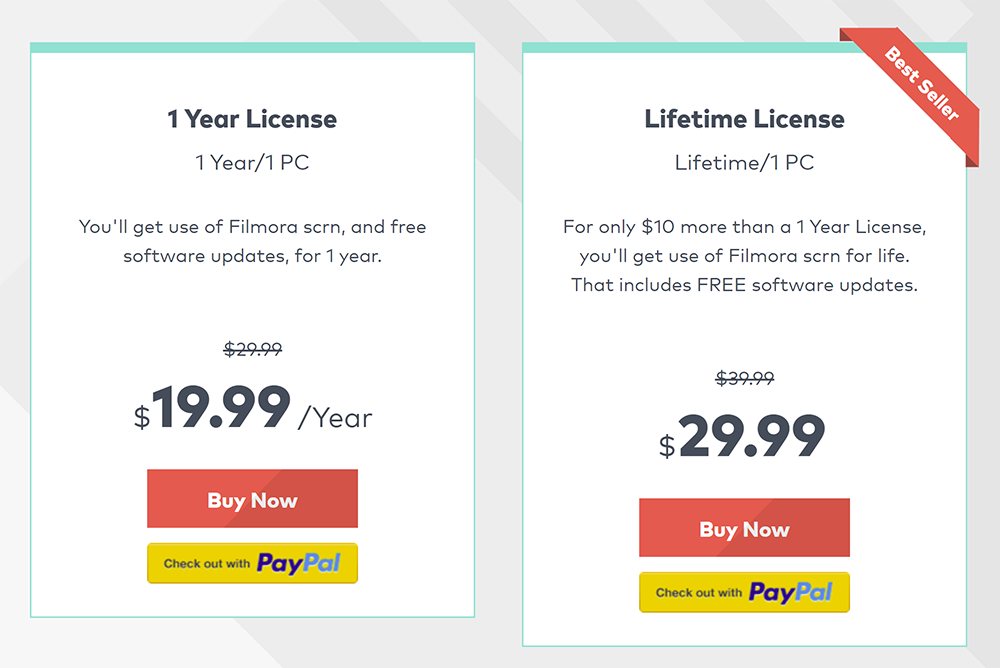
Both the yearly license and lifetime license remove the watermark from recorded videos and give you technical support. Despite the fact the software can be downloaded free of charge, Wondershare still offer a 30 day money back guarantee to those who change their mind.
Final Thoughts
At only $29.99 for a lifetime license, Filmora Scrn is one of the best screen recording solutions available today.
The software is free to download on Mac and Windows. I recommend installing it to give it a try and see what it can do for yourself.
Thanks for reading.
Kevin
* I was paid to check out Hosting24, however paid reviews are no guarantee of a positive review. They only guarantee that I will look at the service and do an honest review. Please visit my advertising page for more information.