
- Pricing for E-Junkie
- The Seller Interface
- Build Your E-Junkie Product Pages
- Upload Your Product on E-Junkie
- Adding Your Checkout Buttons
- Promote Other Products
- View Your past Sales in E-Junkie
- Designate Your Payment Platforms
- Implement Taxes and Discount Codes
- Setting up Physical Products
- Create Your Own Affiliate Program
- E-Junkie Support is Top-Notch
There was an estimated $1,250,000,000,000 in global online sales in 2013, meaning that people are clearly trying to purchase lots of their products online, and if you don’t sell online products, you might be missing out.
Whether you have eBooks, audio tracks, audio lessons or even cool new shirts to sell, the E-Junkie shopping cart is a great way to reach out to customers and provide a safe and effective sales process.
One of the most common ways to start selling online is with a PayPal button, but there comes a time when you want to move up to the big leagues and include additional features on your sales pages like tax calculators, inventory management, product codes, affiliate management and more.
Let’s take a look at this E-Junkie review to see if the product might fit well in your site to sell online products and make a few extra bucks.
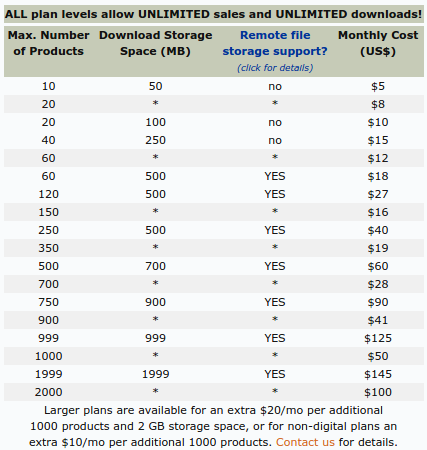
Pricing for E-Junkie
This is one of the main reasons E-Junkie has stuck around as a prominent online shopping cart provider, and I have to say, their pricing is unmatched. Unlike other shopping cart options, E-Junkie doesn’t take any transaction fees, and you don’t have to pay for bandwidth costs or anything like that.
You get to try out E-Junkie for one week without paying anything or even putting down a credit card. In terms of payment, once the one-week trial is over, you select a flat-rate monthly plan, and that’s it.
You get unlimited sales and downloads with every plan. The only reason you might need to move up a payment plan is if you add more products or if your uploads pass certain size requirements. Start off for just $5 per month and you can sell up to 10 products on your own website. That’s not too shabby.
The Seller Interface
The only thing I don’t like about E-Junkie is the old-looking interface. It’s not the worst thing in the world, but it looks like they haven’t made an update from their 90s style backend management system in a while. They seem to add features quite a bit, but the interface remains the same.
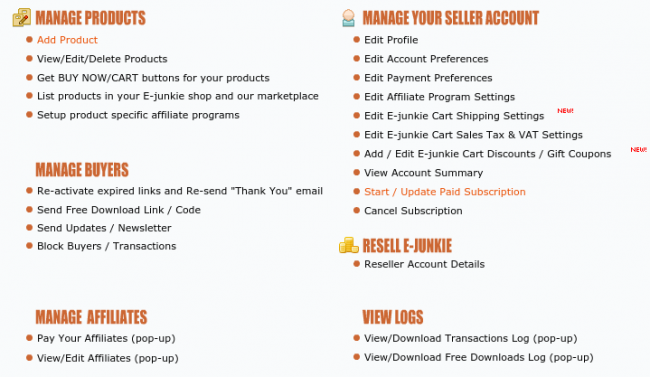
That’s OK though, because the setup is very simple, and whenever I revisit E-Junkie I’m reminded of why it’s such a wonderful way to sell online products. To start, the Seller Admin page is broken down into six headers, and the primary option is the area to Add and Manage your products. You can also go in and manage your seller account, which is good for updating payment and processing information.
Manage your buyers if someone sends you a support email, checkout your sales in the logs section and manage your affiliate program if you set one up.
Build Your E-Junkie Product Pages
Like I stated above, the Add Product button is the most prominent option on the Seller page, and there’s a reason; It’s the main button you use with E-Junkie. Once again the interface looks a tad old, but it’s self-explanatory when you look at it.
Type in the name of your product, specify whether it’s a file download or a physical product and mark down the price at the bottom. E-Junkie supports a wide range of currencies, and you can even setup a greeting email whenever someone buys something from you. It’s all quick and simple. I’ve never felt overwhelmed by E-Junkie when setting up a product.
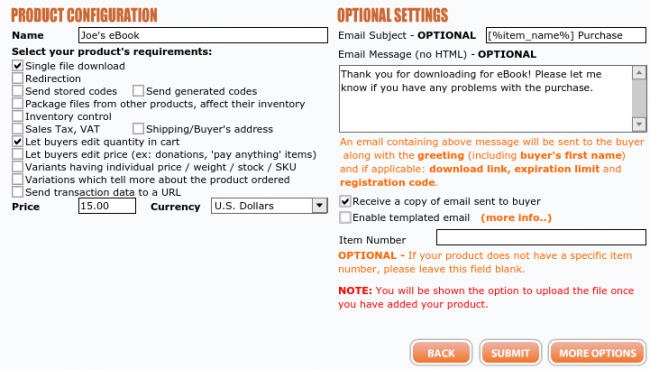
Additional product setup options include an item expiration date and time, in case you want to create a sense of urgency for your product. Maybe you’re selling spots to a live training video and you have a deadline. You can also include a remote product file URL, which basically sends people to your website or another site to purchase the product.
There is also a unique option to change how often the download link is valid. If you want to limit the amount of times people can use the link, this is perfect for doing so.

Upload Your Product on E-Junkie
After you setup your product, upload the content from your computer. I simply uploaded a PDF eBook to show as a test. Feel free to upload any audio, video or text files you want to sell. The default payment options include the E-Junkie Shopping Cart Buttons, general Buy Now Buttons and PayPal buttons.
Each option provides code for you to copy and paste into the backend of your website, for a quick and easy transition process. You don’t need to know what the code means–just grab it and go.
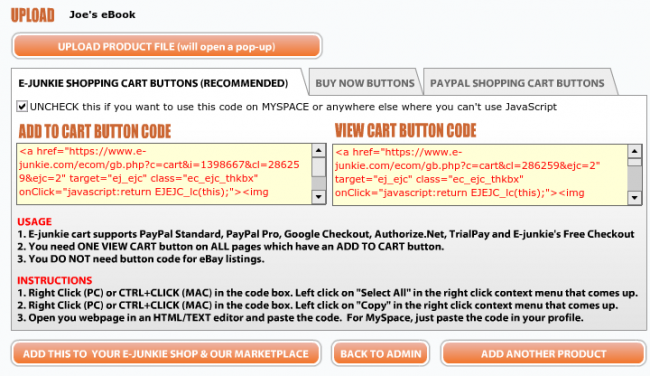
Adding Your Checkout Buttons
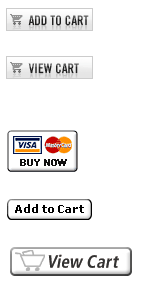
If you look at the screenshot below, this is what the buttons look like on your website. The E-Junkie buttons are on top, the general one in the middle and the last two or for Paypal. Place these wherever you want on your site, but remember that if you include an Add to Cart button, a View Cart button must be included.
When a customer clicks on the Buy Now or Add to Cart buttons, they see a simple shopping cart area to modify how many products they want. Then they can purchase the product.
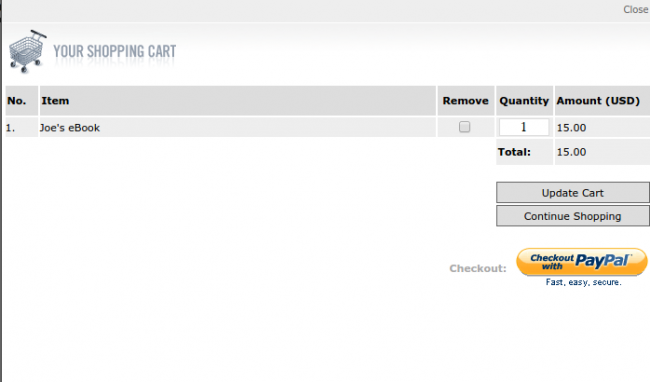
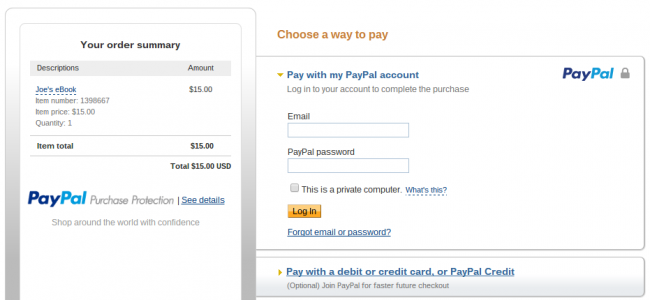
Above is the standard E-Junkie checkout, and below is the standard PayPal option.
Promote Other Products
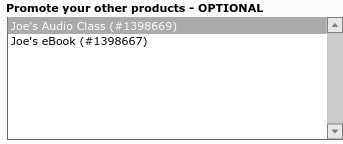
One of the reasons I love posting books on Amazon is because Amazon is king when it comes to promoting your other products after people purchase from you. Not to worry, because with E-Junkie you can promote the same way. When you create a new product, simply go to the More Options area and specify which other products you want to promote when a person is purchasing a different item.
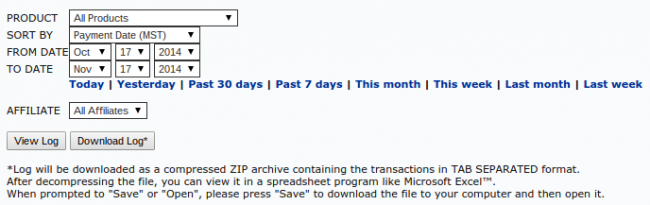
View Your past Sales in E-Junkie
E-Junkie stores all the logs from your past sales to help you understand how well your products are performing. Checkout affiliate sales, along with items you’ve sold from your own page. Just specify the time frame and go.
Designate Your Payment Platforms
PayPal and the E-Junkie platform are not the only ways to sell products through E-Junkie. Feel free to include your Google Checkout, 2Checkout, ClickBank or TrialPay IDs if you are more comfortable with those.
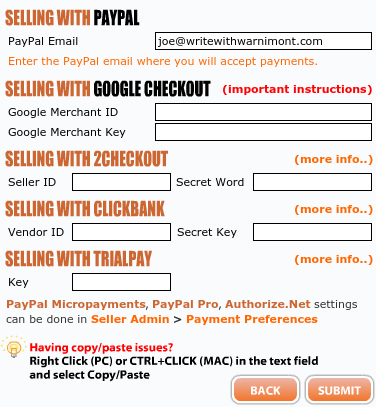
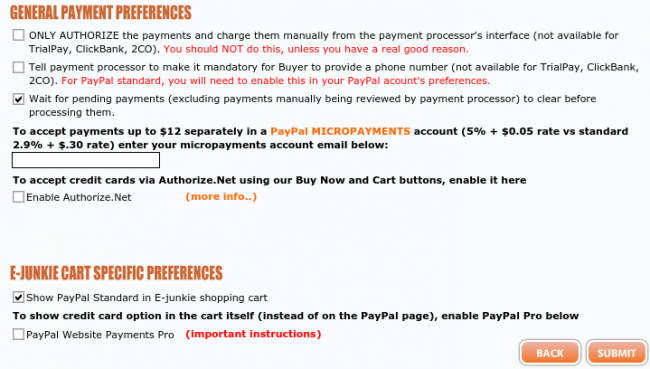
There are additional payment preferences to customize, including the Authorize.net activation.
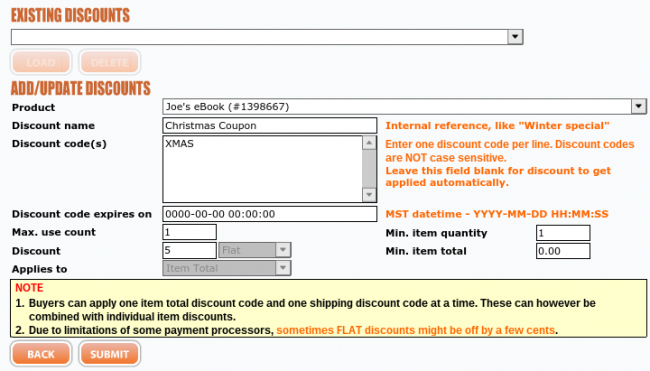
Implement Taxes and Discount Codes
Not everyone will use this, but E-Junkie includes a simple way to charge tax with your products. Specify the location, and even incorporate VAT rates if your country requires.
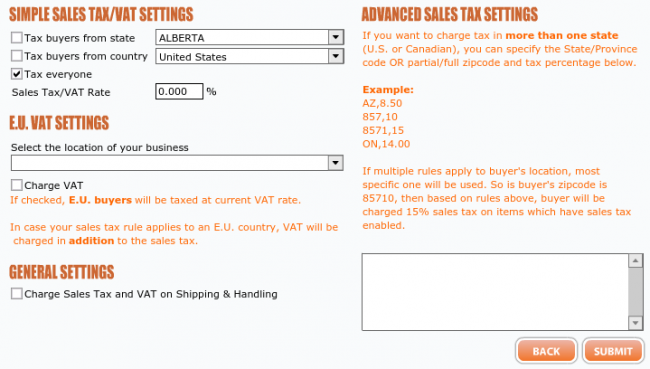
One of my favorite parts of E-Junkie is the coupon code area, where you can select a product, create a specific code for the product and then give the code to customers or market it elsewhere so they can punch it in when buying.
Setting up Physical Products
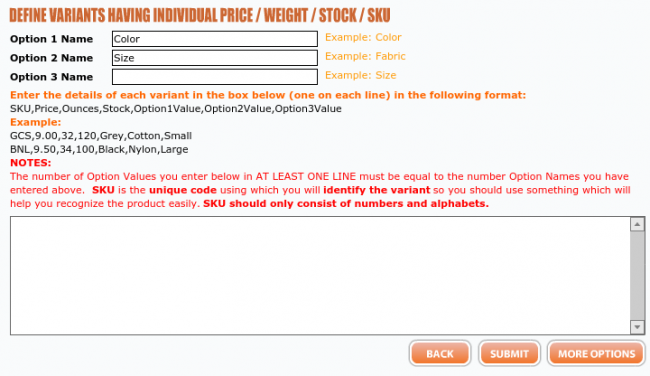
E-Junkie is primarily designed to sell digital products, but it’s actually quite easy to setup your physical products as well. If you have over maybe 100 physical products I might look for a more powerful solution, but this works fine if you just plan on making some t-shirts or something.
The interface allows you to change variants such as color, size and fabric.
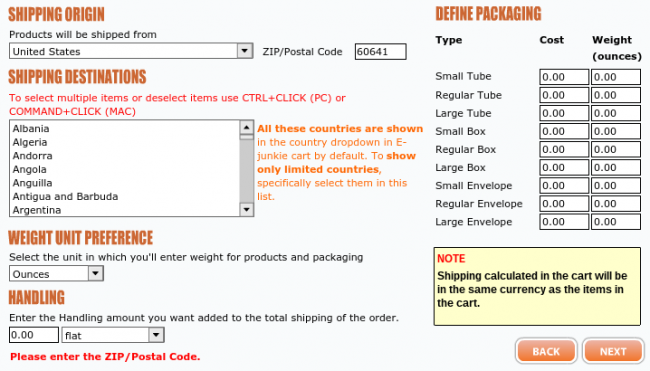
You can then modify your shipping settings to charge people from different areas of the world.
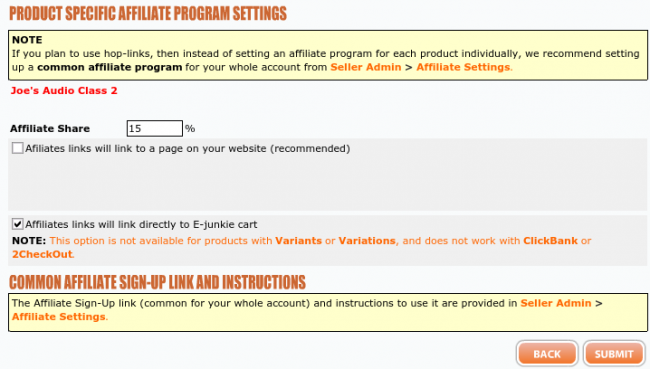
Create Your Own Affiliate Program
If you are selling your own products, why not convince others to do so for a cut of the action? E-Junkie has a powerful affiliate program that requires very little setup. Just designate how much people make if they sell your product and give them an affiliate link.
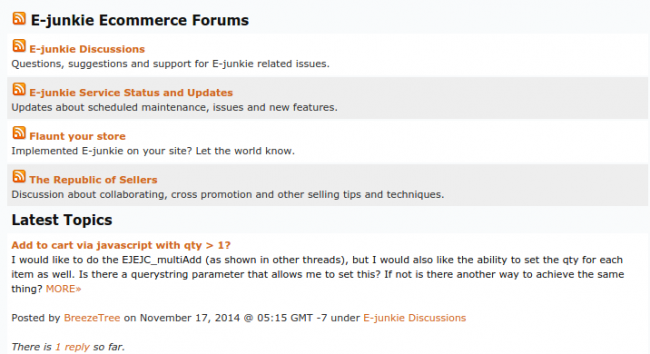
E-Junkie Support is Top-Notch
After everything is said and done, E-Junkie support always blows me away. They provide email and phone support for all customers, and you have a forum to chat with other users and figure out problems.
They even include an interactive shopping cart demo if you want to test out the buttons before using your trial period.

Feel free to test out the service here if you want.
Overall, E-Junkie is a minimalist shopping cart option that is perfect for most bloggers and small companies who want to sell online products.
Let me know in the comments section if you have any questions about how to use E-Junkie. Good luck trying to sell online products, and share your thoughts on this E-Junkie review, along with any experiences you have with the E-Junkie shopping cart.